Wow, it is Thursday and not a holiday! Time for a new Throw Back Thursday
post, to review past projects made before I started blogging. In 2010 I created a few personalized
magnetic memo boards for my nieces and sis-in-law. I made a total of five, but did not photograph the first two before I sent them off. (Oops!)

For each I started with a 12” x 12” galvanized metal sheet
that I rounded the corners and drilled holes in for a more finished look. Plaid Mod Podge in matte finish layered
the decorative papers in place. A
combination of patterned papers, stamping, stencils, decorative scissors, and
punches were used to decorate the layers.

I painted chipboard letters with Making Memories Scrapbook
Colors paint. I still have a large
collection of paint colors and it is perfect for painting on paper or chipboard. Pam and Larissa’s letters were finished
with stamped images in StazOn Cotton White. Rachael’s letters covered in the same paper as the Tim Holtz
music staff stencil at the bottom of her board . . . it was the first try with
the stencil repurposed to decorate the letters. Each letter has small ceramic magnets so the name letters
can also be used to hold things to the board. A jewelry grade adhesive, E6000 glue held the magnets in
place.
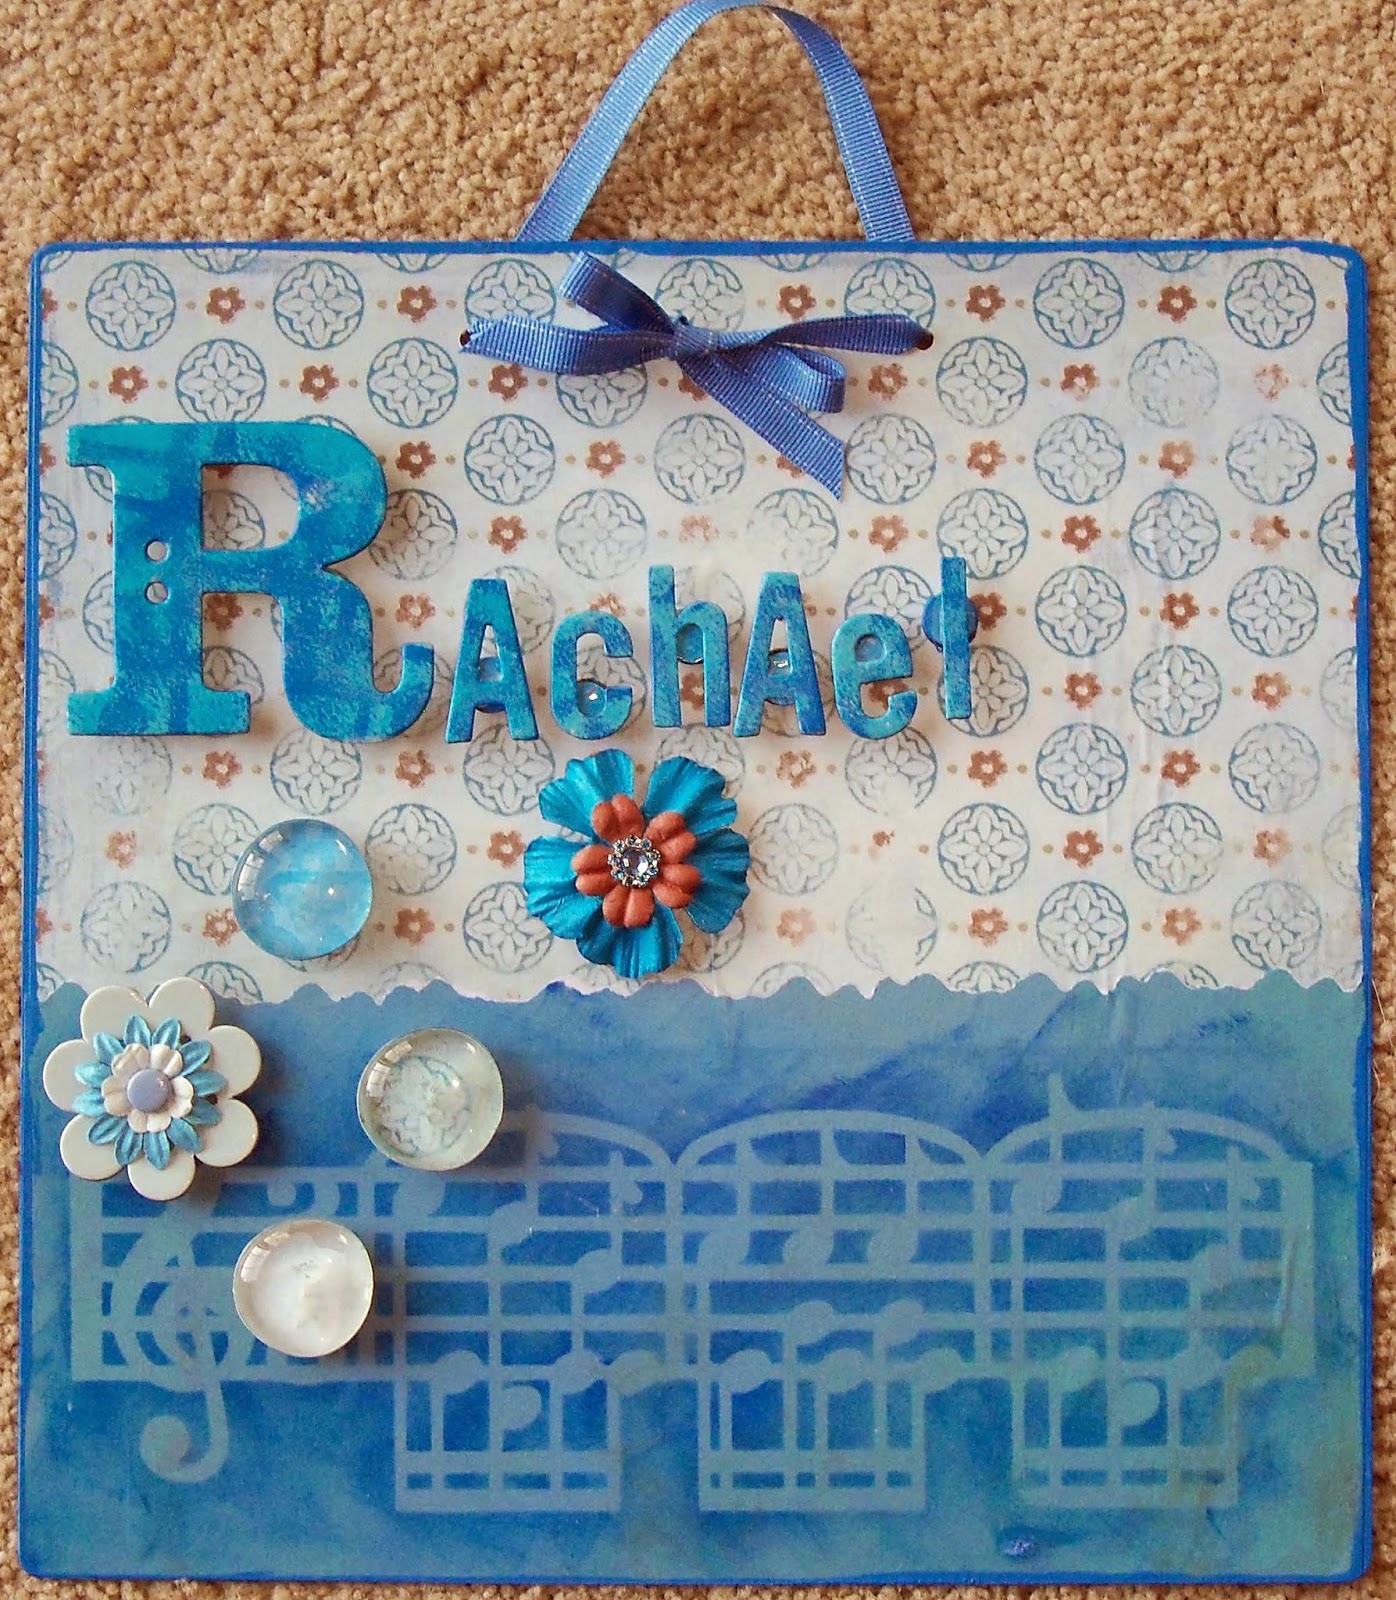
The flower magnets were assembled and adhered to ceramic
magnets. The glass baubles
have decorative paper adhered with Mod Podge to the back-side, then they are
attached to ceramic magnets. Each
board is finished with a coordinating ribbon.
Moved Rachael back into the dorm on Monday; Tuesday it was on the wall again. It is great to see she is using it. Gma Lyon
ReplyDelete