Showing posts with label Technique Tuesday. Show all posts

Tuesday, July 15, 2025

Color Challenge for Retro Rubber #259

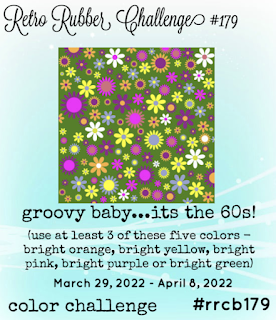
 Summer time!  We have a great color challenge for the next two weeks.  Please play along with us at Retro Rubber Challenge Blog.  


Honestly my first impression was of the colors of our rival University in the state of Oregon.  BUT I decided I could work through the rivalry and go with flowers!  
 
  • The flower image is Kind Cosmos from Technique Tuesday released in 2019.  Sadly, Technique Tuesday closed their doors a few years ago.  I am thankful for the smattering of smaller floral images with matching dies.
  • The image is stamped in Memento Luxe Tuxedo Black and heat embossed with black embossing powder.  Derwent Watercour Pencils are used to create the color gradient on the flowers and leaves.  Cosmos have very feathery foliage.   The matching die is used to die cut the image.
  • The Thanks sentiment is from TT Echinacea  set, and is water colored to match the flowers.
  • Pinkfresh Studio Slim Ornate Banner is used to create the shaped background.
  • Elizabeth Craft Designs Stitched Retcangles created the base from patterned paper.
  • All the layers are adhered together.

This card was fairly simple to put together, and the finished product is nice and simple for a thank you for summer time.  Thank you for stopping by!  Please play along with our Retro Rubber challenge!


CHALLENGE GUIDELINES

  • We require stamps older than one year.  If we feel you are using newer stamps, you may be disqualified from the challenge without notification.
  • New papers/dies are OK – but you must use at least one stamp older than a year and describe the age in your blog post.
  • Please note that all challenges require the use of at least one stamp older than a year.
  • Post your new creation to your blog or online gallery.   Use keyword RRCB259.  No backlinking. 
  • Link back to the blog using the Linky Tools by the due date. 
  • Enter as many times as you like. 
  • Feel free to combine our challenge with a maximum of 5 challenges.  Entries linked to more than 5 challenges will be disqualified without notification.
  • If your project is posted on a private group site such as Split Coast Stampers or a photo sharing site not all DT members may be able to comment.   Thank you for understanding.
  • Turn off Word Verification.  We love to comment but word verification can make that difficult.


Tuesday, February 11, 2025

Sketchy Time at Retro Rubber

 We have a great sketch, perfect for Valentine's Day if you still need to make a card for someone!  Check out the great makes of the Design Team at Retro Rubber Challenge Blog.  

So my take followed the sketch for the most part with a few additions.


 I knew I had some lovely deep red suede paper that is easily 25 years old.  In that folder I found the border that must have been left over from an old project.  I had a perfect use for it!

  • The hearts are ancient Quickutz dies cut from cream cardstock and the above mentioned red suede paper.  
  • Scrapbooks.com had a great layering tag die that I use ALL the time.  After die cutting black cardstock, it is run through and pressure embossed with Sizzix Scattered Hearts embossing folder.  
  • The scrap bin of patterned papers yielded the perfect strip paper for the design.
  • Lawn Fawn die cut banners is stamped with a Technique Tuesday Love is all you need stamp set from 2008.  Memento Luxe Rhubarb Stalk ink is used to stamp the image and it is heat embossed with clear embossing powder.  
  • The layers are adhered together and a small tied bow is the finishing touch.

Thank you so much for stopping by and I hope that you enjoy playing along with this sketch at Retro Rubber Challenge Blog.   

CHALLENGE GUIDELINES

  • We require stamps older than one year.  If we feel you are using newer stamps, you may be disqualified from the challenge without notification.
  • New papers/dies are OK – but you must use at least one stamp older than a year and describe the age in your blog post.
  • Please note that all challenges require the use of at least one stamp older than a year.
  • Post your new creation to your blog or online gallery.   Use keyword RRCB248.  No backlinking. 
  • Link back to the blog using the Linky Tools by the due date. 
  • Enter as many times as you like. 
  • Feel free to combine our challenge with a maximum of 5 challenges.  Entries linked to more than 5 challenges will be disqualified without notification.
  • If your project is posted on a private group site such as Split Coast Stampers or a photo sharing site not all DT members may be able to comment.   Thank you for understanding.
  • Turn off Word Verification.  We love to comment but word verification can make that difficult.


Tuesday, January 31, 2023

Just Love You for Retro Rubber Challenge 199

Here we are with our second challenge of 2023 at Retro Rubber.  We are getting close to Valentine's Day so a color challenge working with Valentiney colors is appropriate!

A clean and simple card using cream, pink and silver was my choice for this challenge.


Unity Stamp Company has this really fun set called "Moon Beam and Heart Strings" released in Sept 2015.  I knew it would be perfect for a clean and simple one layer card.  
  • The image is stamped in the center of the card with Delicata Silvery Shimmer and heat embossed with silver embossing powder.  The image is also stamped off the edge of the card to both the right and left to create a string of hearts across the entire card.  The outside images are offset towards the top of the card.
  • The hearts are colored in with Memento Dual Tip Marker in Angel Pink.
  • The middle sentiment is from the Unity Stamp Company set and is stamped in Memento Angel Pink.  The "we" was masked before inking the stamp, as both my husband and I will be signing this card.
  • Technique Tuesday's Say It Happy "Happy Valentine's Day" is stamped int he lower right corner in Delicata Silvery Shimmer and Heat Embossed in Silver embossing powder.  

Clean and simple can be very elegant and effective, as well as quick to put together once the design decisions are made!  Enjoy all the cards made by the design team over at Retro Rubber

CHALLENGE GUIDELINES

  • We require stamps older than one year.  If we feel you are using newer stamps, you may be disqualified from the challenge without notification.
  • New papers/dies are OK – but you must use at least one stamp older than a year and describe the age in your blog post.
  • Please note that all challenges require the use of at least one stamp older than a year.
  • Post your new creation to your blog or online gallery.   Use keyword RRCB198.  No backlinking. 
  • Link back to the blog using the Linky Tools by the due date. 
  • Enter as many times as you like. 
  • Feel free to combine our challenge with a maximum of 10 challenges.  Entries linked to more than 10 challenges will be disqualified without notification.
  • If your project is posted on a private group site such as Split Coast Stampers or a photo sharing site not all DT members may be able to comment.   Thank you for understanding.
  • Turn off Word Verification.  We love to comment but word verification can make that difficult.

Thanks for stopping by, and as always comments are appreciated!

Thursday, June 23, 2022

Fourth of July Layout Made Easy with Memento inks and Fireworks!

Today I will share how easy it is to create a very cohesive layout using just two ink colors and the matching Fireworks! colors for an amazing Fourth of July scrapbook layout.  With just white cardstock, an embossing folder, a large die cut, and stamps this layout is perfect for Independence Day.

Skill:  Beginner

Time:  2 hours

 Directions:

Step 1:


Trim white cardstock to 1" on each edge larger than the photos.  Pressure emboss with Star Blanket.  Ink raised portion of embossed areas and edges with Memento Danube Blue or Lady Bug.  For my layout I trimmed two sections 5" x 7", three sections 4" x 5", and one section by 4" x 4" to back my phtotos.

Step 2:


Die cut two sets from Spellbinders Cascading Stars die and remove the stars.  Trim one outline die cut into a section of five stars, with the other being four stars.  Use Jumbo Dauber to tap Memento Danube Blue over one die cut and the smaller portion of the trimmed die cut.  Tapping the ink onto the paper keeps from damaging the die cut, which can occur if a rubbing motion is used.  The larger portion of the trimmed die cut is inked in Memento Lady Bug.  Continue to add ink until it is the desired hue. 

Step 3:


The splatter method is used with Fireworks! to add some interest to the white background.  Shake the bottle to distribute glimmer and then remove spritzer nozzle and gently tap the top to splatter ink from the outside of the spray tube.  Continue to tap until the desired amount of ink is on the paper.  I choose sections where the die cuts would be eventually placed.  I alternated the color choices from the die cut color.  This is the lower right corner of the right page.  

Step 4:


The left side of the layout shown completed with splattered Fireworks! in Memento Lady Bug and Danube Blue.

Step 5:


Determine placement placement of elements to add stamped sentiments.  Place on layout and remove other elements.  Use a stamp platform to stamp sentiments in proper position.

Step 6:

On the right page the stamped elements are determined, then half are removed before stamping to allow for clean stamping of correct colors.  The remaining elements are added and stamped.  It was easier to stamp all the images Memento Lady Bug at one time, then follow with images in Memento Danube Blue.

Step 7:


Spritz Fireworks! into a plastic tray or surface.  Place die cut stars from step 2 face down on the Fireworks! ink to add color.  Use tweezers to move around in the ink and add more ink to tray as needed.  About a third of the stars were inked with Fireworks! in Lady Bug the remaining in Fireworks! Danube Blue.

Step 8:


Determine correct placement of Fireworks! stars in the die cut.  I rotated the star until it fit properly into the die cut area.  Not all the stars are identical, so taking the time to find the right one was worth the effort for a seamless look.   

Step 9:

Adhere elements to layout.  Tear It! tape was used to adhere the photos to the textured mats.  The die cuts are adhered with On Point! glue.  The small dots around the star frames keep the layout clean and smudge free.  


Art Supplies

Imagine:

Memento--Lady Bug and Danube Blue

Fireworks!--Lady Bug and Danube Blue

Jumbo Dauber

Tear It! Tape

On Point Glue

Other:

White Cardstock

Cuttlebug Star Blanket embossing folder

Spellbinders Cascading Stars

Technique Tuesday Spectacular Memories

Hero Arts CL493 Holiday Sentiments

Tweezers

Die Cut machine

Stamp Platform

Tuesday, March 29, 2022

Let's Get Groovy with 60's Colors at Retro Rubber Challenge Blog

Our color challenges this year are inspired by the recent decades, this time we are featuring the 60's.  What fun color combos at Retro Rubber Challenge Blog.  Do come see what the design team has come up with this Groovy Challenge!

With all the illness going around it was time to for a humorous get well card!  It features a set from Technique Tuesday, Funny Fruits from 2018.  I figured a bright yellow banana would be perfect for the color scheme.  I used a very old sketch from Sheetload of Cards back from June 2019.

  • After searching through my scrap papers for all the layers including the patterned papers I trimmed each to layer to fit the sketch.  I added an extra layer, the green so three colors in the challenge would be represented.
  • The green layer is 4" x 5.25", the orange patterned paper (ancient paper slab by My Mind's Eye) is 3.75"x 5", the orange cardstock is 3.25" x 4", and the yellow patterned paper is 3" x 3.25.  
  • A 2" is trimmed and then punched with the Paper Studio Fish Tail Punch.  
  • The layers are adhered together as  shown.
  • The banana and face is stamped in VersaFine Onyx Blank and heat embossed with iridescent embossing powder.  It is colored with Prisma colored pencils in Canary Yellow, and Deco Yellow for a bit of shading.  The banana is die cut with the coordinating die and adhered with dimensional foam adhesive.
  • The sentiment is stamped in VersaFine Onyx black and heat embossed with iridescent embossing powder.
  • I pulled out my trusty Lawn Fawn Cuts Everyday Sentiment Banners to die cut the sentiment with a fish tail.  The other end was trimmed so to the sentiment would line up under the banana and with the edge of the backing orange cardstock.

To be honest I would not have put these colors together  if it had not been for this challenge.  I believe they all compliment each other nicely!  Please do join our challenge over at Retro Rubber Challenge Blog and have a little fun with 60's themed colors.

 CHALLENGE GUIDELINES

  • We require stamps older than one year.  If we feel you are using newer stamps, you may be disqualified from the challenge without notification.
  • New papers/dies are OK – but you must use at least one stamp older than a year and describe the age in your blog post.
  • Please note that all challenges require the use of at least one stamp older than a year.
  • Post your new creation to your blog or online gallery.   Use keyword RRCB179.  No backlinking. 
  • Link back to the blog using the Linky Tools by the due date. 
  • Enter as many times as you like. 
  • Feel free to combine our challenge with a maximum of 10 challenges.  Entries linked to more than 10 challenges will be disqualified without notification.
  • If your project is posted on a private group site such as Split Coast Stampers or a photo sharing site not all DT members may be able to comment.   Thank you for understanding.
  • Turn off Word Verification.  We love to comment but word verification can make that difficult.

Tuesday, January 18, 2022

dig it . . . like the 50's Chickadee Birthday Card for Retro Rubber

Welcome back to a new year of challenges with us here at Retro Rubber Challenge Blog.   We have a great new color challenge to honor the colors of the 50's.  I personally just barely made it into the 50's by being born in 1959, the same year Barbie doll was introduced.  So I don't have many memories of this color scheme.

I've had this set from Technique Tuesday Chickadee 2.0 from 2017 and thought it would be perfect to use the color scheme.  They are cute little Chickadees!

  • The card base and backing banners are pastel yellow cardstock.  
  • The card front is pastel soft turquoise die cut with Kat Scrapiness Stitched Slimline frame.
  • The card front is stamped in VersaColor Turquoise with the sentiment from the set, "Smile".
  • The chickadees are stamped in Memento Luxe Tuxedo Black and heat embossed in Iridescent embossing powder.  Makes it easier to color inside the lines!
  • The chickadees are colored with a brush point Fantastix in Memento Angel Pink, VersaColor Seafoam, VersaMagic Thatched Straw, and VersaColor Turquoise.  They are die cut with the matching die.
  • The sentiments are stamped in VersaColor Turquoise and die cut with Lawn Fawn Sentiment banners.  The backing banners are cut from one side larger.  To get the banners the right length I die cut each of them twice for the fish tail ends.
  • The card is adhered together and is ready to send to a friend!

Please do join us at Retro Rubber Challenge Blog!  Do come see all the pretty creations of the design team!  We would love to see your work in our gallery! 

 CHALLENGE GUIDELINES

  • We require stamps older than one year.  If we feel you are using newer stamps, you may be disqualified from the challenge without notification.
  • New papers/dies are OK – but you must use at least one stamp older than a year and describe the age in your blog post.
  • Please note that all challenges require the use of at least one stamp older than a year.
  • Post your new creation to your blog or online gallery.   Use keyword RRCB173.  No backlinking. 
  • Link back to the blog using the Linky Tools by the due date. 
  • Enter as many times as you like. 
  • Feel free to combine our challenge with a maximum of 10 challenges.  Entries linked to more than 10 challenges will be disqualified without notification.
  • If your project is posted on a private group site such as Split Coast Stampers or a photo sharing site not all DT members may be able to comment.   Thank you for understanding.
  • Turn off Word Verification.  We love to comment but word verification can make that difficult.

Thanks so much for stopping by!


Tuesday, November 2, 2021

A Clean and Simple Fall Card for Imagine


In today’s tutorial I will demonstrate how to use both VersaMark and Kaleidacolor ink to create a layered background for a clean and simple design fall card.  VersaMark is a beautiful watermark ink especially on dark cardstock.

Skill:  Beginning

Time:  30 minutes

Directions:


Step 1

Trim a cream cardstock base to 8.5” x 5.5”, score and fold in half.  Trim a dark brown cardstock to 4.25” x 5.5”.


Step 2

Use a stamp platform and stamp the leaf images in VersaMark Dazzle Champagne on the dark brown cardstock.  Any VersaMark ink will work, but there is a bit of Champagne shimmer with the Dazzle ink.  With the stamps in the same position on the stamp platform, stamp in Kaleidacolor Cappuccino Delight.  The Oak leaf is stamped on the darker brown end and the maple leaf is stamped on the lighter orange end of the Kaleidacolor Cappuccino Delight pad.


Step 3

Continue stamping the base cardstock and dark brown cardstock.  Clean stamps between the Kaleidacolor ink and VersaMark ink.  It is not necessary to clean after the VersaMark ink as it will not affect the color of the Kaleidacolor ink.


Step 4

Trim 0.5” from each edge of the brown cardstock.


Step 5

Stamp the leaves in Kaleidacolor Cappuccino Delight.  The sentiment is stamped in the darkest color of the ink pad.  (I choose and another sentiment for the finished card.)  Die cut the leaves and the sentiment.  Edge the banner sentiment with a Brush Tip Fanstix using the orange from the Kaleidacolor Cappuccino Delight. 


Step 6

Line up the dark brown cardstock with the base layer.  Adhere with Tear It! Tape.  Adhere the oak leaves with Tear It! Tape and the maple leaf and sentiment with dimensional foam adhesive. 


Art Supplies


Imagine

·      VersaMark Dazzle--Champagne

·      Kaleidacolor—Cappuccino Delight

·      Fantastix Brush Tip

·      Tear It! tape


Other

·      Technique Tuesday I Give Thanks Stamp and Die

·      Lawn Cuts Everyday Sentiments Banners


Thanks for stopping by and have a wonderful Thanksgiving!

Tuesday, September 28, 2021

Play Tic Tac Toe with Retro Rubber!

 We have such a variety of cards when a Tic Tac Toe is posted over at Retro Rubber.  Design Team's samples are all unique, do come check them out!


I choose the bottom row:  Something that flies, Die or Punch, Add a Bow for my inspiration.  After a quick search of Dragonfly colors I decided on this very autumn palette!


  • Black cardstock is misted with Fireworks! in Dandelion and Tangelo.  I was impatient so I used my heat gun to dry the cardstock.
  • Kaliedacolor in Cappuccino Delight and a rubber brayer is used to ink up glossy card stock.  It is hard to tell in the photo, but the tail portion and back wings have a darker ombre tone.  The Dragonfly is die cut with Technique Tuesday's 2016 Inspired Dragonfly die.  The overlay is die cut from black and carefully glued into place.
  • The sentiment is from the same set and is stamped in Versafine Habanero.  After a quick trim, the edges are inked in the same.
  • Sheer orange ribbon is wrapped around the card front and adhered.  A double looped bow is added to fit the challenge.
  • The sentiment and dragonfly are adhered with dimensional foam adhesive.
  • A few sequins from my stash add the finishing touch!

Thanks so much for joining me, I hope you will play along at Retro Rubber

 CHALLENGE GUIDELINES

  • We require stamps older than one year.  If we feel you are using newer stamps, you may be disqualified from the challenge without notification.
  • New papers/dies are OK – but you must use at least one stamp older than a year and describe the age in your blog post.
  • Please note that all challenges require the use of at least one stamp older than a year.
  • Post your new creation to your blog or online gallery.   Use keyword RRCB167.  No backlinking. 
  • Link back to the blog using the Linky Tools by the due date. 
  • Enter as many times as you like. 
  • Feel free to combine our challenge with a maximum of 10 challenges.  Entries linked to more than 10 challenges will be disqualified without notification.
  • If your project is posted on a private group site such as Split Coast Stampers or a photo sharing site not all DT members may be able to comment.   Thank you for understanding.
  • Turn off Word Verification.  We love to comment but word verification can make that difficult.

Tuesday, August 31, 2021

Creating with Fireworks! sprays Birthday Card for Imagine


In today's card making tutorial I will show you how to use your Fireworks! spray inks in different ways rather than just spraying them!  All of the blooming sunflowers during my travels were the inspiration for this late summer birthday card.  It is very cool that sunflower heads follow the sun throughout the day, and they are always bright and cheery!


Skill:  Intermediate


Time:  1.5  hours 


Directions:


Step 1

Stamp sunflower image in Delicata Golden Glitz and heat emboss with Iridescent Embossing Powder.  The Delicata Golden Glitz is one of the brightest gold inks, and works best for a sunflower.  Die cut with an electronic die cut machine, or fussy cut with scissors. 


Step 2

Use a brush tip Fantastix to color in the center of the sunflower with Delicata Black Shimmer.


Step 3

Shake the Fireworks! spray until all of the shimmer is mixed in.  When the spray sits for awhile, the shimmer settles to the bottom and can be seen as a thin layer through the bottle.  Remove the spray lid and tap a bit of Fireworks! on your work mat from the end of the plastic tube.  Use a fine tip paint brush to paint the sunflowers a beautiful iridescent Dandelion Yellow.  Yellow ink is one of the more difficult inks to use, and this method solves that dilemma!


Step 4

Stamp the leaf image in Brilliance Pearlescent Ivy and heat emboss with Iridescent Embossing Powder.  Using embossing powder helps maintain the original ink color of the image while painting over with Fireworks! spray.  It also allows you to color inside the lines much more easily! Use a fine point paint brush to add Fireworks! in Bamboo Leaves.  Die cut or fussy cut the leaves.


Step 5

To get a finer sprinkling of more carefully located drops of Fireworks!, use the same paint brush and gently tap over the card stock to create a fine splatter pattern.  When using the spray nozzle, the color is denser on the cardstock.  Finish the edges by inking with an ink blusher and Brilliance Pearlescent Ivy. 


Step 6

Edge the base card with an ink blusher and Delicata Golden Glitz.  Using inks throughout the card allows for perfect coordination.


Step 7

Position the leaves and sunflowers on the card front to determine the location for the sentiment.  Stamp the sentiment in Brilliance Pearlescent Ivy and heat emboss with Iridescent embossing powder.  Adhere the layers of the card together.  The card front and leaves are adhered with Tear-It! Tape, and the sunflowers are adhered with thin dimensional foam adhesive. 


Art Supplies


Imagine


·      Delicata—Golden Glitz, Black Shimmer

·      Brilliiance—Pearlescent Green

·      Embossing Powder—Iridescent

·      Fireworks!—Dandelion, Bamboo Leaves

·      Fantastix

·      Tear It! tape


Other

·      Auntie Amy Sunflower image

·      Heartfelt Creations Bold Leaf stamp

·      Technique Tuesday Large Birthday sentiment stamp

·      Fine point paint brush

·      Dimensional Foam Adhesive

·      Brother Scan-N-Cut


 Thanks so much for stopping by!  I hope you have a wonderful end to your summer!

Monday, May 24, 2021

Learn how to make a Quick Father's Day Card for Imagine

 Learn how to make a Quick Father's Day Card

 By Neva Cole

Today I will be demonstrating how to make a quick multi-layered card using three stamps and Versa Color and StazOn inks.  This tone on tone card is a simple way to create a wonderful card for the Father in you life.


 Skill:  Beginner

Time: 30 minutes


Directions

Step 1

Stamp the sentiment in Versa Mark Mountain Lake and heat emboss with Sparkle Embossing Powder.  Then die cut the sentiment with Lawn Fawn Everyday Sentiment Banners.

 
Step 2
 
Use Versa Color Mountain Lake and stamp the Tape Measure and the Love Beyond Measure around the perimeter of an A-2 card base.  Ink the edges of a 3 1/2" x 4 5/8".  Stamp the Tape Measure in StazOn Ink in in Jet Black, die cut with matching die.
 

Step 3

Pressure emboss the 3 1/2" x 4 5/8" with Spellbinders Maze Embossing Folder.  Lightly ink with Seafoam.  Stamp the the Love Beyond Measure on card front.


Step 4

Assemble the card with dimensional foam adhesive and enjoy!


Art Supplies

Imagine

  • Versa Mark-Mountain Lake, Seafoam
  • StazOn-Jet Black
  • Embossing Powder-Sparkle

Other 

  • Hero Arts CL1498 Holiday Sentiments
  • Technique Tuesday What a Guy Stamp and Die
  • Lawn Fawn Everyday Sentient Banner
  • Spellbinders Maze Embossing Folder