Showing posts with label Specialty Paper. Show all posts

Tuesday, April 22, 2025

Challenge time with a Tic Tac Toe

Another two week challenge at Retro Rubber Challenge Blog.  This particular board was my choice, so super fun to play along!


The decision to use as much of the challenge of possible was easy!  I missed stitching and Sequins/gems as the card seemed complete at this point.


  •  The background is pearlized vellum pressure embossed with Darice Basket Weave embossing folder.
  • The stamp is Pink Fresh Painted Peony from March 2021.  It was stamped in Delicata Silver and heat embossed with clear embossing powder.  This was one of the first stamp sets I owned that stencils were available to color the image.  Memento ink in Angel Pink, Rose Bud, Lilac Posies, Dandelion, Cantaloupe, Morocco, New Sprout, and Cottage Ivy.   The set also had a dies to match the stamps.  Very fun!
  • The Sentiment is Altenew Elegant Saying released in 2023 stamped in Delicata Silver and heat embossed to match the stamped focal image.
  • The front of the card was pierced on each edge of the vellum that was mounted to the card base.  The twine from my stash was threaded through and tied in a bow.  

 Your turn!  Play along with us at Retro Rubber and create your own card!   

CHALLENGE GUIDELINES

  • We require stamps older than one year.  If we feel you are using newer stamps, you may be disqualified from the challenge without notification.
  • New papers/dies are OK – but you must use at least one stamp older than a year and describe the age in your blog post.
  • Please note that all challenges require the use of at least one stamp older than a year.
  • Post your new creation to your blog or online gallery.   Use keyword RRCB253.  No backlinking. 
  • Link back to the blog using the Linky Tools by the due date. 
  • Enter as many times as you like. 
  • Feel free to combine our challenge with a maximum of 5 challenges.  Entries linked to more than 5 challenges will be disqualified without notification.
  • If your project is posted on a private group site such as Split Coast Stampers or a photo sharing site not all DT members may be able to comment.   Thank you for understanding.
  • Turn off Word Verification.  We love to comment but word verification can make that difficult.

Thanks for stopping by!  Come again soon. 

Tuesday, February 11, 2025

Sketchy Time at Retro Rubber

 We have a great sketch, perfect for Valentine's Day if you still need to make a card for someone!  Check out the great makes of the Design Team at Retro Rubber Challenge Blog.  

So my take followed the sketch for the most part with a few additions.


 I knew I had some lovely deep red suede paper that is easily 25 years old.  In that folder I found the border that must have been left over from an old project.  I had a perfect use for it!

  • The hearts are ancient Quickutz dies cut from cream cardstock and the above mentioned red suede paper.  
  • Scrapbooks.com had a great layering tag die that I use ALL the time.  After die cutting black cardstock, it is run through and pressure embossed with Sizzix Scattered Hearts embossing folder.  
  • The scrap bin of patterned papers yielded the perfect strip paper for the design.
  • Lawn Fawn die cut banners is stamped with a Technique Tuesday Love is all you need stamp set from 2008.  Memento Luxe Rhubarb Stalk ink is used to stamp the image and it is heat embossed with clear embossing powder.  
  • The layers are adhered together and a small tied bow is the finishing touch.

Thank you so much for stopping by and I hope that you enjoy playing along with this sketch at Retro Rubber Challenge Blog.   

CHALLENGE GUIDELINES

  • We require stamps older than one year.  If we feel you are using newer stamps, you may be disqualified from the challenge without notification.
  • New papers/dies are OK – but you must use at least one stamp older than a year and describe the age in your blog post.
  • Please note that all challenges require the use of at least one stamp older than a year.
  • Post your new creation to your blog or online gallery.   Use keyword RRCB248.  No backlinking. 
  • Link back to the blog using the Linky Tools by the due date. 
  • Enter as many times as you like. 
  • Feel free to combine our challenge with a maximum of 5 challenges.  Entries linked to more than 5 challenges will be disqualified without notification.
  • If your project is posted on a private group site such as Split Coast Stampers or a photo sharing site not all DT members may be able to comment.   Thank you for understanding.
  • Turn off Word Verification.  We love to comment but word verification can make that difficult.


Tuesday, October 22, 2024

Fall by the Lake

We have just passed the peak of our fall colors here in Northern Minnesota.  This is only my second fall living here, and experiencing a true fall color season.  Last week my husband and I took a drive to see the colors, and discovered that some of the best were right in our backyard, well along the small highway and street we live on!  We also put our boat away for the season and I had to stop driving the boat to take some photos of the colors along the shoreline that were simply amazing.  So blessed!  At Retro Rubber each design team member choose our challenges throughout the year.  This is my theme challenge!  Perfect timing!

I choose a few old school ways to create this fall card to convey the beauty of nature around us.  It was really fun to create and color this card.


  • The image is Stampendous 1995 is stamped on velour paper in Memento Tuxedo Black.  
  • The image is colored with Prisma colored pencils.
  • The image is adhered by using a slot punch to mount to cream cardstork.
  • The edges of the cream cardstock is outlined in a metallic gold pen.
  • Another layer of brown cardstock mounted behind before being mounted to a light green card base.  

Please do come and play along with us at Retro Rubber Challenge Blog!  We do have a few guidelines we ask you follow:

CHALLENGE GUIDELINES

  • We require stamps older than one year.  If we feel you are using newer stamps, you may be disqualified from the challenge without notification.
  • New papers/dies are OK – but you must use at least one stamp older than a year and describe the age in your blog post.
  • Please note that all challenges require the use of at least one stamp older than a year.
  • Post your new creation to your blog or online gallery.   Use keyword RRCB242.  No backlinking. 
  • Link back to the blog using the Linky Tools by the due date. 
  • Enter as many times as you like. 
  • Feel free to combine our challenge with a maximum of 10 challenges.  Entries linked to more than 10 challenges will be disqualified without notification.
  • If your project is posted on a private group site such as Split Coast Stampers or a photo sharing site not all DT members may be able to comment.   Thank you for understanding.
  • Turn off Word Verification.  We love to comment but word verification can make that difficult.

 Thank you for stopping by!

Tuesday, March 2, 2021

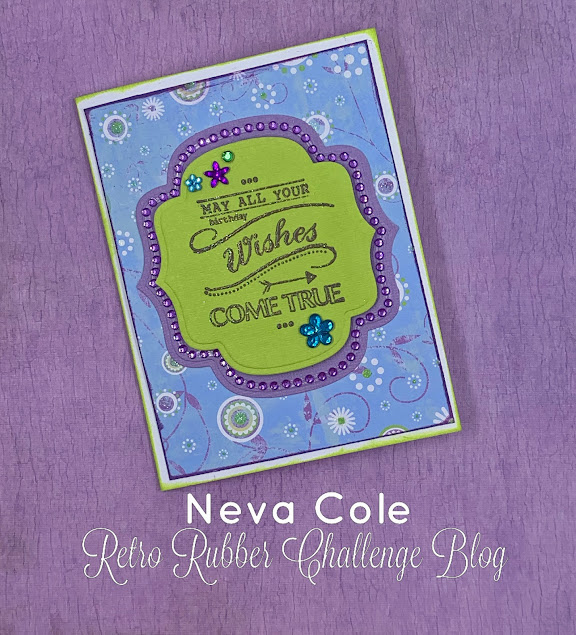
Tic Tac Toe for Retro Rubber Birthday Card

Here we are in March already and a new Retro Rubber Challenge is up to play with your paper and stamps!


I choose to go with the top line, and some really ancient supplies!  The Rhinestones or gems really caught my eye and so I ran with it.
 

  •  I started with the background paper from DCWV in my card scraps kits, called Posies Glitter Print.
  • Also in the card scrap kits were the matching cardstock colors.  
  • Using Spellbinders Labels Nine (released in 2010!) I die cut both layers.
  • Want 2 Scrap makes matching Nestabling to several of the Spellbinders dies, and this set was released in 2016.
  • The sentiment by Unity Stamp company "Jubilee" sentiment set released in July 2013 is stamped in Memento Luxe Sweet Plum and heat embossed with Iridescent Embossing Powder.  A few extra rhinestones from my stash finished the top die cut.
  • The background paper is edged in Memento Luxe Sweet Plum, and the card base in Memento Luxe Pear Tart.  
  • The die cuts are adhered with foam adhesive to finish up the card. 
Please do come join us at Retro Rubber Challenge and play along with our challenge.  We have a few simple rules: 1)  Use a stamp that is older than a year and needs a little inky love 2) tell us how old the stamp is 3) enter up to 10 challenges including ours.

Thanks so much for stopping by and know that I love reading your comments!

Tuesday, February 2, 2021

For My Love Valentine for Retro Rubber

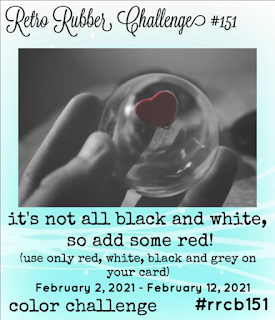
Hello!  It is Valentine's season and our challenge over at Retro Rubber Blog Challenge can be either for a Valentine, or other special card as the Design Team will demonstrates on the blog.  Do go check out their wonderful cards for our theme:


I wanted to create a special Valentine for my husband and using this color scheme makes for a very masculine look.

I just purchased this great die from Sizzix designed by Tim Holtz and thought it was perfect for a shaker card.

  • I used the Sizzix Thinlits 66416 to die cut the heart with the heartbeat squiggle from 4" x 5 1/2" grey cardstock from Recollections.  
  • The front was then pressure embossed with Sizzix 3-D Confetti Hearts embossing folder.
  • The squiggle didn't fare so well after being embossed so I die cut another and fussy cut tabs so it could be adhered to the back of the card front.
  • A section of acetate was trimmed to fit the heart opening and Darice Adhesive foam strips were used to create the window around the heart.  More foam adhesive was put around the outside edges of the card front.
  • An A-2 card base was inked with Versa Fine Crimson Red before the card front was adhered.  A small amount of heart confetti (manufacturer unknown--too old!) in the spot where the window will be in the card.  It is much easier to center the card front on the card base using this method.
  • The sentiment is by Technique Tuesday, a set from 2008 "All you need is Love".  It is stamped in Versa Fine Crimson then die cut with Lawn Cuts Everyday Sentiments Banners.  The custom length is done be placing the die cut piece back in the die to get the diagonal ends just where I wanted them.

Wait, there's more!  Here is the inside of the card!  I also loved the additional squiggle die cuts and had to use them on the inside.

 
  • The heart and love squiggles are die cut from the same grey cardstock and adhered with very small dots of Zig blue at the tips of the lines.
  • The inside sentiment is from the same Technique Tuesday set and is stamped in Vera Find Crimson Red.
  • The final touch is a small cupid sequin, again it is so old I have no idea who made the sequins, but they sure come in handy around Valentine's Day! 
Do come join the fun for our challenge at Retro Rubber!   We have a few simple rules:  1) Use a stamp that is at least one year old or older in your project.  2)  Tell us how old your stamp is  3)  You may enter up to ten challenges including ours 4)  You may enter our challenge up to three times.  Thanks so much for stopping by and do have some fun with this challenge!


Tuesday, December 1, 2020

Christmas Theme for Retro Rubber

For our last Retro Rubber challenge of the year is a Christmas theme board.  We have a couple of simple rules 1) Use at least one stamp that is at least one year old 2) Tell us how long you have the stamp 3) Enter no more than ten challenges including ours 4) Enter our challenge up to three times.  Have some fun and join us at Retro Rubber. 

I decided to dig through my really old Christmas themed papers.  The old ones from Paper Pizzaz that came in 8 1/2" x 11" tear out books, from about 1996 or so.  The prints are smaller and coordinate well together.


  • The sentiment manufacturer is unknown, but written on the back is 1998 and a price of $4.75.  My guess is Sonshine stamps?  It is stamped in Memento Cottage Ivy, then trimmed and edged in the same ink.
  • Patterned paper is trimmed to fit the front of the 5" x 6 1/2" card front and edged in Cottage Ivy as well.
  • Sizzix Winter leaves is used to die cut three layers of red, green, and brown cardstock to assemble the greens.  
  • Stars are die cut from patterned paper, then backed with three layers of white cardstock to create "chipboard" stars.  
  • Snowflakes are die cut from Elizabeth Craft Designs Entwined Circle, and Spellbinders Four Seasons. 
  •  The add to the country feel theme, a strip of burlap ribbon is added and the embellishments are adhered with glue dots.  

Another Christmas card ready to send greetings is finished!  Please come join the fun of our last challenge of the year over at Retro Rubber!

Tuesday, November 17, 2020

Happy Birthday for Retro Rubber

Here we are soon to wrap up 2020!  Over at Retro Rubber we are celebrating birthdays with our challenge.  So for the next two weeks come and play along!  Our rules are simple 1) Use a stamp that is at least a year old that needs inky love 2) tell us about the age of said stamp 3) Enter up to ten challenges including ours 4)  You may enter our challenge up to three times.


Since snow is falling,  in all honesty it's mixed with rain, I thought a winter birthday card would be in order.  Plus I have a niece who is big into the outdoor sports including snowboarding so I thought a snowflake themed card would be fun and feminine.


  • A quick search in my vellum stash I found the perfect light blue vellum.  It is pressure embossed with Darice Snowflake background.
  • Tried and true Spellbinders Create a Flake One and Three provided the die cuts.  They are also pressure embossed and then inked through the die with Versa Color Mountain Lake to high light the snowflake shape.
  • Taylored expressions In & Out Birthday from Sept 2014 provides the sentiment.  It is stamped in Versa Color Mountain Lake.  The corners are rounded with the WeR Memory Keepers corner punch.  I like this punch because you can choose three different curves for the corners.  The panel is edged in Versa Color Mountain Lake.
  • I adhered the snowflakes and sentiment with dimensional adhesive THEN wrapped the American Crafts color hemp around the snowflakes.  It seemed a little easier than trying to glue down the hemp cord!
  • All the layers are adhered to the front of a standard A2 card.

Thanks so much for stopping by!  Please do come by Retro Rubber and play along with us!  We love seeing you in our gallery!


Saturday, April 4, 2020

Dog Sympathy Card

On Monday of this week I accompanied my In-laws to the vet to help their beloved Duke cross the Rainbow Bridge.  It was not unexpected, but is still always hard to say goodby to a well loved dog.  Once I found a sketch and the pet patterned paper I was good to go!


  • DCWV The Pets Stack provided the right panel and the "Duke" name.  One sheet had a list of common dog names, conveniently so for Duke!  
  • I used the Three-in-one heart die by Lifestyle Crafts from 2010 to create all the hearts, and fussy cut the aqua around the Duke names.
  • Recently I purchased a Dog Sympathy stamp set from Scrapbook.com and have already used it twice since the beginning of the year.  The sentiment is stamped in Memento Luxe Wedding White and the paw prints in Memenoto Luxe Rhubarb Stalk
  • All the cardstock is from my scrap stash. 
This card was inspired by the following sketch at Freshly Made Sketch 429


Thanks so much for stopping by!  I was happy to have the time to create a special card for my Mother and Father In-Law. 

Friday, October 25, 2019

Fremont Street Experience

When in Las Vegas, taking in the craziness that is Fremont Street Experience is part of the fun.  I had read about Fremont Street Experience and wanted to see the lighted dome . . . little did I know this was not the only aspect of Fremont Street that people went to see!  I was advised by a local to wear shoes . . . as it is usually crowded and dirty, and to be prepared to see all kinds of characters!


We went right as the light shows started, but it was not as crowded or crazy.  We got the tame version, which was fine by me and my husband.  We saw many other street performers, a few that were not suitable for my scrapbook pages.  Notice the blue circles on the street, those are scheduled assigned spots where the performers can stand.

I used purple cardstock as a base to match the purple in the printed Old Antique Words by Scrapbook Customs for ScrapbooksRUs.  Two different colors of grey cardstock are used to complement the colors.  I trimmed 1 1/4" strips and die cut the edges with Spellbinders Classic Bracket.  Not much of the strip shows from behind the photos on the right side, but I wanted more of the printed paper to show.  Sizzix Thinlits by Jen Long Just a Note font is used to die cut both titles.

With so many photos I decided to keep the embellishments to a minimum.  I am pleased with the outcome of the layout.

Thanks so much for stopping by and sharing your thoughts here at Snippets of Time to Craft!  Have a blessed day!

Thursday, October 24, 2019

Around Las Vegas

Two more pages, not actually companion pages, but they will reside side by side in the album.  If we had more time we would have hiked in Red Rock Canyon, but as it was we just drove by, so two scenic shots.  There will be another layout about the craziness that is Fremont Street, but our photos at the iconic Las Vegas landmark were perfect for the next layout.


The background papers are Old Antique by Scrapbook Customs for ScrapbooksRUs.  By the way if you have not had the opportunity to shop at Scrapbook Customs I would highly recommend their products.  I have a stash of custom papers that I will use for scrapbooking my kids high school graduations.  They also have many awesome custom sport papers.  You will notice the the color of the title influences the overall color of the paper.  Both sides have the photos double matted.  Red Rock has a journal block, and the mats on the Fremont St. trimmed a bit larger to include room for journaling at the bottom.  

Thanks for stopping by and checking in with Snippets of Time to Craft!  As always your comments are appreciated!

Tuesday, October 15, 2019

Back to School 8th Grade

Another year for Back to School for my youngest.  His last as a middle schooler.  I managed to get photos with his brother and with us, his parents.  A big plus was the photo of him at the back of the bus with his friends.


I started with a sketch challenge over at 2peasrefugees and choose complementary colors to my son's shirt and My Minds Eye Academy collection.
  • I am surprised that I have used so much yellow cardstock in my recent scrapbooking and this layout really called for yellow to match the big yellow school bus!
  • A large circle is cut from Darice Dark Blue Plaid and backed with a dark blue cardstock from my stash.  I have found the best tool for large circles in my Creative Memories XXXXX.
  • A stripe of Bus paper and red School Phrases paper go across the bottom of both sides of the layout.   
  • Each of the photos are backed with blue cardstock.  
  • I stamped the embellishment images from The Paper Company Studio with StazOn Black Tuxedo and water colored each with Memento inks in Rhubarb Stack, Paris Dusk, Dandelion, London Fog, and Peanut Brittle.  I colored a little of each from the Memento Dual Tip Pen on my craft mat and added a spritz of Ink Potion #9.  All the images are die cut with my Brother Scan N Cut.  YEAH, no more fussy cutting!
  • I purchased two files from the Silhouette online store to create the title and subtitle.  The yellow is trimmed from behind the circle mats, and the shadow red is from my stash.  
Thanks so much for visiting my blog, your comments are appreciated! 

Tuesday, September 10, 2019

Fall Colors for Retro Rubber

The nights are a little cooler, the days are shorter, and a few of our trees are changing to their fall colors, so it must be time to create a card with a fall color theme!  Join us at Retro Rubber for a little fall fun!  Remember our very simple rules 1)  Use at least one stamp that is one year or older and tell us how long it has been around and 2)  Enter up to ten challenges including ours! 


I acquired a Ginkgo embossing folder last fall and really wanted to use it for this card . . . I also have a stamp from about 1998 or 1999 from Stamp Out Art that I bought at a stamp convention in Portland.  Time to use them both together!  I have a small fascination with Ginkgo trees.  There were several on my college campus and my botany professor taught us that they are living fossils, the only species left in their Division.  They also have male trees and female trees, not both genders on one tree.  Your little botany lesson for the day!


I also played along with the card sketch from Stick It Down.  I am on their design team for double page layouts, which is the post below that went live on September 9th.

  • I had a scrap of paper that was spritzed with several Fireworks! colors that I used for the background strip.  Fireworks! in Lady Bug, Tangelo, Dandelion, and Rich Cocoa give it a shimmery multi-hued look.  
  • Elizabeth Craft Designs Ginkgo embossing folder is used to pressure emboss, then Versa Fine in Vintage Sepia is rubbed over the surface to bring out the embossing.  
  • Three Ginkgo leaves are stamped on another section of the scrap with Vintage Sepia, then fussy cut.
  • The happy Birthday sentiment is from Ms. Sparkle & Co from March of 2017.  Sometimes you can find great stamps from the bargain bin at Joanns!  It is stamped in Vintage Sepia. 
  • The sentiment is die cut with my Brother Scan N Cut.  My new machine is used in almost every project now, so I think it was a good investment!
  • A bit of mesh from my stash is layered under the Ginkgo embossed strip and also held down with dimensional foam adhesive that anchors the sentiment and leaves to the card.  
Thanks for stopping by, and do join the fun at Retro Rubber for the next two weeks with your fall color inspired projects!
(I did mention I have a thing for Ginkgo trees!)


Tuesday, August 27, 2019

Congratulations Mr. & Mrs. for Retro Rubber

We recently were honored to go to a family destination wedding to Catalina Island.  What a wonderful place to enjoy family, the sights, and a very memorable wedding!  This sketch for Retro Rubber came in really handy to put together a quick but elegant card.


I went for clean and simple and incorporated the elements of the sketch


  • I have a collection of papers that are very retro, easily more than 15 years old that were purchased a Costco.  The card base is 5" x 6 1/2" and each of the layers are 1/2" smaller in dismension.
  • The sentiments are from Feb 2017 Cardmaking and Papercraft, Sincere Sentiments by SC Design.  This set has been a mainstay for elegant cards.
  • The sentiments are stamped in Delicata Silvery Shimmer then embossed with Creations Unlimited Embossing Powder in 24K Sterling.  The embossing powder is silver with gold glitter which is not only really sparkly but also pulls together the gold and silver accents in the layers.
  • The champagne glasses are a die cut from Elizabeth Craft Designs Wedding Charms 1188.  The charm loop was trimmed away and the glasses are heat embossed with matching ink and embossing powder.
  • The layers are adhered together to finish the card.
Please do join along with us at Retro Rubber.  We would love to see your creations using this great sketch.  We have two simple rules 1) Use at least one stamp older than a year and tell us how long you have had it in your stach 2) Enter up to ten (10) challenges including ours.

Thanks for stopping by today!  Have a wonderful crafty day!

Sunday, June 16, 2019

Congrats Bridal Shower Card

It is a busy month for our family this year.  Besides Father's Day and three June birthdays we also have a wedding and a college graduation.  This is the card I made for my niece's bridal shower.  She is a music teacher, so I incorporated that a little bit into the design. 


With a few embossing folders and dies this card came together very quickly using the Mojo Monday sketch from Poetic Artistry.
  • The card base is 5" x 6 1/2".
  • A section of Bazzill Bling in purple is pressure embossed with Sizzix 3-D Confetti Hearts.
  • Silver glitter paper is pressure embossed with Spellbinder Music.
  • Another section of Bazzill Bling is die cut with Elizabeth Craft Design Stitched Circles.
  • Heartfelt Creations Timeless Amour hearts die cuts two hearts to top the circle.
  • Ribbon from my stash is tied into a double bow before being adhered to the front of the card to finish the sketch.
I was inspired by the following challenges:


Until next time . . . thanks for stopping by!

Tuesday, January 29, 2019

Share a little love with Retro Rubber

Hello stamping and crafty friends!  For the next two weeks at Retro Rubber we are hosting a Valentine's themed challenge with a twist.


Super easy, make a card or project that is love themed and include a ribbon or two!  My card is actually for my husband for our latest anniversary, and uses our wedding colors.  I just so happen to have paper left over from scrapping our wedding, so every once and awhile the colors make an appearance. 


I started with an A-7 size card base, 5 1/2" x 7" and layered it with Color Mates Deep Racy Raspberry.  The Spellbinders Decorative Labels Eight is die cut from the center of the panel as it will be covered up by the next layer.  Confetti Hearts 3-D Textured Impressions by Sizzix is used to pressure emboss Canson Silver Paper.  Two hearts are die cut from Color Mates Deep Groovy Grape using the Scribble Heart by Impression Obsession.  The hearts are adhered with On Point Glue by Imagine.  It is handy to use when attaching delicate die cuts to other layers.  The sentiment by SC Design is from the Sincere Sentiments released in early 2017 and is stamped in Elderberry memento Luxe and heat embossed with clear embossing powder.  It is stamped on white cardstock and die cut with Spellbinders Labels Eight.  The finishing touch is a double looped bow tied from sheer white Offray ribbon.  The labels are adhered with dimensional foam adhesive, and the bow is attached with a glue dot.

Please do come play along with us at Retro Rubber Challenge Blog.  We have great challenges every two weeks and selected winners are asked to guest design.  Tons of fun!  Our rule list is very short 1)  Use a stamp at least a year or older 2) Tell us how old the stamp is 3) Enter up to 10 challenges including ours.  Hope to see you soon!

I am delighted to enter this card in the following challenges:

Monday, September 3, 2018

007 Prom for Stick It Down

Wow it seems like Senior year just flew by!  Here is one more memory of the year using out fabulous sketch from Stick It Down for September.

You will notice that the selection of papers are identical to the ones I used for the Promposal layout for SID's sketch for last month.  It was a great way to tie the two layouts together, and use the scraps from the first layout.  I did not have to cut into another piece of cardstock, wow!


The black cardstock is by Wausau and is a textured Eclipse Black.  The ancient Costco specialty paper pack is the source for both the red and gold mulberry paper and the white and black flocked paper.  The Gold Glitter cardstock and the Red Small Flourish Gemstones are both by Paper Studio.  The title is die cut from the Gold Glitter cardstock with Spellbinders Etched Alphabet.  This glitter cardstock die cuts beautifully, and I love the shine and shimmer!  Jelly Roll White Gel pen makes it easy to journal although the photos do speak for themselves!

Do come play along with us at Stick It Down, we have some great sketches to work with this month.  We are playing along with Spiegelmomscraps this month and she has offered a great coupon for 20% off, just use SIDSMS when checking out.  She does ship internationally, shot her an email if the $$ seems a bit high.

Thanks for stopping by!  Oh, and I just figured out that I was not receiving emails notifying me of all those wonderful comments you have been leaving me!  Busy summer, heads down to get crafting projects done before traveling, and some major upheavals within the family.  Blessings!


Monday, August 6, 2018

Promposal for Stick It Down

This event may have happened last spring, but the photos of my son's Promposal and him leaving for Prom were a great match for this three photo double page sketch from Stick It Down this month. 

I really like how the layout came together with a few sheets of vintage specialty paper and glitter cardstock!


About 10 years ago or so Costco used to carry some scrapbooking supplies.  They had several packages of specialty paper in the usual Costco quantities.  My mother, sister, and I bought the sets and split them between the three of us, so we had 2 sheets each of the paper.  Both the red mulburry with gold embossed dots, and the white with black flocked leaf patterns are from this era.  I used the EK Success Star border punch across the top of the black card stock then  backed it with Paper Studiot's Gold Glitter cardstock.  Additional stars were die cut with Spellbinder's Stars S4-092 and with the same Star Border and adhered to the top of the layout.  Even close up it is difficult to tell which layers are on top and which is under!  The title is die cut using Quickutz Emily font from the glitter cardstock.  All of the glitter cardstock was run through a Xyron to add adhesive before I die cut the stars or title.  Makes it much easier to adhere to the finished layout.


A close up of the title, it adhered really nicely to the mulberry paper and cardstock, and has enough sparkle to really stand out!


A close up of the border and the different specialty papers.  I knew I was "saving" these papers for a special layout, and they worked so wonderfully together for this one!  You will be seeing some of the same when I scrap the photos of my son and his girlfriend taken at the park later that evening!

Thanks for stopping by and do have some fun with our August sketch from Stick It Down!

Tuesday, October 24, 2017

Halloween Birthday card

Wow, time got away from me and this post is late!  We have a new challenge over at Retro Rubber, and it is a sketch this go around!


I decided to flip the sketch and use some fun witches boots to create a birthday card for a family member born on Halloween.


I used Hero Arts Witch Feet Stamp and Cut set from 2016, and Taylored Expressions In & Out Birthday from September 2014.  The various Witch Feet are stamped and heat embossed with Irridescent Embossing Powder.  Imagine (Tsukineko) Delicata Golden Glitz and Black Shimmer are set off by Brilliance Pearlescent Lavender inks.  The images are "water colored" with the various inks using Ink Potion No. 9.  To set off the Witch Feet, Spellbinders Nested Lacy Pennats are die cut and inked with Brilliance Pearlescent Lavender,  The base card edges are also inked with Brilliance Pearlescent Lavender, topped with a layer inked in Delicata Golden Glitz.  I had a bit of Doodlebug Desings Black Chenille cardstock from 2008 that was a perfect layer for this card.

With some masking and an ink positioner I stamped the sentiment.  The top portion is from the Hero Arts Witch Feet Stamp and Cut set with the Halloween masked.  The Birthday is from part of the Taylored Expressions In & Out Birthday with the happy portion masked.  The sentiment is die cut with Spellbinders Classic Scalloped Squares small.  The rectangle is created by lining up the scallops and die cutting it slightly smaller than the square.

I hope my favorite Halloween witch enjoys her special card!

Saturday, March 11, 2017

Guest Designer for Joy Clair


I am delighted to be invited to join Joy Clair as a Guest Designer for the month of March.  There are so many wonderful stamps sets in their Color by Faith Bible Journaling stamp line, it was hard to choose which to work with first!  Joyful Noise is a great set that can be used with so many passages, especially those of the Psalms.  I was drawn to the wonderful guitar and look forward to using it in Bible Journaling as well as for cards for my musical family and friends. 

  
 I choose to journal Psalms 13:8 with the Joyful Noise set focusing on the “Your Praise will ever be on my lips”.  My personal preference for Bible journaling is that I like to be able to read the other passages on the page and so it is more clean and simple.  


I started by stamping the guitar on a piece of brown Mulberry paper I had in my stash.  I used Brilliance ink in Coffee Brown with an accent of Brilliance in Rocket Red.  The Rocket Red was applied with an Imagine Fantastix Brush Tip.  This is a great little tool to use when coloring with inks. 


The image was fussy cut, then adhered with Glue Dots Vellum Adhesive.  What a perfect way to create a light-weight embellishment!  I also like that the reverse side of the page is ready for journaling as well.


Once I had the guitar adhered I moved the remaining images around on the page to see what I could fit. It was easy to use an acrylic block to lift them up and have the placement already set for the majority of the musical notes.  The sentiment and heart swirl image are stamped in Brilliance in Rocket Red.  The musical notes are stamped in Brilliance Galaxy Gold.  The Brilliance inks are pigment based and need to be heat set with a heat gun, or allowed to air dry before closing the Bible to prevent transfer. 

The verse Psalms 13:6 “I will sing the Lord’s praise, for he has been good to me” is underlined with Memento Dual Tip marker in Lady Bug. 

There are many other Psalms I plan to use the Joyful Noise set with in the future.  Thanks for stopping by and enjoy your time reflecting on God’s word.


Remember I’ve decided to offer a bit of blog candy to my loyal readers and followers.  I will draw a name at the end of March from my followers who comment on any of my posts by March 31st.  Click either method to the left to become a follower or follow Snippets of Time via email.  I have a few things in my stash that need new homes, both new and gently used.  So, hang out with me during March, follow the blog, and comment on your favorite blog posts.  To win the blog candy you must comment and be a follower, or follow via email.  Thanks, and good luck!

Thursday, December 22, 2016

Sparkly Snowflake Card


Our challenge this month was to create something sparkly, which for the winter season means snowflakes and a multitude of fun Imagine products.  I resisted the temptation and choose to work with just a few to create a multi-layered snowflake card.  There are a few snowflakes peeking through the snowflake embossed vellum layer that add an extra dimensional to this sparkly holiday card.  The photo really does not do the card justice!  I had fun using my border punch to create a peek-a-boo effect along the bottom edge.  Drop by the Imagine blog to check out the step-by-step tutorial!