Saturday, March 30, 2019

The Pond is COLD!

Remember the time when . . . in this case the kiddos wanted to swim the the irrigation pond at our new home.  As the title suggests it was very cold, and this was about the only time they used it as a swimming hole!


I love shopping my old stash and this is a perfect example of some fun paper choices I have available.  I also feel good when I use up some of the paper I've collected over the years!
  • The background is DCWV blue cardstock chosen to match the water and colors in the coordinating papers.
  • All the patterns are from a paper stack by My Minds Eye.  I am not sure of the name.  At one point MME would print the same patterns on paper that they had released on cardstock.  The stacks were available at Michaels.  This is a duplicate layout so each pattern was trimmed to 6" x 12" before I designed the page. 
  • The the corners are rounded on the layers.  
  • The title is Quickutz's Star Mini and Diesel Classic and is die cut from brown cardstock. 
Another layout complete from a few years ago . . . I have a few years to catch up on and am glad my scrapping mojo is going full force.  I am also thankful that I have a stash to shop from because the only way I can acquire new collections is by shopping online, there are no LSS in my area anymore.  Only the big box versions, which are good for cardstock selection, but not so much for new releases.  Have a wonderful day, we are finishing our spring break here and are thankful for slightly warmer weather!

Friday, March 29, 2019

Fishing at Wizard Falls

This was a fun layout to create, one that used old school die cuts from my stash.  


I had some really sweet photos of the children's fishing day at Wizard Falls Fish Hatchery.  I remembered I had a rod and reel in my die cut stash from back in the day when we would buy die cuts . . . before all of the chemical etched dies came on the market.  The trees were most likely die cut from a steel-rule die at a Local Scrapbook Store.  Remember when we would buy the paper and stand at their die cut station and die cut multiples for future use?  That time is finally now, about 18 years or so later?  
  • The water and shore is trimmed and punch with the EK Success bubble edge punch.  
  • I used Square Pastels to add dimension and depth all of the cardstock.
  • Delicata Silvery Shimmer is used on the reel part of the die cut.  
  • White craft thread is adhered to the back side of the rod and adhered with rolled up glue dots to the page.
  • The title was rather long so I decided to print it out on vellum to be adhered to the layout.  (I made a duplicate of this layout, one for each boy's album.)
  • Journaling is written in Zig Chocolate Dual Tip pen.
My husband really likes the whimsical wonky trees and the fishing rod and reel.  It is one of his favorite layouts for the month.  I hope you enjoy my stepping into an old style layout!

Thursday, March 28, 2019

Softball on the 4th

This layout is from the first Fourth of July we celebrated in our new home.  We actually have a softball field in our backyard.  Now we mostly use it to graze two steer in the summer.  But this is proof that we have played softball on our property!


The photos didn't really call for a red, white, and blue theme so I went with a patterned paper that featured stars in many colors.

  • I had two sheets of Star Struck from the Shabby Princess Collection from Bo Bunny Press 2007.  The pattern had an obvious direction for the stars.  I wanted to make two duplicate layouts, so one sheet I trimmed on the horizontal axis (all 3" x 12"), and the other on the vertical axis (2 1/2" x 12" and 3 1/2 x 12".  Viola, enough patterned paper for both layouts!
  • Digging through my stash of old Provo Craft Slabs I found coordinating papers from Slab II, Slab III, and Slab IV.  The yellow pattern is 6 1/2" x 11 1/2", the green is 5" x 12" and the blue is trimmed to back four of the photos.
  • The cardstock from DCWV and is the backing frame on the right and the base of the layout.  
  • Both cardstocks are used to die cut the title using Quickutz's Tangerine with Shadow font.
  • I also have giant Ric Rac from my stash (unknown origin) that was a perfect finishing embellishment.  Fortunately there is enough synthetic fiber in the Ric Rac to singe the ends to keep it from from fraying. 
This was a fun day that included a BBQ and lots of laughter.  Thanks for checking in, and every comment is fun to read!

Wednesday, March 27, 2019

We Love Our Puppy

Typically I am not a single photo on a layout type of scrapper, but this photo deserved it's own page.  My four-year-old son had his face painted at a local street event and wore the paint for the rest of the day.  Once he got home I snapped this adorable photo.  The challenges over at Rochelle Spears and Scrap Your Stash were a great fit for this layout.


I have about 6 inches of Provo Craft light weight paper in my stash that I dug through to find all of the coordinating patterns and colors.  Once that was done the layout came together quickly, that is the beauty of using a sketch for inspiration!

  • All three mats that back the photo are trimmed to 4 1/2" x 6 1/2".
  • The striped pennant is 2 1/2" wide because that is the largest size that fits into my new Paper Studio Pennant Punch.
  • Rings are die cut with two sizes of Spellbinders Standard Circles Large and Small.  They are about 4" in diameter.  I use Zig glue to carefully adhere them to the layout.
  • The tag is also 2 1/2" wide because I have another punch by Paper Studio punch that punches tag tops.  To finish the tag I punch a 5/8" circle and adhered it to the tag before punching the center whole.  It is finished with a ribbon bow, made from ribbon out of my stash.
  • I searched through my pet embellishments to find a few things to create the cluster.  KI Memories made Lace Cardstock titled Dirt Treats that I had sprayed with a few different Tsukineko Walnut Inks from the Spritzer Workstation (Eucalyptus, Terra Cotta, and Walnut) to make a background for another layout.  I still had the "mask" in my stash.  I trimmed a small corner to be the base of the cluster.
  • A Coluzzle template allowed me to cut the perfect size heart to layer over the top.  
  • Two paw print die cuts from my stash topped the cluster.  
  • With the dark background it was time to pull out the white sticker letters.  Swirly White by Creative Memories spelled out the title. 
  • I used my first try at the Coluzzle heart to journal and finish the layout.
Thanks for checking in here at Finding Snippets of Time to Craft, I hope you are finding snippets of time to craft in your neck of the woods! 

I was inspired by the following challenges:  
Scrappy Friends March--I was inspired by the love, circles and the puppy images in her layout!

Tuesday, March 26, 2019

Get Well Wishes for Retro Rubber

I always enjoy using Tic Tac Toe boards to create cards, there are so many options to work with and be inspired by!  Retro Rubber has a fun Tic Tac Toe for this challenge.


I decided to use the Punch or Dies, Leaves (on the flowers), and Ribbon or Twine. 


  • I stamped the Technique Tuesday image from 2016, the Wild Rose stamp set, in Delicata Black Shimmer and heat embossed with clear embossing powder. It was then die cut with matching die.
  • I colored on a craft mat with Memento Markers in Morocco, Tangelo, Pistachio, and Olive Green. Then I picked up the color with a Niji water brush to color the image.
  • The sentiment shape is die cut and inked with a large Ink Dauber with Memento Cantaloupe.  I stamped the sentiment in Memento Morocco.
  • The two backing layers are die cut with Spellbinders Floral Ovals and Petite Ovals Large.  These were inked with a large Ink Dauber in Cantaloupe and Pistachio. 
  • The edges of the card base with are inked with an Ink Blusher and Pistachio for a soft edge effect.
  • The layers are adhered together with dry adhesive and dimensional foam adhesive.
  • To finish the card I tied a double looped bow from orange craft twine, added an extra set of tails,  and adhered to card with a glue dot.

Thanks so much for stopping by, and please do play along. We have a few simple rules.  You must use at least one stamp the is one year or older.  Please limit you challenges to ten including ours. Hope to see you in our gallery.

Monday, March 25, 2019

Fourth Grade Memories

If you have been scrapbooking for awhile like I have, you undoubtedly have a few page kits in your stash.  I've made it a goal to use up these wonderful gems, and here is an example that features a kit from embellish it! from 2013 with a few changes.

  • The kit features Simple Stories 24/7 including Red Tweed Calendar, Good Stuff, and Journaling Card Elements.
  • The Journaling Card Elements are trimmed apart and used as embellishments through the layout.
  • Cast Away Lazer Cork "Memories" was part of the kit, as were the mini film strip, twine and buttons.  I used the twine on one of the journal card elements that is cut apart into journal strips.  I also added some red craft thread to the buttons for little bows.  I don't like empty button holes!
  • The additional title words are DCWV Cork Stack die cut with Quickutz Frankie.
  •  Another plus of journal cards?  They can be used to journal a layout!
This kit was designed for four photos, but with a little creative use of the journal card elements I was able to pull off a cohesive layout.  Another layout complete for my son's album!  Thank you for leaving a comment when you stop by, they are always encouraging!

Sunday, March 24, 2019

Best Friends Water Fight

Nine years ago on the Fourth of July my young son enjoyed a water fight with our German Shepherd.  She was easily twice his size, but was his devoted companion and guardian.  The first years on our new property I knew that if Peter was outside with Sable, she was only a few feet behind and would make sure he was safe.  She was also a great playmate for a young boy.  I particularly like his expression in the last photo, one of pure joy!

  • I choose to work with scraps from the DCWV Premium Pet Stack.  The theme and colors worked well in many ways with the photos.
  • Only one sheet of the "just right" color of a Bazzill green was found in my stash, so I made it work.  The actual background of the left side is just lightweight white cardstock, so all of the sections would stay in place.  
  • Blue DCWV cardstock is used to die cut the title with Quickutz Katie.  This font allows a longer title, but doesn't take up as much space width wise.  
  • Vellum Quotes w/Flair Dogs provided the theme appropriate quotes.
  • The journaling is completed with a Zig Pen in Blue.  If I were to do this again I would use a black pen on this dark green cardstock to make it easier to read.  
My husband likes this layout as well, because it shows the relationship between Peter and Sable.  It was just a few moments in time, but now can be remembered and shared.  Thanks for stopping by and sharing your thoughts!

Saturday, March 23, 2019

We love Snow, (just not 28" in 48 hours)

Winter came late this year in Central Oregon . . . February 25th to be exact.  Lots of snow in a short amount of time.  Four snow days from school as the city and county could not keep up with plowing the roads, even though the fourth day was blue-bird clear and beautiful!  As the journaling indicates, we all contributed to moving snow, and had fun playing outside.  I captured some stunning photos from our back deck, one in the early morning capturing the sunrise, moon and Venus.  The second is actually also looking the same direction but at dusk when mist was forming over the snow fields around our home.  These two photos directed my color choices.


  • The background is really old Creative Imaginations Snowflake paper that I've have for probably 15 years!
  • Two pieces of white cardstock are trimmed to 5" x 12", and 2 1/2" x 12 inches.  Martha Stewart's Aspen border punch set punches out the small snowflake pattern.  
  • Needing a bit more color I trimmed lavender cardstock to fit the area and pressure embossed with Darice Snowflake background.  To bring out the snowflakes the surface is sanded.  
  • The two focal photos are backed with coordinating cardstock.
  • The title is Quickutz Frankie Classic and Shadow along with Frankie Mini.  The larger letters are embossed with Quickutz Goosebumps Sparkle.  After adhering to the backing letters I sanded the surface to bring out the design.
  • I inked Studio Calico wood veneer snowflakes with Memento Luxe Wedding Dress, and a heart with Versa Magic Spring Posies.
  • The journaling is done on white cardstock and using Microsoft word and creating text boxes.  The edges are inked in Versa Magic Spring Posies.
Another winter in Bend, and another beautiful snowfall.  It is taking a while for the all snow to melt, many parking lots and side streets still have a great piles of snow!  Thanks for stopping by and I truly enjoy reading your comments!

Friday, March 22, 2019

Butterflies at High Desert Museum

Did you know that March 14th was National Learn About Butterflies Day?  I didn't finish this layout in time to post it on March 14th, but still want to share our fun experience from a few years back.

Since many of the butterflies that photographed well in the exhibit had orange coloration, I choose orange cardstock for the background.

  • The border along the bottom is Spellbinder's Butterfly card front.  The die is designed to be continuous, but great care must be taken to line up the design.  I die cut 3 1/2" x 12" sections from white cardstock to create the border. 
  • Cuttlebug Butterfly dies are used to die cut black cardstock.
  • I found some great butterfly washi tape by Paper Studio at Hobby Lobby to finish the edge of the bottom die cut.  Such pretty butterflies!
  • Fortunately I had taken photos of the identification charts so I was able to accurately label the photos of the butterflies we interacted with in the exhibit.
  • The title is CK Typist by Quickutz.
Even though the layout is simple it did take time to die cut the bottom border and title!  Butterflies are wonderful insects and have special meaning for me.  We don't have many varieties here in Central Oregon, so visiting a butterfly exhibit is a special treat worth remembering.  Thanks for stopping by and taking a look!

Thursday, March 21, 2019

Last Day of 5th Grade (School is finally out Version 2.0)

It just so happened that the year that school was extended by a week was the last year my younger son was in elementary school.  In the month of January that year, his school was closed for 11 days due to snow.  Well actually 4 or so of those days were because of snow and lack of plowing, but the other days were due to the fact that another elementary school in our district had their gym roof collapse! School was cancelled just as classes were starting and the district called in the engineers to check the structural integrity of all the buildings.  They found problems in five more schools, and spent parts of the next two weeks clearing the roofs of buildings with snow blowers and shovels.

I used the Bo Bunny Toy Box collection and two colors of Bazzill cardstock to create this layout.


  • The blue cardstock is trimmed to a circle using my trusty Creative Memories circle cutter.  I like that I can cut large circles cleanly, even though it is a really old tool!  The circle is then divided to bookend the other patterned papers.
  • Bo Bunny's Cheerful, Story Time and Circles scraps are trimmed  and layered together with the outside corners rounded.  
  • One of the reasons I choose the Toy Box collection is because the colors matched this ancient die cut of a bus of unknown origin.  Yeah!  It is on a layout and no longer languishing in my stash.
  • Quickutz Venus and Blossom are used to create the title.  
  • To add a the finishing touches I added a few wood veneers from Studio Calico, a heart and an arrow.  
My older son's version of this layout is much different, but it is fun to use photos in multiple ways.  Thanks so much for stopping by, your comments are always appreciated!

Wednesday, March 20, 2019

Dogs by Sergey

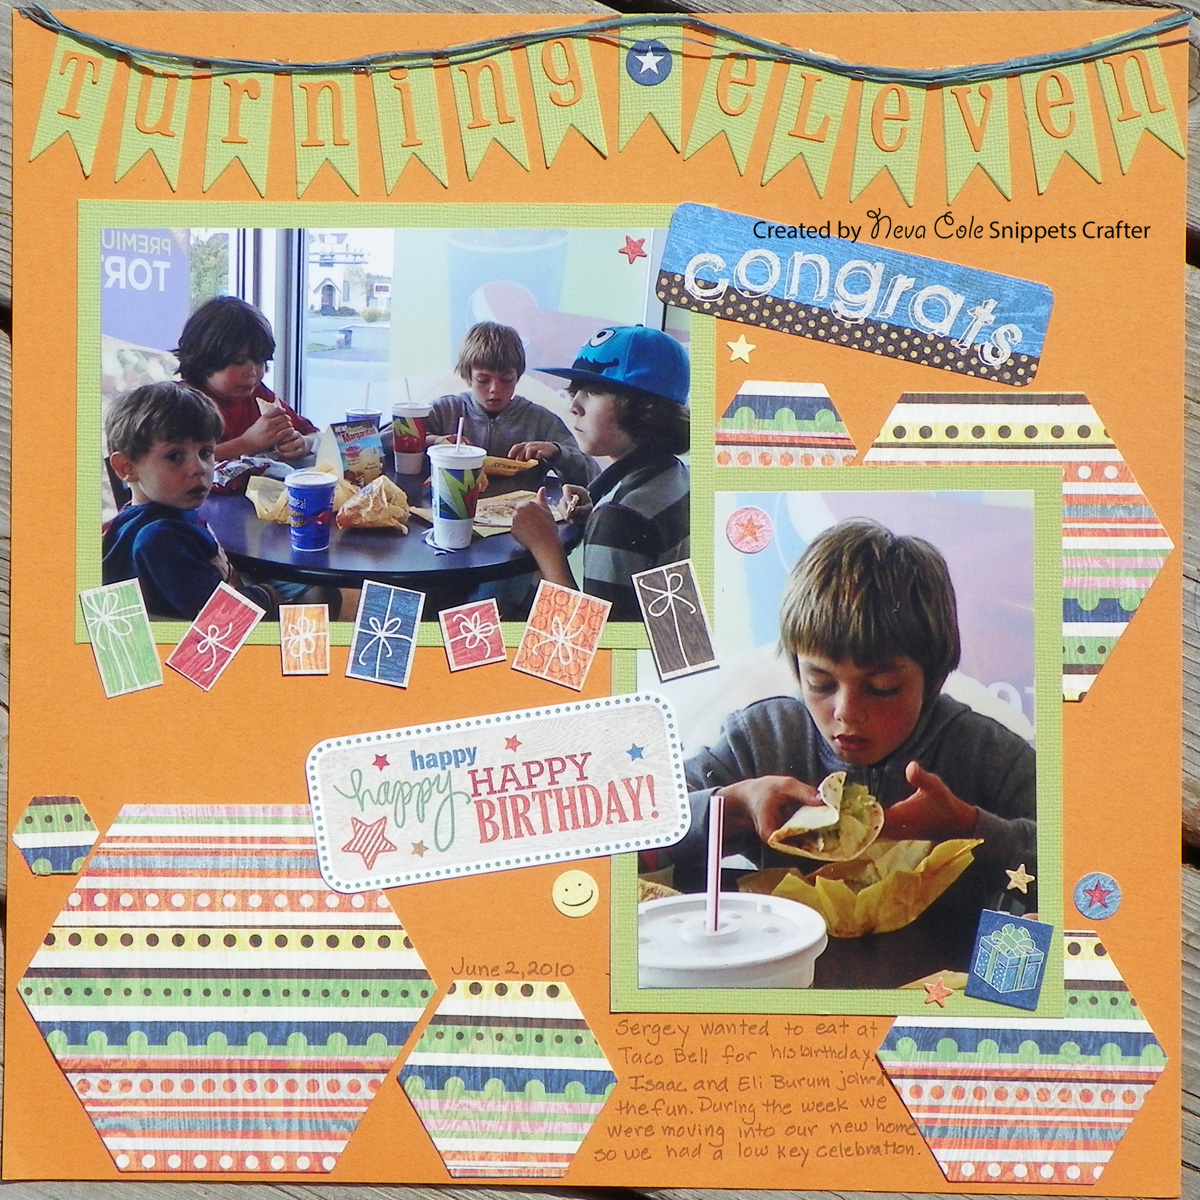
Doctor Suess' birthday is this month, so it is great time to scrapbook about books!  This layout is about a book my son wrote in fourth grade.

Both of my sons are adopted from Russia, and he completed his book project about 6 months after he came home to the US.  Our older son still used his Russian name, but changed his choice just a few months later.  Both our oldest, my husband's daughter and our son had the same fourth grade teacher.  They did the same project four years apart.  So this layout is not just about a school event, but the parallels between the two kids.

I have a great collection from My Mind's Eye, Academy by Jen Wilson that is subtlety glittered and has a bit of grunge feel.  Combining several patterned papers from this collection and two colors of coordinating cardstock pulled together a cohesive double page layout.


  • Four sections Burnt Red cardstock are trimmed to 1/2" x 12" to break up the pattern between the large polka dots and the glittered stripes.  
  • The striped pattern is trimmed to 1" x12" and 2" x 12".
  • The center Sage Green cardstock is trimmed to 5" x 12".
  • The title is die cut fro the Burnt Red cardstock using Just a Note by Sizzix.
  • Journaling is done in Zig Writer.
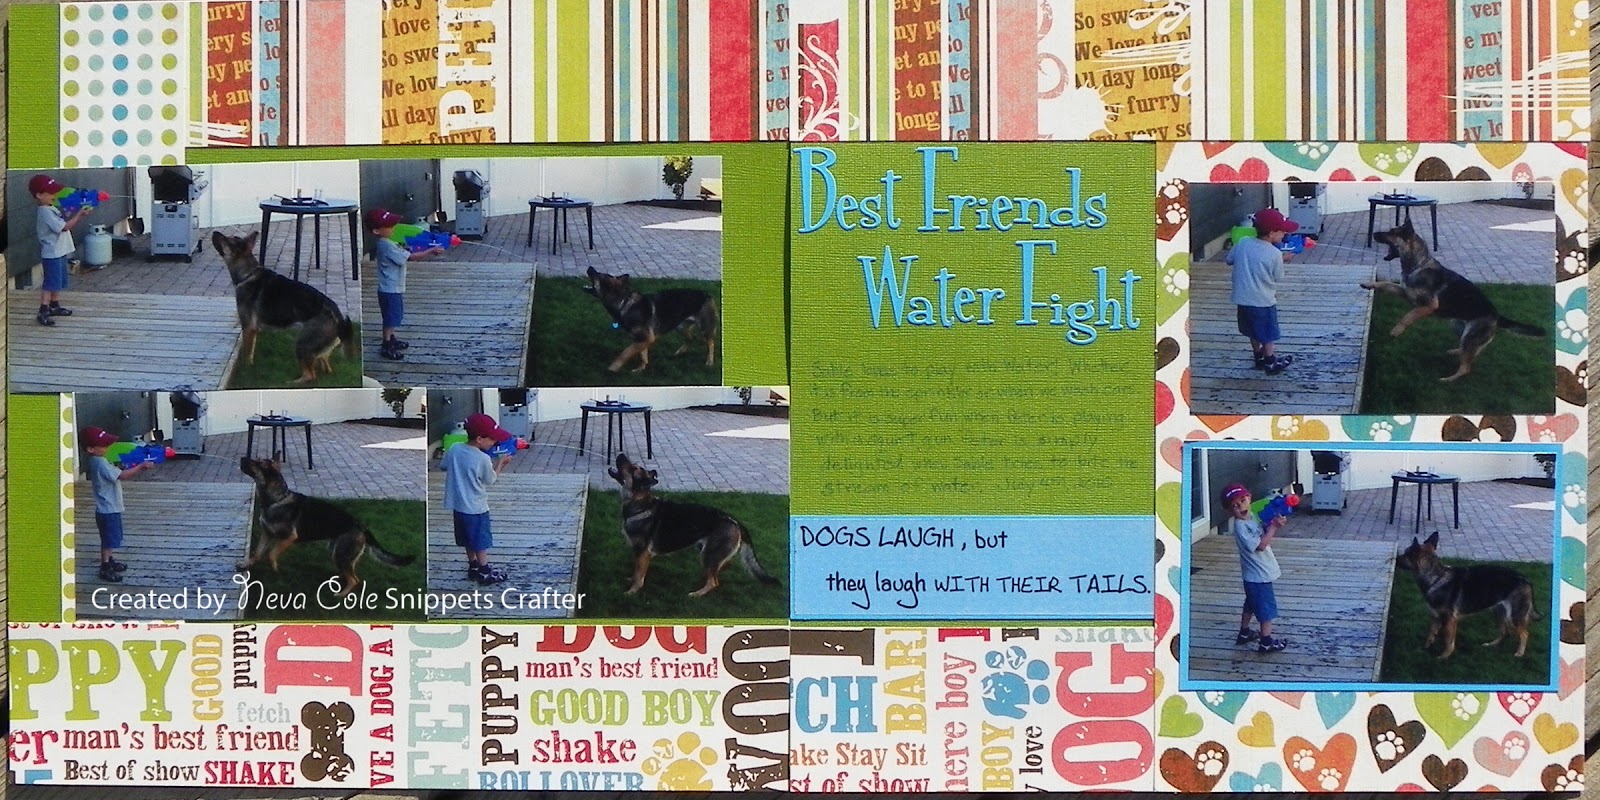
  • A few dog themed brads by Around the Block are added by the title.
  • I still wanted to add a bit more, so two Brackets #1 by Plain Janes Deluxe Designs were inked up with Red Brick Versa Magic.  
Even though the photos aren't the best, I am pleased with the final layout.  Another memory preserved.  Thanks so much for stopping by!  I hope you enjoy my little creative space!

Tuesday, March 19, 2019

Turning Eleven

I decided to work with a challenge that required using paper scraps and using up a sticker sheet.  The paper and stickers are left over from It's Your Day layout about my younger son's eleventh birthday. The color scheme is very similar but the two layouts are totally different!


The collection is from 2010 by Basic Grey named Life of the Party.

  • I selected two coordinating colors to the paper collection that turned out to be orange and green, complementary colors.
  • The scraps of striped paper left over from the first layout were adhered together to form a section that was about 5" x 12".  
  • Spellbinders Hexagons were used to die cut the shapes.
  • The title is die cut from the orange cardstock using Quickutz's Blossom font.
  • Spellbinders Nested Pennants are die cut from the green cardstock.
  • The photos are backed with the same green cardstock.
  • To be honest I moved the hexagons around the page to fit the title and the fun stickers before sticking everything down.  
  • I still had a few presents left over as well that could be fussy cut to line the bottom of one photo.
  • The journaling is done in Zig Writer Blue Jay.  Turns out the blue doesn't really show up much as blue on orange cardstock.
This is a really busy time for our family when the photos were taken.  We had purchased a new home and started moving the day before my son's birthday.  So a party at home wasn't in the cards, but a simple dinner out at his favorite fast food restaurant was a perfect fit.  

Thanks for stopping by, you comments are always appreciated!

Tuesday, March 12, 2019

Thank you with a few stripes for Retro Rubber

It is always fun to use a few stripes in your cards and scrapbook pages, they add a bit of visual interest.  Our challenge at Retro Rubber Challenge Blog is:


Great collections from Quick Quotes often include a stripe pattern that ties all the colors together in the collection.  Here I used the Spring Showers Collection for this card.


  • I based my choice of dimensions for this card on the size of the sentiment.  To fit the elements I went with an A7 size card base.
  • The striped section of is trimmed to 1 3/4" and inked the edges with Powder Puff Chalking Ink in Rusty Nail.  
  • The floral section is trimmed to 3" and inked the edges with PPCI in Rusty Nail.
  • The sentiment from the Thanks stamp set from 2014 by Stephanie Barnard for Sizzix is stamped in PPCI in Capri Blue on a piece of coral cardstock.  It is die cut with the center oval from the Spellbinders Radiant Rectangles then edged with PPCI in Capri Blue.
  • The two pennants are about 1/2" wide and the ends are die cut with a combination of Spellbinders Classic Petal and Classic Decorative Inserts Two Edgeabilities.  The edges are inked with PPCI in Capri Blue.  The pennants are trimmed to match the curve of the die cut.
  • The two backing layers are adhered together and the pennants are adhered.  
  • Craft thread is wrapped around the layers and adhered.  Three strands of craft thread are tied into a bow and adhered.  The sentiment is adhered.
  • The outer edges of the card are inked in PPCI in Capri Blue.
  • I thought it needed a bit more so I pulled out a small wooden heart to add the final embellishment.
Thank you so much for stopping by (pun intended).  Please do come by and play along with us at Retro Rubber.  We would love to see what you create in our gallery.  Just a few reminders about our simple rules.  Please use at least one stamp that is older than a year and tell us how old it is, and enter 10 or fewer challenges.  See you soon!

Monday, March 4, 2019

DMC Wrestling Season Double Page Layout for Stick It Down

We have a great quick double page sketch for the month of March at Stick It Down, one that I used to create a layout about my son's most recent club wrestling season.


Club wrestling runs before the Middle School wrestling, and helps our wrestlers prep and have an opportunity to compete with different kids.


I have a number of wrestling themed papers that I mixed and matched for this layout.
  • I trimmed two sections of 4" x 12" from On the Mat Coaches Call by Moxxie and layered the across the bottom of the layout.
  • Both sides of Wrestling Life Paper 5a by Scrapbook Customs are used to create the top of the sketch.  The strips are trimmed to 3/4" x 12" so that the design matches.
  • I wanted embellishments that worked for these wrestling photos and looked everywhere for a stamp or additional stickers to no avail!  So a search of the internet for free non-copyright clip art yielded a few choices.  The clip art is sized, printed on white cardstock, fussy cut, and colored with Prisma colored pencils to add detail and depth.
  • Journaling is done in Zig Writer in Black.
  • Tangerine Classic and Shadow by Quickutz is used for the title to die cut red and black cardstock.
That is all there was to it!  Quick as well as clean and simple, sometimes that is just what the photos call for in a layout.  This is a fantastic sketch for the month, we also have single page and card sketches to play along with at Stick It Down.  Come and join us!