Showing posts with label AIR Imagine Crafts. Show all posts

Thursday, December 15, 2022

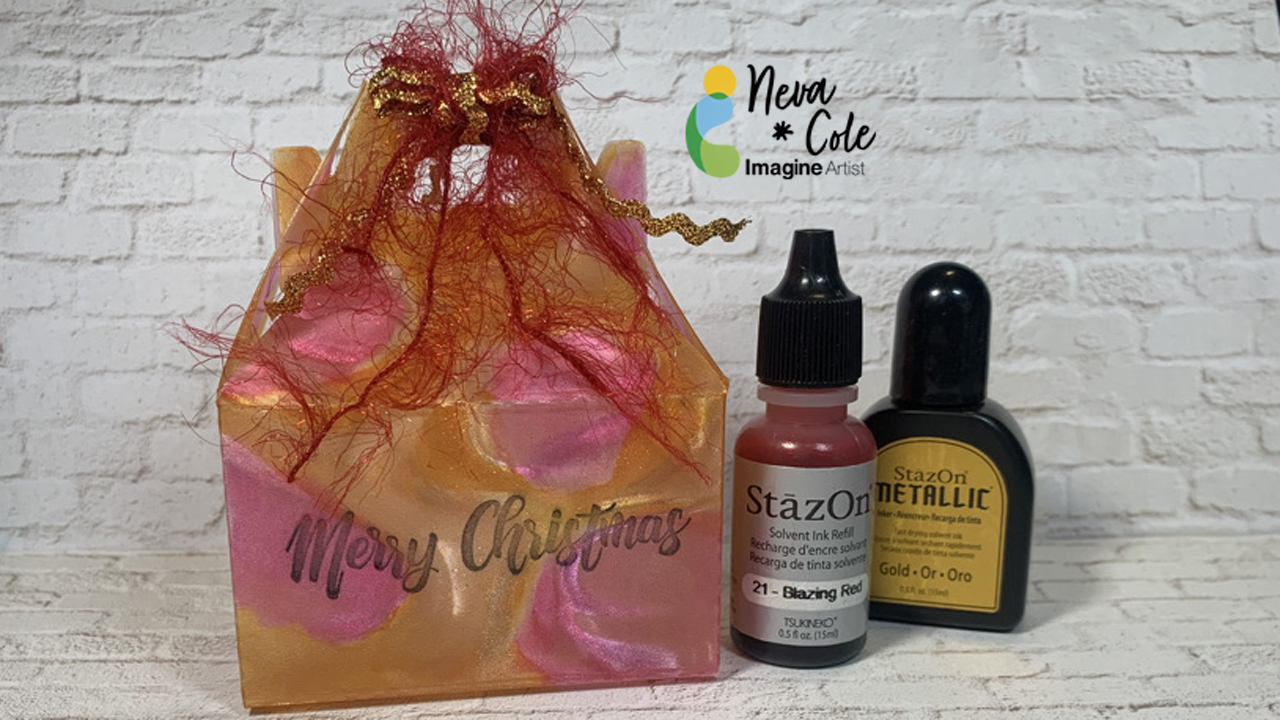
Vertigo Christmas Gift Box with StazOn Inks


Vertigo is a beautiful translucent material to use in creating projects, in today's tutorial there will be tips and hints to make your project shine!  The perfect ink for this box is StazOn,  and is the only ink that will dry on Vertigo and other plastics. 

 Skill:  Intermediate

Time:  1 hours

Step1:

 
Vertigo can be cut with scissors OR with a simple die.  Complex dies do not work well with most plastics, vertigo included.  This particular box needed 8.5" by 5" section of Vertigo, 12" x 12" sheets can be purchased directly from Imagine Crafts website.  Recycled packaging may be substituted for Vertigo, however the results will not have the stunning effect the the patterns that Vertigo provides.   The Pebbles pattern of Vertigo was used for my box.

Step 2:


Place a few drops ink from StazOn Blazing Red inker on a plastic surface to use as a palette.  On the INSIDE  of the box use a cotton swab to color each of the pebbles from the center out.  A little goes a long way with the translucent colors. 

Step 3:

 
Metallic StazOn ink is slightly less translucent than the other colors.  To capture more shimmer apply a drop or two of StazOn Metallic Gold on the INSIDE of the box and move the ink with a cotton swab to color around the pebbles.

Step 4:

 
Continue to add StazOn Metallic Gold ink to cover the remaining areas of the inside of the box.  Set aside to dry, as the Metallic ink is a bit thicker and takes a longer to dry. 
 
Step 5:

The sentiment is stamped on the OUTSIDE of the box, keeping the interior of the box ink from lifting and to have the correct orientation.  Merry Christmas is stamped in StazOn Jet Black. 

Step 6:
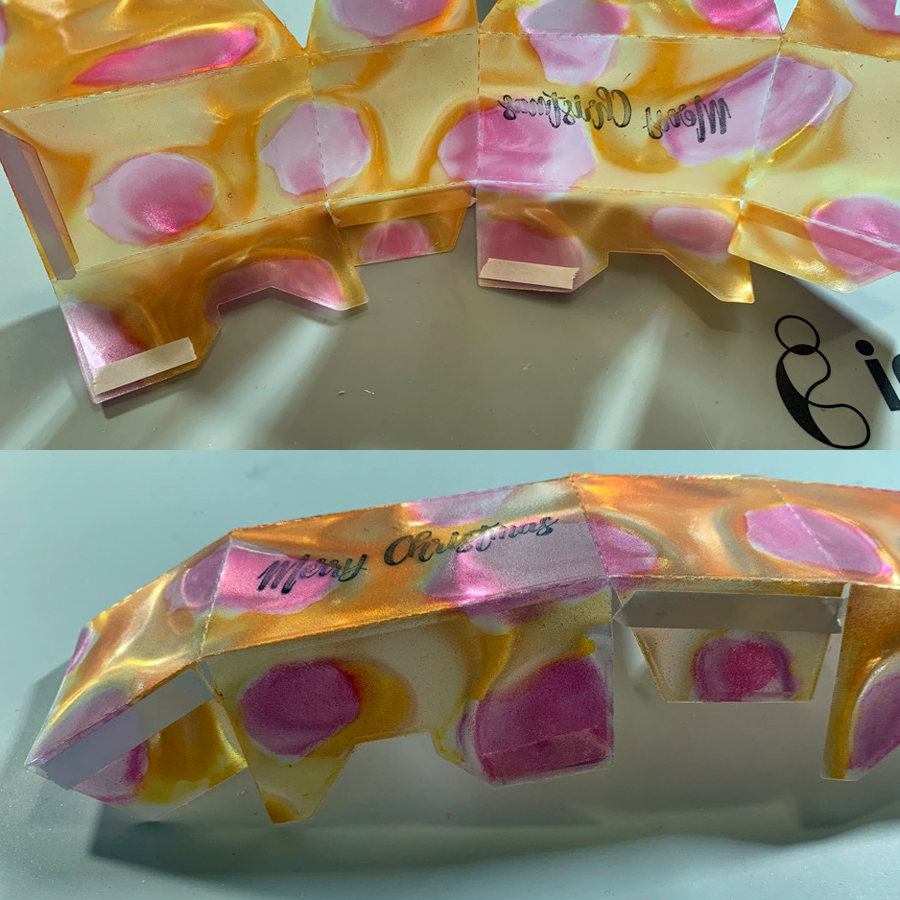

Tear It! tape is perfect to hold the bottom of this gift box together.  Assemble box and determine the best placement for the Tear It! tape.  Unfold box and add Tear It! tape, my project called for five sections to hold the box in shape.

Remove Tear It! tape liner and assemble gift box.  Decorate with matching ribbon and fibers to close the top and keep your gift secure.

Art Supplies

Imagine:

Vertigo--Pebbles 12" x 12" sheet

StazOn Inkers--Blazing Red and Metallic Gold
 
StazOn Jet Black
 
Tear It! tape
 
Other:

Bakery Gift box die--Lifestyle Crafts

Cotton Swabs 

Sentiment--Christmas Blessings Taylored Expressions

Misc:  Gold Ric Rac and red fibers

Tuesday, September 13, 2022

Kaleidacolor Fall Thank You


Learn how to make a vividly fall colored Thank You Card using Kaleidacolor ink pads.  There are many Kaleidacolor pads that are in the autumn themed pallet.  Even though this card is multi-layered it comes together in a short amount of time considering all of the inked embellishments!

Skill:  Intermediate

Time:  2 hours

 Directions:

Step 1:


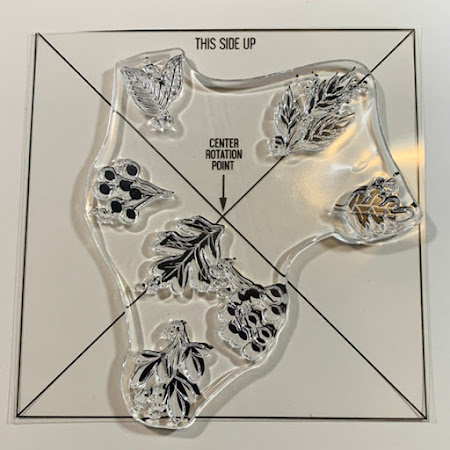
Trim cream cardstock to 5" x 5" and center the overlay and stamp on the center rotation point of the Turn About Stamp.  Place on stamp platform to pick up stamp, and remove overlay.

Step 2:


Ink up the stamp with Kaleidacolor in Autumn Leaves with the green end of the pad and stamp the image.  Rotate the paper 90 degree to the right.
 
Step 3:


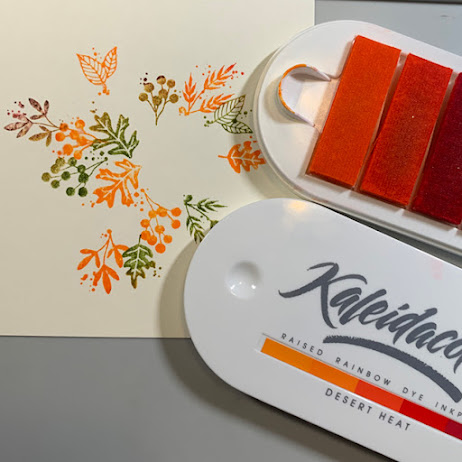
Ink up the stamp with Kaleidacolor in Desert Heat with the orange end of the pad and stamp the image.  Rotate the paper 90 degree to the right.

Step 4:


Ink up the stamp with Kaleidacolor in Cappuccino Delight with the brown end of the pad and stamp the image.  Rotate the paper 90 degree to the right.

Step 5:

 
Ink up the stamp with Kaleidacolor in Desert Heat with the red end of the pad and stamp the image.  Rotate the paper 90 degree to the right.  After I started the card I realized it can also be completed with two complementary Kaleidacolor pads, just by using opposite ends to ink the image.  Die cut the completed wreath with a circle die cut.

Step 6:


Ink the sentiment from the red end of the Kaleidacolor Desert Heat pad and stamp.

Step 7:


Die cut the sentiment.  The edges are then blended in with an Ink Dauber and the yellow end of the Kaleidacolor Desert Heat pad.  
 
Step 8:


More embellishment is added with included stamps from the set from various sections of all three Kaleidacolor pads.

Step 9:

Spritz a section of cream cardstock with Ink Potion No. 9.  This will allow the ink to spread more uniformly on the cardstock.  Generally glossy cardstock works best, but the rest of the card was regular cream cardstock, this is a good work around.

Step 10:


Using a 2" rubber brayer add ink liberally to the white cardstock until fairly well blended.  All three Kaleidacolor ink pads are used on one piece of cardstock with the intention to have several colors to die cut the coordinating leave dies.

Step 11:


Decorate the front of the 5" x 7" card front in the same way the sentiment die is inked and stamped in Step 8.  

Step 12:


Arrange die cuts from the brayered section of cardstock on the card base.  Use repositionable adhesive to pick up the edges of the die cuts and flip over the entire front circle wreath.  Add dimensional foam adhesive to secure die cuts in place.  (You will notice that the reverse side was the first try, however it wasn't the best, so it is simply flipped over and the other side was used.  You only see the mistake in the demonstration step!)

Step 13:


Adhere stamped wreath to card front.  Adhere the sentiment to the center of the stamped wreath with dimensional foam adhesive.

Art Supplies

Imagine:

Kaleidacolor--Autumn Leaves, Desert Heat, Cappuccino Delight
 
Ink Potion No. 9
 
Ink Dauber

Other:

Cream  Cardstock

Concord & 9th--Harvest Wreath Turnabout Set and Dies

Elizabeth Craft Designs--Stitched Circles

2" Rubber brayer

Temporary repositionable adhesive

Dimension Foam adhesive

Die Cut machine

Stamp Platform

Thursday, August 25, 2022

Create a Watercolor Sunflower using stencils and Fireworks!


In today's tutorial I will share how I used layering sunflower stencils to create a water color look to my image.  Notice there is no stamp outline, that helps achieve a more organic look to the project.  I learned a few things along the way, and almost want to include a few blooper photos!  Instead I share the way that will give you the cleanest look avoiding the pit falls!

Skill:  Intermediate

Time:  2 hours

 Directions:

Step 1:

Trim white watercolor cardstock to 4 1/4" x 9 1/4",  or about 1/4" on each side larger than your stencil.  this will allow you to handle your project more cleanly.  Use reposition able painters tape or washi tape to secure stencil along left side with edges matching along the upper and left hand side.  Spritz with Fireworks! in New Sprout until color depth desired is achieved.  In this close up photo freezer paper is used underneath the stencil and paper with the plasticized side up.  This allows collection of the over spray for background papers.    Carefully lift stencil to keep excess Fireworks from leaking under the stencil and adding unwanted color. 

Step 2:


 Secure next layer of layering stencil in place and spritz with Fireworks! in Bamboo Leaves.  This photo shows a spray box that protects your work area from over spray.  It also shows the best distance of 12" to 18" to spray the stencil to avoid large droplets of Firewoks. 
 
Step 3:


Clean stencils with sections of watercolor paper after each layer.  Move the watercolor paper around on the freezer wrap to pick up excess spray.  Keep color families together, as both colors of green are used on this background paper.  Clean up excess with paper towels or baby wipes. 

Step 4:

Continue with additional layering stencils.  Here Dandelion is used for Stencil 3, and Tangelo for Stencil 4. 

Step 5:


Sometimes as a designer you discover easier methods in the process of designing a project.  I was not satisfied with the color through the stencil by just spraying with the stencils that were smaller openings.  It is recommended to use this method for the rest of the layers.  Fireworks! in Tangelo is shown here sprayed on a plastic sheet.  Using a cotton swab the color is carefully dabbed through the stencil to give better color depth.  A cotton swab also prevents leakage underneath the stencil of excess color.  A lot less of the spray was used with this method!  Stencils 5 and 6 used this method to complete the look.  Stencil 5 used Fireworks! in Lilac Posies, and Stencil 6 a mixture of Fireworks! Rich Cacoa (for shimmer) and Walnut Ink in Java for a darker color. 

Step 6:


Here are the images from the entire stencil set.

Step 7:

One "blooper" photo, all the backgrounds made with the over spray and Fireworks! left on the stencils.  To be used in future projects?  The green sheet is trimmed to 4 1/4? to 5 1/2" to cover the front of the card.

Step 8:


Tap drop of Fireworks! in Dandelion on white watercolor paper trimmed to 3 3/4" x 5".  Use quilted card front die to add texture to front panel.

Step 9:

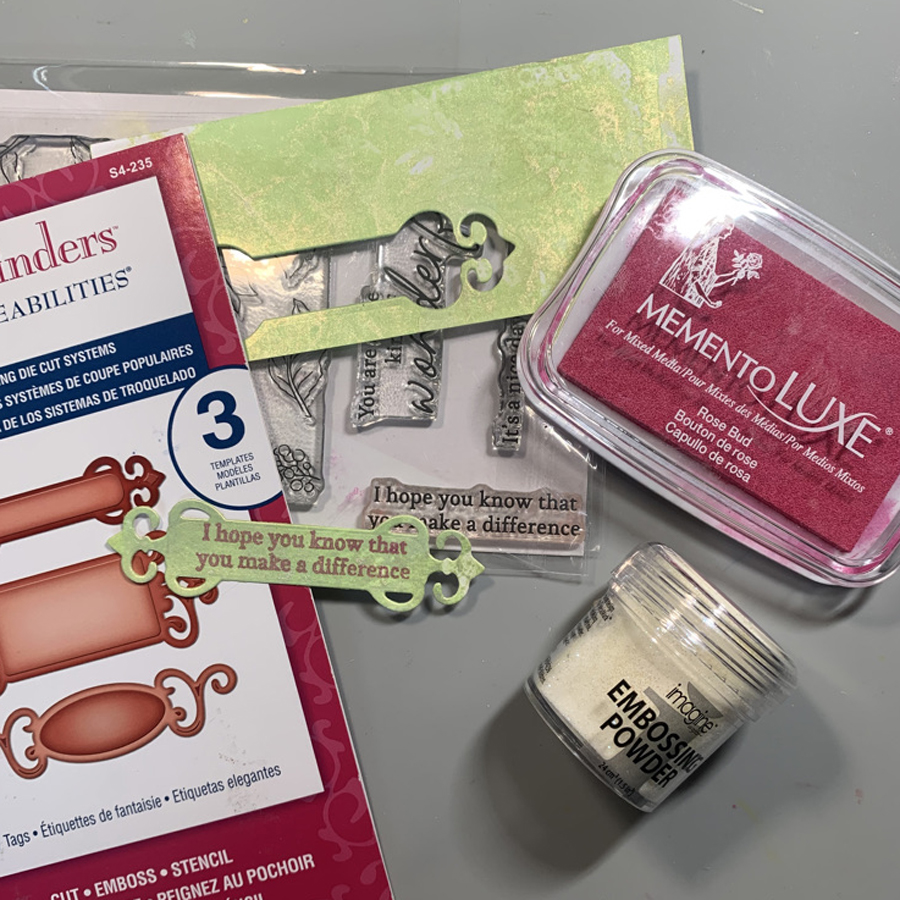
Part of the remaining background section is stamped with Memento Luxe in Lilac Posies using a sentiment from the Sunflowers stamp set.  It is die cut with a Spellbinder die.

Step 10:


The Sunflower is die cut with the coordinating die.  The layers are adhered together with Tear It! Tape with dimension foam tape behind the card front.  


Art Supplies

Imagine:

Fireworks!--New Sprout, Bamboo Leaves, Dandelion, Tangelo, Lilac Posies, Rich Cocoa

Walnut Ink--Java

Memento Luxe--Lilac Posies

Embossing Powder--Iridescent

Tear It! Tape

Other:

White Watercolor Cardstock

Pink Fresh Studio Sunflowers Stencils, Coordinating Die, and Clear Stamp

Concord & 9th Quilted Card Front Die

Spellbinders Fancy Tabs

Dimension Foam adhesive

Cotton swabs

Die Cut machine

Stamp Platform


Tuesday, July 19, 2022

Create Your Own Perfectly Matching Background Paper!


In today's tutorial I will show you how to create a background paper that will allow your photo(s) to shine on a scrapbook layout.  Using Memento Inks that match the photo allows the photo to be the center star of the layout.  All the embellishments will also match by coloring with the same inks.  The background itself is super quick and simple, and can be used for cards as well as layouts.

Skill:  Beginner

Time:  1 hours

 Directions:

Step 1:


Select ink colors that are in the photo you wish to highlight.  In my case it is one of my favorite photos from our travels to Oahu when we climbed to the top of Koko Head.  The stunning blue, brown, and green directed my choice of ink colors.  In this step Memento in Peanut Brittle is brayered randomly over a sheet of canvas textured white cardstock.  Cover about a third of the cardstock in varying levels of ink layers.  The key to this technique is to not look for perfection, just go for a fun look!

Step 2:


Memento Bahama Blue is used to ink the next layer in the background.  A good quality rubber balloon is filled with popcorn and tied off.  This is used to ink with random size dots in varying ink intensities on the background covering about one more third of the paper.

Step 3:

A second balloon filled with rice gives a slightly different ink look for the last layer using Memento Olive Grove.  Fill in the remaining open areas on the cardstock to finish the background.

Step 4:


The embellishments are shown here as one step, as the main focus of this tutorial is the background technique.  Smooth texture cardstock is used for all the embellishments as it die cuts more cleanly.  A frame of white cardstock is trimmed to 7 1/2 " x 5 1/2 " and inked with Memento Luxe in Peanut Brittle.  The Luxe ink blends a little more easily over larger areas.  The title is die cut in triplicate, then adhered together with small dots of OnPoint Glue around the die cuts to add dimension, and finally inked with Memento in Danube Blue.  A die cut of the island of Oahu is inked in Memento Olive Grove.  

Step 5:


When the photo was layered over the frame the match between the soil and the Peanut Brittle was so close, they blended together!  The edges of the photo are inked with StazOn in Jet Black to add definition to all edges of the photo, and allow the photo to stand out from the frame.

Step 6:

A journal block is written on the computer and printed out using photo settings and trimmed to size.  A frame is trimmed 1/4" larger than the journal block and inked in Memento Danube Blue.  The two are adhered together with Tear It! Tape.

Step 7:

 
The elements of the layout are placed on the background and adhered with Tear It! Tape or OnPoint Glue.  Memento Dual Tip Marker in Tuxedo Black is used to mark a small "X" as to the location of Koko Head on the Island of Oahu.   

Art Supplies

Imagine:

Memento--Peanut Brittle, Danube Blue, Olive Grove

Memento Luxe-- Peanut Brittle

StazOn--Jet Black

Memento Dual Tip Maker--Tuxedo Black

Ink Daubers

Tear It! Tape

On Point Glue

Other:

White canvas textured cardstock

White smooth textured cardstock

2" Rubber Brayer

Rubber balloons with popcorn and rice

Momenta Casual Script Alphabet Dies

Die Cut machine

Brother Scan and Cut 

Silhouette Design Store--Hawaii State die cut modified, Candy Apple Bold Script

Friday, May 27, 2022

Use Creative Medium Background for a Stunning card

Use Creative Medium Background for a Stunning Card


I am always searching for new ways to use supplies and tools.  Creative Medium comes in many colors, but the Iridescent Green creates stunning results on black paper.  The use of an Embossing Folder helps the layers of the iridescent effect really shine.  A few layered stamped images and I have a beautiful sympathy card to send to a dear friend.  
 

Skill: Beginner


Time: 1 hour plus dry time


Directions:


Step 1:


Cover a section of black paper (with or without texture) with a thin layer of Creative Medium in Iridescent Green.  I used Imagine's Squeegee to spread the layer across the paper.  The rubber edge was very helpful to get a thin even layer.  Set aside to dry, possibly overnight.  After it is dry it will still have a slightly rubbery texture.


Step 2:


Trim a section of the paper to 4" x 5 1/4" and pressure emboss with Sizzix Tropical Paisley Embossing Folder.  You can really see the detail in this photo.


Step 3:


Layer stamp the Hero Arts Hibiscus and leaves images.  Start with the lightest ink first.  For the Hibiscus--Radiant Neon Electric Yellow, Memento Cantaloupe, Memento Tangelo, and Versa Fine Habanero.  The leaves are stamped in Memento Bamboo Leaves and Northern Pine.  The images are die cut twice more from white and layered under matching die cuts with OnPoint glue.


Step 4:


The sentiment from Unity Stamp Company is stamped in Versa Fine Habanero then heat embossed with Iridescent Embossing powder.  (Not shown) The image is die cut with Lawn Cuts Everyday Sentiments die.  One end is trimmed off square.  The banner is inked with an ink dauber and Radiant Neon Electric Yellow.  The edges are inked with Memento Cantaloupe. 


Step 5:


Ink the edges of a 4 1/4" x 5 1/2" card with Radiant Neon Electric Yellow ink with an ink dauber.


Step 6:


The layers are adhered together with Tear It! Tape.  It adheres well with the textured layers of the card.  The two Hibiscus flower are lifted a bit with dimensional foam adhesive.


Imagine

  • Creative Medium Iridescent Green
  • Imagine Squeegee
  • Radiant Neon Electric Yellow
  • Memento--Cantaloupe, Tangelo, Bamboo Leaves, Northern Pines
  • Versa Fine Habenero
  • Tear It! Tape
  • Ink Dauber

Other

  • Black and white cardstock
  • Sizzix Tropical Paisley Embossing Folder
  • Stamp Platform
  • Heat Embossing Gun
  • Hero Arts Hibiscus C1868
  • Unity Stamp Company "beautiful life, blessed memories"
  • Lawn Cuts Die Everyday Sentiments
  • Dimensional Foam Adhesive

Friday, April 29, 2022

Colorful Peonies Created with Ink and Stencil Birthday Card


See how to use a variety of inks to create a stunning card using layering stencils and Fireworks as an embellishment.  Layering stamps have been around for a few years, but recently a few companies have come out with layering stencils that match stamp sets.  It takes a bit more time, but the results are phenomenal and I find that the placement is just a tiny bit easier.  For a finishing touch The Essential Glue Pad produces the look of foil without the need for heated plates or a laminating machine, a win in my book!


Skill: Intermediate


Time: 1 hour


Directions:


Step 1:


Stamp Pink Fresh Painted Peony Mix in Delicata Golden Glitz and heat emboss with Iridescent Embossing Powder.  I placed the stamp at a 45 degree angle on my stamp platform, as the stamped image is longer than most platforms.  This technique creates enough images for at least three cards!


Step 2:


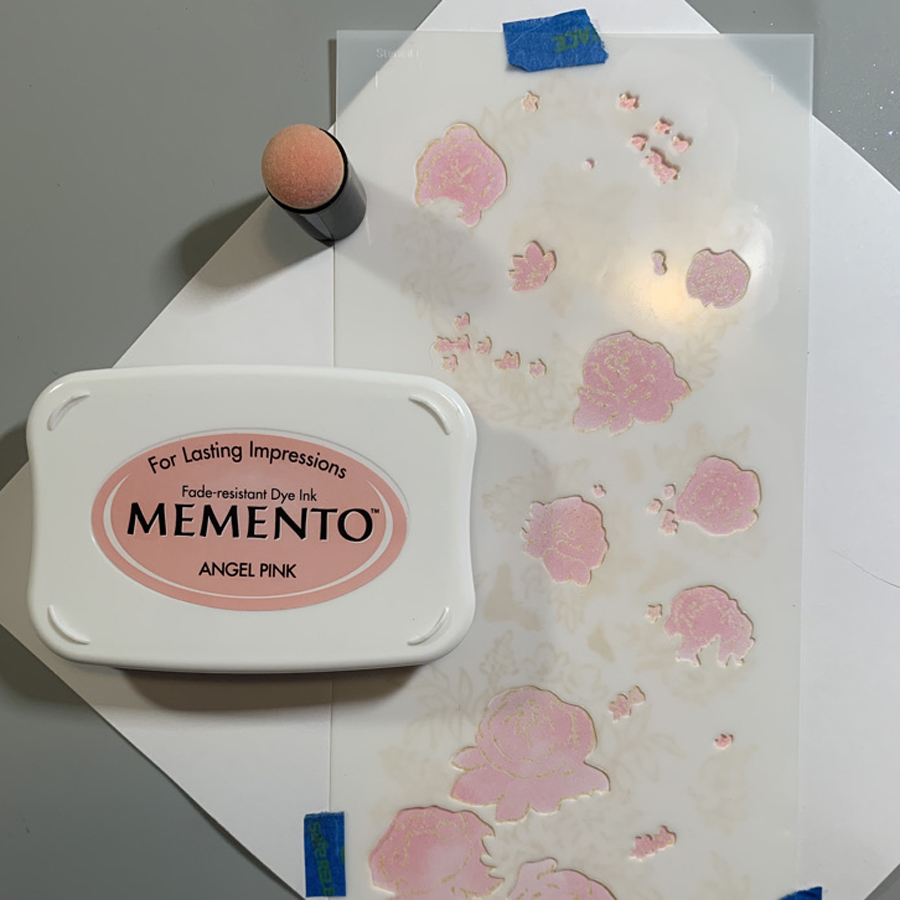
 Most Peonies are white or light pink.  I choose Memento Angel Pink and used a heavy hand with the ink dauber to ink the first stencil.  Using an ink dauber allows for a bit of shading in the process as well.  Each stencil has registration marks to allow precise placement. 


Step 3:


The next stencil in the series colors the complementary flowers in the design.  Memento Dandelion Yellow is inked with an ink dauber, again with a heavy hand.  


Step 4:


The next layer creates the leafy background.  It is inked with Memento New Sprout.  


Step 5:


To shade in the fourth layer of color I used Versa Color Orchid.  As you can see the images are coming together.


Step 6:


Each successive layer adds more dimension, so pretty!
Memento Rose Bud is added in this layer.


Step 7:


Small pieces of removable tape are placed on the flowers that I preferred to accent with something other than the Memento Cottage Ivy used on the leaves.


Step 8


To finish the flowers, Memento Sweet Plum was inked through the previously covered sections of the stencil.


Step 9


Die cut with the matching die.  All nine pieces cut at the same time!


Step 10


Trim a section of white linen textured cardstock to 4" x 5.25".  Shake each Fireworks! and Shimmer spray until the fine shimmer particles are dispersed in the bottle.  Remove sprayer nozzle and tap gently to add color sprays around the white cardstock.  This method produces larger droplets that are not as closely placed together as compared to using the direct spray technique.  


Step 11


Stamp the sentiment on a piece of black cardstock with The Essential Glue Pad and gently place Metallic Flakes over the glue.  Use a brush to remove larger pieces of Metallic Flakes and return to the jar.  A paper towel will clean up the rest of the image.  Trim to desired shape, in this case a fishtail banner. 


Step 12


Trim black cardstock to 5 3/8" x 4 1/8".  Adhere layers together on a A-2 size card base with Tear It! tape.  The flower bouquet is adhere with dimensional foam adhesive. 


Art Supplies


Imagine

  • Delicate Golden Glitz
  • Iridescent Embossing Powder  
  • Memento--Angel Pink, Dandelion, New Sprout, Rose Bud, Cottage Ivy
  • Versa Color:  Orchid
  • Fireworks!--Rose Bud, New Sprout
  • Shimmer Spray Gold
  • The Essential Glue Pad
  • Tear It! Tape
  • Ink Daubers

Other

  • Pink Fresh--Painted Peony Mix Stamp, Stencil Set, Die
  • Black and white cardstock
  • Stamp Platform
  • Heat Embossing Gun
  • Paper Studio Fish Tail punch
  • Painter’s tape
  • Prima Art Ingredients Metallic Flakes Vintage
  • Small paint brush
  • Dimensional Foam Adhesive