Showing posts with label Concord & 9th. Show all posts

Tuesday, July 1, 2025

Birthday theme time at Retro Rubber

 If there is one type of card everyone needs it is a birthday card, so here is a challenge to add one to your stash OR have ready to send tomorrow!  Join us at Retro Rubber Challenge Blog!


I was inspired by the balloons in the inspiration to use a set I have had since Sept of 2017 and have played with only a time or two.  It is Concord & 9th's Happy Balloons Stamp and Die Set.  


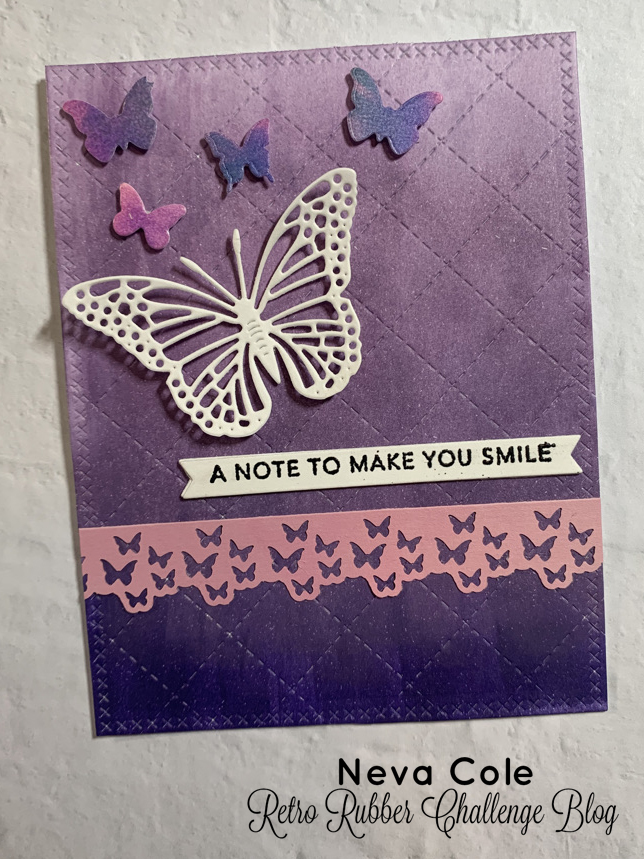
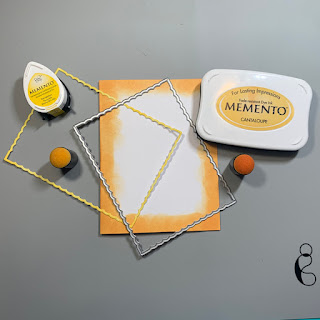
  •  What is really fun about this set Happy Balloons is that you can stamp designs or solids and create cute balloons.  I used the solid and one that creates dimension in the balloon.  The balloon image is stamped on vellum in Memento Cantaloupe, and then the texture layer is stamped over the image several times to create darker dots.  The image is die cut with the matching die. 
  • Melon colored cardstock is die cut to create the balloon outline, banner and string.
  • Birthday is stamped in Memento Morocco on the banner and then the images are adhered together.
  • The background is stamped in Memento Teal Zeal on teal cardstock.  
  • The edges of the card base are inked in Memento Morocco.
  • All the layers are adhered together, and TaaDaa a quick birthday card!  

Please do join us over at Retro Rubber and play along!  

CHALLENGE GUIDELINES

  • We require stamps older than one year.  If we feel you are using newer stamps, you may be disqualified from the challenge without notification.
  • New papers/dies are OK – but you must use at least one stamp older than a year and describe the age in your blog post.
  • Please note that all challenges require the use of at least one stamp older than a year.
  • Post your new creation to your blog or online gallery.   Use keyword RRCB256.  No backlinking. 
  • Link back to the blog using the Linky Tools by the due date. 
  • Enter as many times as you like. 
  • Feel free to combine our challenge with a maximum of 5 challenges.  Entries linked to more than 5 challenges will be disqualified without notification.
  • If your project is posted on a private group site such as Split Coast Stampers or a photo sharing site not all DT members may be able to comment.   Thank you for understanding.
  • Turn off Word Verification.  We love to comment but word verification can make that difficult.


Tuesday, May 20, 2025

Muted Spring Color Challenge at Retro Rubber

 Spring has sprung!  Time for a fun color challenge over at Retro Rubber Challenge Blog.  


This is a peachy orange with a touch of olive green and teal.  My choice was to use a Concord & 9th Triple Step Floral Frame stamp and die sets released in October, 2021.  


  • The base layer is stamped in Versa Color Winter Green and Versa Magic Persimmon, Mango, and Red Brick.
  • Another layer of individual flowers is stamped in Versa Color Fresh Green, and the Versa Magic colors.
  • The frame die created a lovely outline that was inked in Mango.  
  • The A2 card base is inked in Versa Color Fresh Green before assembly.
  • The individual flowers are die cut and layered over the base layer.  
  • The sentiment, from the same set is stamped in Versa Magic Red Brick.  

Thanks for stopping by and come play along!

CHALLENGE GUIDELINES

  • We require stamps older than one year.  If we feel you are using newer stamps, you may be disqualified from the challenge without notification.
  • New papers/dies are OK – but you must use at least one stamp older than a year and describe the age in your blog post.
  • Please note that all challenges require the use of at least one stamp older than a year.
  • Post your new creation to your blog or online gallery.   Use keyword RRCB255.  No backlinking. 
  • Link back to the blog using the Linky Tools by the due date. 
  • Enter as many times as you like. 
  • Feel free to combine our challenge with a maximum of 5 challenges.  Entries linked to more than 5 challenges will be disqualified without notification.
  • If your project is posted on a private group site such as Split Coast Stampers or a photo sharing site not all DT members may be able to comment.   Thank you for understanding.
  • Turn off Word Verification.  We love to comment but word verification can make that difficult.


Tuesday, April 8, 2025

Sketch Challenge Fun at Retro Rubber

 Time for a new challenge over at Retro Rubber.  Are you ready for some fun?  This sketch has several different shapes and layers to work into your card.


 A few weeks back we attended a Memorial Service for a family member.  It was important to have handmade cards for each of the cousins.  This is one of the batch I created.  Plus I was able to prep a great sample for this challenge!


This card is a perfect example of using previous experiments to pull together a cohesive card with many layers.

  • The base layer is Imagine Creative Medium Interference.  This product is no longer available, I loved the result--but it dried out quickly in the jar.  There are other companies that are bringing similar product to market.  I used a Heidi Swap stencil from about 20 years ago.  
  • The next layer is vellum stamped with Heartfelt Creations Large Elegant Word Background from about 2014.  It is stamped in Kaleidacolor Spectrum.
  • Watercolor paper is spritzed with Fireworks! Lilac Posies and let to dray.  It was then pressure embossed with Concord & 9th Quilted Card Front die.  Paper Studios flag punch creates the shape.  Great Impressions sentiment from 2015 is stamped in Memento Luxe Tuxedo Black and heat embossed with iridescent embossing powder. 
  • A scrap of variegated gold metallic cardstock is trimmed to fit the sketch.   
  • The final embellishment is a wax seal that was created from items purchased from Amazon.  

Please join us and create a card with this sketch!

CHALLENGE GUIDELINES

  • We require stamps older than one year.  If we feel you are using newer stamps, you may be disqualified from the challenge without notification.
  • New papers/dies are OK – but you must use at least one stamp older than a year and describe the age in your blog post.
  • Please note that all challenges require the use of at least one stamp older than a year.
  • Post your new creation to your blog or online gallery.   Use keyword RRCB252.  No backlinking. 
  • Link back to the blog using the Linky Tools by the due date. 
  • Enter as many times as you like. 
  • Feel free to combine our challenge with a maximum of 5 challenges.  Entries linked to more than 5 challenges will be disqualified without notification.
  • If your project is posted on a private group site such as Split Coast Stampers or a photo sharing site not all DT members may be able to comment.   Thank you for understanding.
  • Turn off Word Verification.  We love to comment but word verification can make that difficult.

Enjoy!


Tuesday, November 8, 2022

Ombre Just a Note to Make you Smile

 For the next two weeks the challenge at Retro Rubber Challenge Blog is to use the Ombre effect.  Blend inks, find an ombre patterned paper, have some fun!  Check out how the Design Team interpreted this challenge!  As you can see by the graphic, you may go in any color direction you wish!

 I went with one of my favorite colors, purples to create my card.  I actually used snippets left over from other projects to pull this card together once I had the background completed.


  • Using a Imagine Ink Blusher I added color to one edge of white cardstock (4 1/4" x 5 1/2") and dragged the color into the rest of the card.  The first ink I used was Versa Fine Clair Fantasia.  
  • To lighten up the ombre effect I switched to Memento Luxe Sweet Plum to finish the background.  A little Ink Potion #9 helped blend the colors.
  • The add interest the card front panel was die cut with the Concord & 9th Quilted Card front die and the Lawn Fawn Stitched Rectangle Stackables.  
  • Taylored Expressions Background (Original) Simple Strips Sentiment was stamped in Versa Fine Clair Nocturne and heat embossed with clear embossing powder, then die cut with the matching die.  The first set of Simple Strips was released in April of 2019.  It is mounted on two more die cuts to add a bit of dimension.
  • One of the snippets from my stash with a pink strip that had been border punched with the Tonic Butterfly border punch.  It glued to the card front and trimmed at the edges.  
  • A butterfly is cut from white cardstock using Cheery Lynn Design Exotic Butterfly, and adhered with a rolled up glue dot under just the body of the butterfly.
  • Impression Obession Butterflies die is used to cut another scrap that had very similar colors to the purple and are adhered with 1/8" dimensional foam adhesive.  These also happened to be in my snippets stash.

Please do come play along with our challenge at  Retro Rubber Challenge Blog.  We would love to see your projects!

CHALLENGE GUIDELINES

  • We require stamps older than one year.  If we feel you are using newer stamps, you may be disqualified from the challenge without notification.
  • New papers/dies are OK – but you must use at least one stamp older than a year and describe the age in your blog post.
  • Please note that all challenges require the use of at least one stamp older than a year.
  • Post your new creation to your blog or online gallery.   Use keyword RRCB194.  No backlinking. 
  • Link back to the blog using the Linky Tools by the due date. 
  • Enter as many times as you like. 
  • Feel free to combine our challenge with a maximum of 10 challenges.  Entries linked to more than 10 challenges will be disqualified without notification.
  • If your project is posted on a private group site such as Split Coast Stampers or a photo sharing site not all DT members may be able to comment.   Thank you for understanding.
  • Turn off Word Verification.  We love to comment but word verification can make that difficult.

Thanks for stopping by, your comments are always appreciated!

Tuesday, September 13, 2022

Kaleidacolor Fall Thank You


Learn how to make a vividly fall colored Thank You Card using Kaleidacolor ink pads.  There are many Kaleidacolor pads that are in the autumn themed pallet.  Even though this card is multi-layered it comes together in a short amount of time considering all of the inked embellishments!

Skill:  Intermediate

Time:  2 hours

 Directions:

Step 1:


Trim cream cardstock to 5" x 5" and center the overlay and stamp on the center rotation point of the Turn About Stamp.  Place on stamp platform to pick up stamp, and remove overlay.

Step 2:


Ink up the stamp with Kaleidacolor in Autumn Leaves with the green end of the pad and stamp the image.  Rotate the paper 90 degree to the right.
 
Step 3:


Ink up the stamp with Kaleidacolor in Desert Heat with the orange end of the pad and stamp the image.  Rotate the paper 90 degree to the right.

Step 4:


Ink up the stamp with Kaleidacolor in Cappuccino Delight with the brown end of the pad and stamp the image.  Rotate the paper 90 degree to the right.

Step 5:

 
Ink up the stamp with Kaleidacolor in Desert Heat with the red end of the pad and stamp the image.  Rotate the paper 90 degree to the right.  After I started the card I realized it can also be completed with two complementary Kaleidacolor pads, just by using opposite ends to ink the image.  Die cut the completed wreath with a circle die cut.

Step 6:


Ink the sentiment from the red end of the Kaleidacolor Desert Heat pad and stamp.

Step 7:


Die cut the sentiment.  The edges are then blended in with an Ink Dauber and the yellow end of the Kaleidacolor Desert Heat pad.  
 
Step 8:


More embellishment is added with included stamps from the set from various sections of all three Kaleidacolor pads.

Step 9:

Spritz a section of cream cardstock with Ink Potion No. 9.  This will allow the ink to spread more uniformly on the cardstock.  Generally glossy cardstock works best, but the rest of the card was regular cream cardstock, this is a good work around.

Step 10:


Using a 2" rubber brayer add ink liberally to the white cardstock until fairly well blended.  All three Kaleidacolor ink pads are used on one piece of cardstock with the intention to have several colors to die cut the coordinating leave dies.

Step 11:


Decorate the front of the 5" x 7" card front in the same way the sentiment die is inked and stamped in Step 8.  

Step 12:


Arrange die cuts from the brayered section of cardstock on the card base.  Use repositionable adhesive to pick up the edges of the die cuts and flip over the entire front circle wreath.  Add dimensional foam adhesive to secure die cuts in place.  (You will notice that the reverse side was the first try, however it wasn't the best, so it is simply flipped over and the other side was used.  You only see the mistake in the demonstration step!)

Step 13:


Adhere stamped wreath to card front.  Adhere the sentiment to the center of the stamped wreath with dimensional foam adhesive.

Art Supplies

Imagine:

Kaleidacolor--Autumn Leaves, Desert Heat, Cappuccino Delight
 
Ink Potion No. 9
 
Ink Dauber

Other:

Cream  Cardstock

Concord & 9th--Harvest Wreath Turnabout Set and Dies

Elizabeth Craft Designs--Stitched Circles

2" Rubber brayer

Temporary repositionable adhesive

Dimension Foam adhesive

Die Cut machine

Stamp Platform

Thursday, August 25, 2022

Create a Watercolor Sunflower using stencils and Fireworks!


In today's tutorial I will share how I used layering sunflower stencils to create a water color look to my image.  Notice there is no stamp outline, that helps achieve a more organic look to the project.  I learned a few things along the way, and almost want to include a few blooper photos!  Instead I share the way that will give you the cleanest look avoiding the pit falls!

Skill:  Intermediate

Time:  2 hours

 Directions:

Step 1:

Trim white watercolor cardstock to 4 1/4" x 9 1/4",  or about 1/4" on each side larger than your stencil.  this will allow you to handle your project more cleanly.  Use reposition able painters tape or washi tape to secure stencil along left side with edges matching along the upper and left hand side.  Spritz with Fireworks! in New Sprout until color depth desired is achieved.  In this close up photo freezer paper is used underneath the stencil and paper with the plasticized side up.  This allows collection of the over spray for background papers.    Carefully lift stencil to keep excess Fireworks from leaking under the stencil and adding unwanted color. 

Step 2:


 Secure next layer of layering stencil in place and spritz with Fireworks! in Bamboo Leaves.  This photo shows a spray box that protects your work area from over spray.  It also shows the best distance of 12" to 18" to spray the stencil to avoid large droplets of Firewoks. 
 
Step 3:


Clean stencils with sections of watercolor paper after each layer.  Move the watercolor paper around on the freezer wrap to pick up excess spray.  Keep color families together, as both colors of green are used on this background paper.  Clean up excess with paper towels or baby wipes. 

Step 4:

Continue with additional layering stencils.  Here Dandelion is used for Stencil 3, and Tangelo for Stencil 4. 

Step 5:


Sometimes as a designer you discover easier methods in the process of designing a project.  I was not satisfied with the color through the stencil by just spraying with the stencils that were smaller openings.  It is recommended to use this method for the rest of the layers.  Fireworks! in Tangelo is shown here sprayed on a plastic sheet.  Using a cotton swab the color is carefully dabbed through the stencil to give better color depth.  A cotton swab also prevents leakage underneath the stencil of excess color.  A lot less of the spray was used with this method!  Stencils 5 and 6 used this method to complete the look.  Stencil 5 used Fireworks! in Lilac Posies, and Stencil 6 a mixture of Fireworks! Rich Cacoa (for shimmer) and Walnut Ink in Java for a darker color. 

Step 6:


Here are the images from the entire stencil set.

Step 7:

One "blooper" photo, all the backgrounds made with the over spray and Fireworks! left on the stencils.  To be used in future projects?  The green sheet is trimmed to 4 1/4? to 5 1/2" to cover the front of the card.

Step 8:


Tap drop of Fireworks! in Dandelion on white watercolor paper trimmed to 3 3/4" x 5".  Use quilted card front die to add texture to front panel.

Step 9:

Part of the remaining background section is stamped with Memento Luxe in Lilac Posies using a sentiment from the Sunflowers stamp set.  It is die cut with a Spellbinder die.

Step 10:


The Sunflower is die cut with the coordinating die.  The layers are adhered together with Tear It! Tape with dimension foam tape behind the card front.  


Art Supplies

Imagine:

Fireworks!--New Sprout, Bamboo Leaves, Dandelion, Tangelo, Lilac Posies, Rich Cocoa

Walnut Ink--Java

Memento Luxe--Lilac Posies

Embossing Powder--Iridescent

Tear It! Tape

Other:

White Watercolor Cardstock

Pink Fresh Studio Sunflowers Stencils, Coordinating Die, and Clear Stamp

Concord & 9th Quilted Card Front Die

Spellbinders Fancy Tabs

Dimension Foam adhesive

Cotton swabs

Die Cut machine

Stamp Platform


Tuesday, July 5, 2022

Sketchy Time at Retro Rubber

Sketches are also a quick way to get a start on a card.  This 2 week challenge uses the following sketch from Retro Rubber.   

This sketch inspired me to use a set I've had for awhile.  One of those from Concord and 9th that I just had to have . . . but this is the first time it's actually seen ink!  Sweet Sprinkles was released in 2017.


  • The sprinkles stamp is stamped four times 1.75" x 4.375".  Once each direction in Brilliance Pearlescent Orchid and Brilliance Galaxy Gold.  The edges are inked in Brilliance Pearlescent Orchid.
  • The cupcake top is inked in Brilliance Pearlescent Orchid, then touches of Brilliance Moonlight White was added to the stamp of add a bit of color variation to represent the frosting.  Brilliance Pearlescent Sky Blue Sprinkles are added to the top, and the image is die cut with the matching die.
  • The cupcake paper was stamped in Brilliance Galaxy Gold, I've always liked gold cupcake papers!  One of the reasons I choose this color scheme.  It is die cut with the matching die cut.
  • Two additional layers of each die cut are adhered to the back to create a more dimensional cupcake.
  • The placement of the stamped section, cupcake and choice of two coordinating washi tapes was determined.  The washi tapes are both by Paper Studio.  
  • The sentiment was stamped in Brilliance Pearlescent Orchid before the cupcake was adhered.
  • To finish the inside of the card My Favorite Things Birthday Greetings was stamped in Brilliance Pearlescent Orchid and another bit of washi tape was added.
I am really pleased with the final result, and it was super fun to actually use a stamp in my stash that needed a little inky love!  Please join us at Retro Rubber and play along with this quick and easy sketch!

CHALLENGE GUIDELINEs

  • We require stamps older than one year.  If we feel you are using newer stamps, you may be disqualified from the challenge without notification.
  • New papers/dies are OK – but you must use at least one stamp older than a year and describe the age in your blog post.
  • Please note that all challenges require the use of at least one stamp older than a year.
  • Post your new creation to your blog or online gallery.   Use keyword RRCB186.  No backlinking. 
  • Link back to the blog using the Linky Tools by the due date. 
  • Enter as many times as you like. 
  • Feel free to combine our challenge with a maximum of 10 challenges.  Entries linked to more than 10 challenges will be disqualified without notification.
  • If your project is posted on a private group site such as Split Coast Stampers or a photo sharing site not all DT members may be able to comment.   Thank you for understanding.
  • Turn off Word Verification.  We love to comment but word verification can make that difficult.

Thanks so much for stopping by, your comments are always appreciated!

Friday, February 25, 2022

Triple-Step Stamped card made simple with Memento Ink

See how to use the Memento ink line to created a cohesive matching layered card in just a few steps.  The beauty of this particular method is you may make a number of cards depending on your needs in more than one color scheme as shown in the bonus step.  Finishing touches use irRESISTible Pico Embellisher, VersaMark Clear ink, and embossing powder.

Skill:  Beginner

Time:  One card 30 minutes plus dry time, multiples add additional time

Directions:


Step 1

Trim white cardstock to 4.25" x 5.5", this will allow a quicker placement in step 2 on the stamp platform.  Center Image "A" from the Concord & 9th Triple-Step Floral Frame Stamp on the white cardstock and then adhere to the stamp platform.  Ink Image "A" with Memento Bamboo Leaves.  Double or triple stamp the image to create even darker images.  (If doing multiple cards, continue stamping Image "A" until you have your desired quantity.)

Step 2

Place Image "B" from the Concord & 9th Triple-Step Floral Frame Stamp on the white cardstock so the small tulip shaped flowers line up with the stems.  Look directly down through the stamp to judge the placement of the stamp.  In this version Memento Cantaloupe is stamped first.  Turn the image 180 degrees and double check image placement, then stamp in Memento Tangelo.  (If doing multiple cards, continue stamping Image "B" until you have your desired quantity.)


 Step 3

The stamp set has two stamps that will add the center of the roses and an additional layer to the small tulip shaped flowers.  Use the same method as Step 2 for placement.  If the center of the rose is slightly off, stamp again until the white area is inked.

Step 4--Bonus Step

Shown are the additional card fronts stamped during my session of triple-stamping.  Once the layering stamps were in place I like to make multiple stampings for future use.


 Step 5

Stamp "So Kind of You" in Memento Tangelo using a stamp platform.  Stamp over the image with VersaMark Clear ink and heat emboss with clear embossing powder.  Use an ink blusher with a light hand to color around the image, the embossed sentiment will resist the ink.  This sentiment has a matching die to allow you to die cut before adhering to your card front. 


Step 6

Trim white cardstock to 5.5" x 8.5" and fold in half to create an A2 card base.  Ink the edges using an ink dauber with Memento Cantaloupe.  The card front die also creates a very narrow border, this one is inked with Memento Dandelion using an ink dauber.  


Step 7

Place the card front face down and align the Dandelion border to the card front.  Carefully place Tear It! tape around all four edges of the card front.  Take time to "catch" the border without having the Tear It! tape show on the front.  


Step 8

Adhere card front to card base and add the die cut sentiment with dimensional foam adhesive.

Step 9

Learn from my mistake!  Add the irRESISTible Pico Embellisher in Dandelion AFTER the card is assembled to the center of the flowers besides the roses.  The irRESISTible Pico Embellisher will retain the rounded shape after drying.  When I die cut the card front after adding the irRESISTible Pico Embellisher the dots were flattened.  However it was an easy rescue as another layer of the irRESISTible Pico Embellisher added the rounded dimension back to the flower centers!

Art Supplies

Imagine

  • Memento--Bamboo Leaves, Cantaloupe, Tangelo, Dandelion (bonus cards--Pear Tart, Lilac Posies, Sweet Plum, Rose Bud)
  • VersaMark Clear
  • Embossing Powder Clear
  • irRESISTible Pico Embellisher--Dandelion (Bonus cards--Lilac Posies)
  • Ink Daubers 
  • Tear It! Tape

Other

  • Concord & 9th Triple-Step Floral Frame stamp and die
  • White cardstock
  • Dimensional foam adhesive
  • Stamp platform

Tuesday, September 22, 2020

Retro Rubber Anything Goes!

 A challenge that everyone can enjoy, Anything Goes at Retro Rubber Challenge Blog!  We have a few simple rules:  1) Use a stamp at least a year or older 2) tell us how old the stamp is 3) enter up to ten challenges only including ours.  Thanks!


I made a few thank you cards for my birthday, and decided to share them with you!

I started with Concord & 9ths' Many Thanks Stamps and Dies from 2017.

  • Since I needed a stack to send out I stamped four sets of the background Thanks.  I used Versa Color Paprika and Brown, Versa Fine Vintage Sepia, and Delicata Dark Brok Shimmer.  Using my stamp positioner I stamped four in succession and cut each 6" x 6" into 3" x 6".
  • The background is inked in Paprika and then mounted to dark craft colored cardstock which is also inked.
  • Brown ribbon from my stash is wrapped around the top for balance and a knotted section is adhered with a glue dot.
  • A die cut of the quote bubble is adhered around the thanks.
  • "so much" is stamped in Paprika on dark craft cardstock.
  • A die cut heart from the set is inked with Paprika as well.
  • The final embellishment is the butterfly from Recollections.
  • Light brown craft cardstock is the card base. 


Here is the finished stack, I ran out of brown ribbon so I repeated the process in another color scheme to make a few more thank you cards.

Come join us at Retro Rubber Challenge Blog for Anything Goes!

Wednesday, February 12, 2020

Guest Designer for Imagine Valentine

There was a call for Guest Designers for Valentines, and of course I had to send in a card using Imagine products.  I was fortunate to be a part of the Artist in Residence for two years, so I had plenty of choices to work with on this project.  The Imagine blog post featuring guest designers went live while I was traveling so I am sharing my post with you now.


This card was super easy to put together and color!
  • Concord & 9th's Geode Stamp and die set heart was stamped several times on the card front in Delicata Golden Glitz and heat embossed with iridescent embossing powder.  
  • Angel Pink and Rose Bud Fireworks! is flicked on the front of the card.  
  • The same image was stamped and die cut.  The different layers with water color painted with Fireworks! in Angel Pink and Rose Bud and diluted with Ink Potion No. 9.
  • The sentiment "You are a Rare Find" was die cut three times and stacked to make a dimensional die cut.  The top layer is inked with Delicata Golden Glitz and heat embossed with iridescent embossing powder. 
  • The die cut heart is adhered with dimensional foam adhesive and the sentiment is added to the card base.
This card is on it's way to my son for Valentine's Day, I hope he enjoys it!

Thanks for stopping by, I always enjoy reading your comments!

I am delighted to enter the following challenges:


Monday, January 13, 2020

Thank You in Blue

You know how sometimes you have a new stamp and you just have to use it?  My new Triple Step Thank You from Concord & 9th is that stamp and die set that earned the distinction of "I wanna play with it now!"  I created a few cards with the set and played around with several colors of Memento Ink.  These are my two favorite versions.


  • For both versions I set up my stamp platform so I could stamp several of the main Triple Step Thank you.  I used Memento Inks in Summer Sky, Bahama Blue, and Paris Dusk.
  • Wink of Stella added a bit of shimmer and sparkle on the letters of the sentiment, it is hard to photograph without bright sunlight and we are a bit short on that here in Central Oregon!  Currently it is snowing.
  • The same three inks are used with the sprinkles from Concord & 9th's Sweet Sprinkles set.  I varied the order of the colors and stamped the design across the card.
  • Craft twine is wrapped around one edge and tied in a bow.
  • The Thank you sentiment is mounted with dimensional foam adhesive.
  • The card base is inked with Bahama Blue and an Ink Blusher.
  • The base layer is adhered to the front of the card.

  • The background is created with Lifestyle Crafts Tide embossing folder.  The ink is applied directly to the embossing folder and the white cardstock is pressure embossed.  only the recessed sections of the cardstock pick up the ink for the most part.  This is a really quick way to create a background, although your fingers do get a bit inky!
  • For this version the card base is inked with Summer Sky.
 Thanks so much for stopping by and have a blessed New Year!

I am delighted to enter the following challenges!