Showing posts with label Mists. Show all posts

Tuesday, June 17, 2025

A Special Birthday Card for the Tic Tac Toe

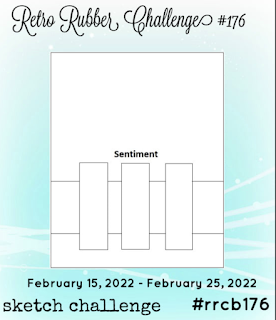
Tic Tac Toe boards are always fun, and so many different ways to for projects to be created.  Try your hand at this challenge from Retro Rubber.  


My mom's birthday is at the beginning of June so I created a special card for her using one of Heartfelt Creations (HC) sets released in 2018, Butterfly Dreams.  I do miss the delicate whimsical images that Heartfelt Creations was known for as they retired in 2024.  Glad I have these to play with!

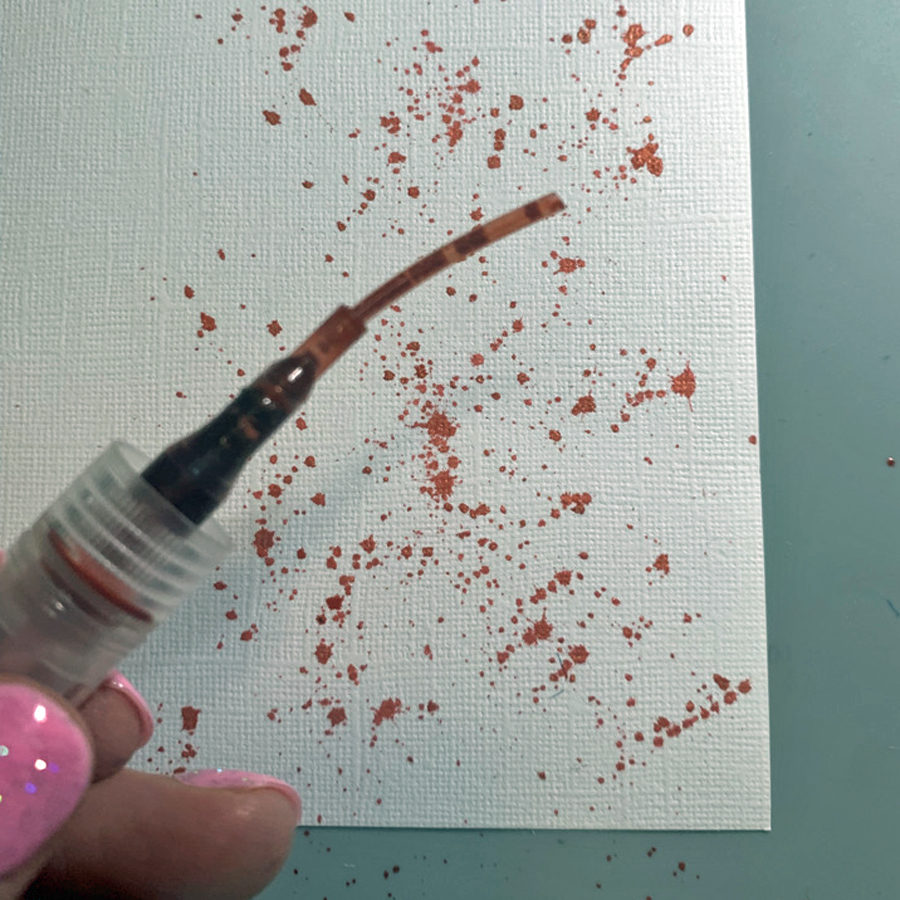
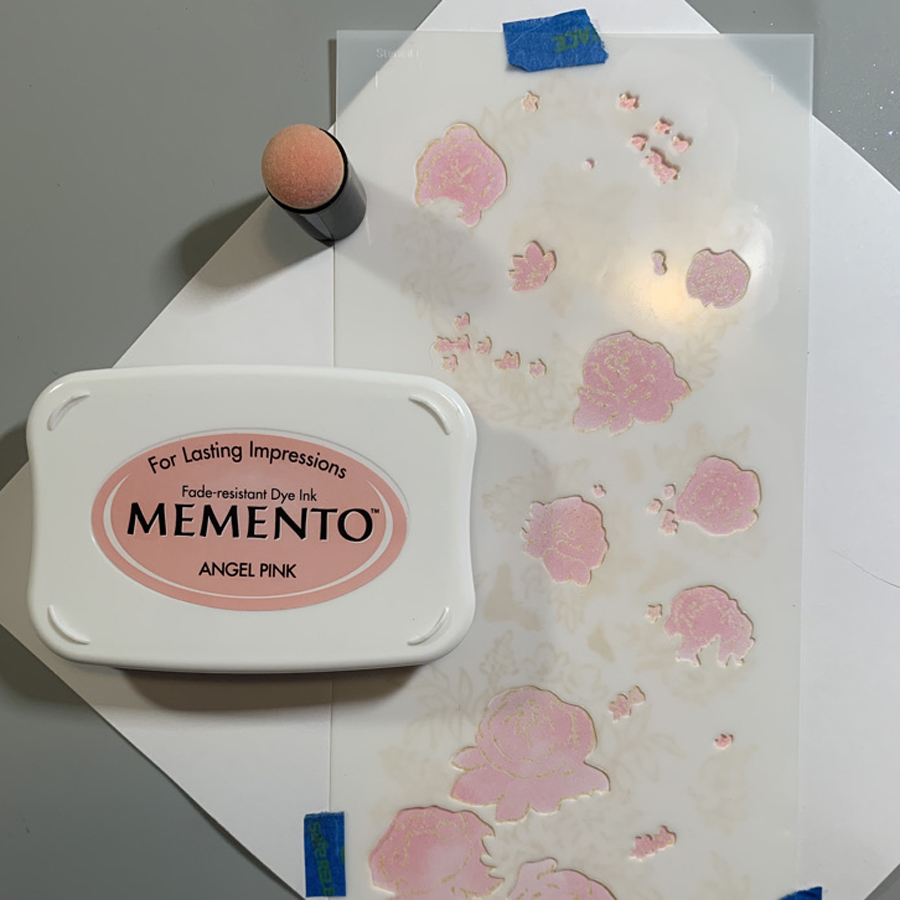
  • Butterfly Dreams paper pack was used for the background and banner.  The background is spritzed with Sheer Shimmer Craft Spray in Sparkle using the The Crafter's Workshop Mini Flutterby stencil.  It is easier to see in person. The edges are inked in Brilliance Pearlescent Ivy.  
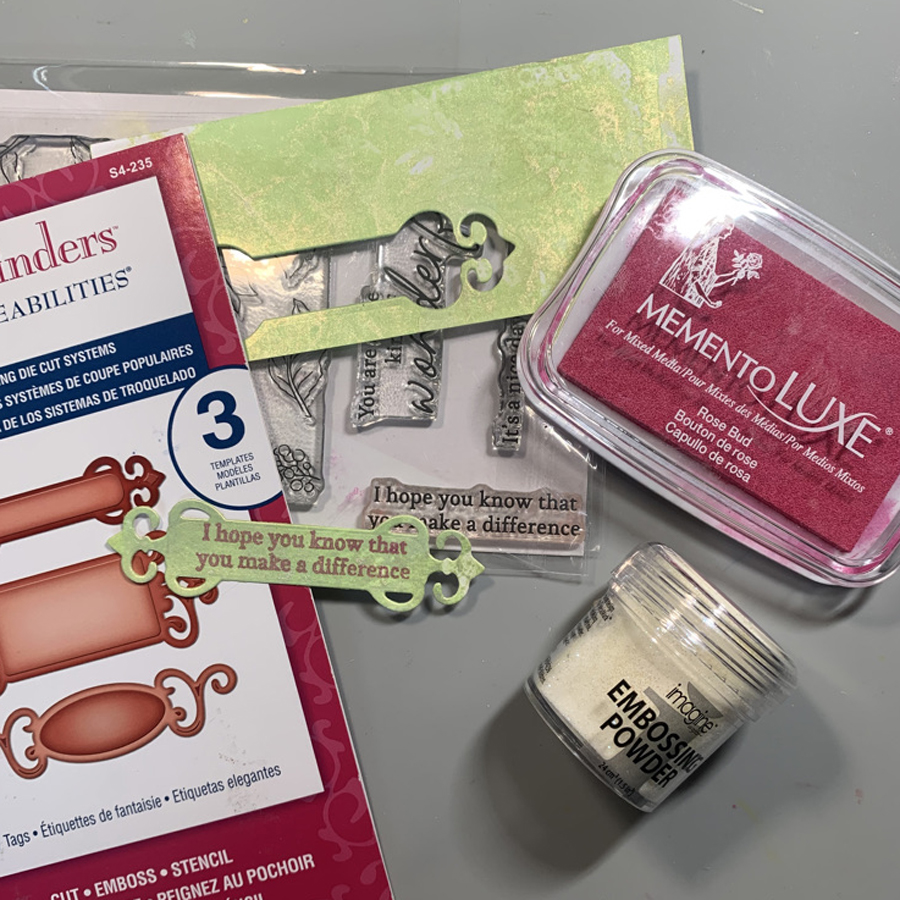
  • White cardstock was die cut the HC Regal Borders and Pocket die.
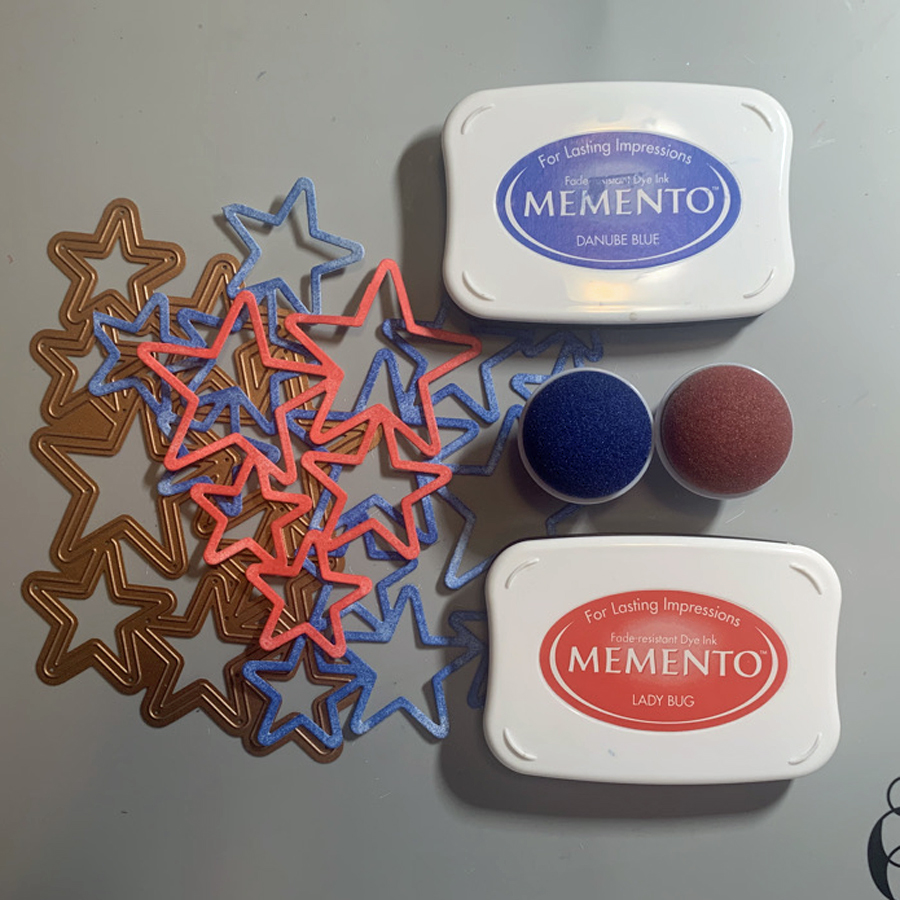
  • Butterfly Kisses Border is stamped in  Brilliance Pearlescent Ivy and heat embossed with iridescent embossing powder.  The images are watercolored with Memento Luxe dual tip pens scribbled on a work mat.  Angel Pink, Rose bud, New Sprout, Summer Sky, Danube Blue, and Tangelo are used.  The image is die cut with matching die and gently shaped with the flower shaping kit.  
  • Purrfect Posies by HC released in 2019 creates the flowers with the stamp, die, and mold combination.  The flowers are water-colored  with Memento Dual Tip markers in Lilac Posies, and the leaves are water-colored with New Sprout.  The centers of the flowers are filled with Perfect Pearls and Prills in Sweet Shoppe by Artquest.  
  • The sentiment is from the HC set and is stamped in Memento Luxe Lilac Posies and heat embossed with iridescent embossing powder.  It was hand cut and then edged in Brilliance Pearlescent Ivy.  
  • The layers are carefully adhered together using liquid adhesive, glue dots and dimensional foam.

This labor of love did take awhile to create, but I am sure my Mom really enjoyed her card.  She saves them all and eventually returns them to me.  

Please do join along with us at Retro Rubber and play along with our challenge.  We would love to see what you create!   We do have a few simple rules.

CHALLENGE GUIDELINES

  • We require stamps older than one year.  If we feel you are using newer stamps, you may be disqualified from the challenge without notification.
  • New papers/dies are OK – but you must use at least one stamp older than a year and describe the age in your blog post.
  • Please note that all challenges require the use of at least one stamp older than a year.
  • Post your new creation to your blog or online gallery.   Use keyword RRCB257.  No backlinking. 
  • Link back to the blog using the Linky Tools by the due date. 
  • Enter as many times as you like. 
  • Feel free to combine our challenge with a maximum of 5 challenges.  Entries linked to more than 5 challenges will be disqualified without notification.
  • If your project is posted on a private group site such as Split Coast Stampers or a photo sharing site not all DT members may be able to comment.   Thank you for understanding.
  • Turn off Word Verification.  We love to comment but word verification can make that difficult.


Tuesday, June 3, 2025

CAS Card sketch for Retro Rubber

 A nice clean and simple sketch to play with over at Retro Rubber Challenge Blog.


This card uses several two different scraps from previous crafting sessions.


  • The vertical piece is created with the shaving cream method and All Purpose Inks on watercolor paper.  Thistle, Cerulean Blue, and Platinum were dropped on shaving cream and swirled with a toothpick.  Watercolor paper is kissed to the mixture and set aside to dry.
  • The pastel purple is created with a stencil and Fireworks! sprays in Lulu Lavender, Summer Sky, and Silvery Shimmer.  
  • The sentiment is Great Impressions from Jan 2015 and is stamped in Delicata Silvery Shimmer and heat embossed with iridescent embossing powder.  The edges of the sentiment are inked and heat embossed as well.  
  • Mauve cardstock is pressure embossed with Elizabeth Craft Designs Hearts Intertwined embossing folder.  
  •  The layers are adhered together to finish a very clean and simple design Sympathy card.

Thank you for stopping in and please do join our fun at Retro Rubber Challenge.  

CHALLENGE GUIDELINES

  • We require stamps older than one year.  If we feel you are using newer stamps, you may be disqualified from the challenge without notification.
  • New papers/dies are OK – but you must use at least one stamp older than a year and describe the age in your blog post.
  • Please note that all challenges require the use of at least one stamp older than a year.
  • Post your new creation to your blog or online gallery.   Use keyword RRCB256.  No backlinking. 
  • Link back to the blog using the Linky Tools by the due date. 
  • Enter as many times as you like. 
  • Feel free to combine our challenge with a maximum of 5 challenges.  Entries linked to more than 5 challenges will be disqualified without notification.
  • If your project is posted on a private group site such as Split Coast Stampers or a photo sharing site not all DT members may be able to comment.   Thank you for understanding.
  • Turn off Word Verification.  We love to comment but word verification can make that difficult.


Tuesday, April 8, 2025

Sketch Challenge Fun at Retro Rubber

 Time for a new challenge over at Retro Rubber.  Are you ready for some fun?  This sketch has several different shapes and layers to work into your card.


 A few weeks back we attended a Memorial Service for a family member.  It was important to have handmade cards for each of the cousins.  This is one of the batch I created.  Plus I was able to prep a great sample for this challenge!


This card is a perfect example of using previous experiments to pull together a cohesive card with many layers.

  • The base layer is Imagine Creative Medium Interference.  This product is no longer available, I loved the result--but it dried out quickly in the jar.  There are other companies that are bringing similar product to market.  I used a Heidi Swap stencil from about 20 years ago.  
  • The next layer is vellum stamped with Heartfelt Creations Large Elegant Word Background from about 2014.  It is stamped in Kaleidacolor Spectrum.
  • Watercolor paper is spritzed with Fireworks! Lilac Posies and let to dray.  It was then pressure embossed with Concord & 9th Quilted Card Front die.  Paper Studios flag punch creates the shape.  Great Impressions sentiment from 2015 is stamped in Memento Luxe Tuxedo Black and heat embossed with iridescent embossing powder. 
  • A scrap of variegated gold metallic cardstock is trimmed to fit the sketch.   
  • The final embellishment is a wax seal that was created from items purchased from Amazon.  

Please join us and create a card with this sketch!

CHALLENGE GUIDELINES

  • We require stamps older than one year.  If we feel you are using newer stamps, you may be disqualified from the challenge without notification.
  • New papers/dies are OK – but you must use at least one stamp older than a year and describe the age in your blog post.
  • Please note that all challenges require the use of at least one stamp older than a year.
  • Post your new creation to your blog or online gallery.   Use keyword RRCB252.  No backlinking. 
  • Link back to the blog using the Linky Tools by the due date. 
  • Enter as many times as you like. 
  • Feel free to combine our challenge with a maximum of 5 challenges.  Entries linked to more than 5 challenges will be disqualified without notification.
  • If your project is posted on a private group site such as Split Coast Stampers or a photo sharing site not all DT members may be able to comment.   Thank you for understanding.
  • Turn off Word Verification.  We love to comment but word verification can make that difficult.

Enjoy!


Tuesday, September 24, 2024

Fall SketchyTime at Retro Rubber

Another two weeks for a fun sketch to use up scraps in your stash at Retro Rubber Challenge Blog.  Patterned paper, specialty paper or in my case, scraps of paper I have inked with various methods over the years.

Several stamps were used in the creation of this card.  First is an ancient rubber brayer that creates a gauze look background.  It is at least 20 years old!  Pink Ink for Impression Obession Falling Leaves stamp and die set was released in 2018.  The sentiment is by Boxer Scrapbooking release in 2007 named Celebrations.

Since many of these "experiments" were done over the last 15 years or so, the colors listed are the most probable colors . . . my color swatch book was very helpful in identification.

  •  Top left and bottom left are from the same scrap.  A foam brayer was used to add color from Kaliedacolor Autumn Leaves. 
  • The next section also appears twice uses a solid rubber brayer and Kaliedacolor Autumn Leaves.  Really a different look.
  • The yellow section was the accidental spill of Fireworks! in Dandelion Yellow.  It has a wonderful shimmer.  The spill happened on my craft mat, and was soaked up with white cardstock.  
  • The yellow orange sections are Faber Castelle Gelatos on white cardstock, which are blended with water.  
  • The bottom left is Faber Castelle Gelatos on brown cardstock.  
  • The white with swirls was an experiment with foam shaving cream and All Purpose Inks in Vegas Gold, Chocolate, and Black Pearl.  
  • The ancient gauze patterned brayer also used Kaliedacolor Autumn Leaves.  The inside edge was trimmed with Creative Memories 12-inch Trimmer and the Deckle trimmer blade. 
  • The sections are trimmed to various sizes and adhered on the A-2 card base.  The remainder is trimmed from the back to line up with the card base.
  • The center circle is Falling Leaves embossing folder inked in Memento Potters Clay and pressure embossed.  It was a little messy, but works perfection in this sketch as a background.  Spellbinders Standard Circle die was used to die cut the circle.
  • The leaf in the center is Fireworks! in Dandelion Yellow, Tangelo, and Rich Cocoa spritzed on white cardstock.  Pink Ink for Impression Obession Falling Leaves stamp is stamped in Tuxedo black and die cut.   Boxer Scrapbooking's Happy Birthday is stamped in Memento Luxe Morocco and heat embossed with Terra Cotta (manufacturer unknown) embossing powder. Another die cut is glued behind to add some dimension.

I hope you enjoyed this little foray into the uses of different mediums to create a cohesive look.  You never know when an experiment goes well, it could be featured in a future project with left over scraps!

CHALLENGE GUIDELINES

  • We require stamps older than one year.  If we feel you are using newer stamps, you may be disqualified from the challenge without notification.
  • New papers/dies are OK – but you must use at least one stamp older than a year and describe the age in your blog post.
  • Please note that all challenges require the use of at least one stamp older than a year.
  • Post your new creation to your blog or online gallery.   Use keyword RRCB240.  No backlinking. 
  • Link back to the blog using the Linky Tools by the due date. 
  • Enter as many times as you like. 
  • Feel free to combine our challenge with a maximum of 10 challenges.  Entries linked to more than 10 challenges will be disqualified without notification.
  • If your project is posted on a private group site such as Split Coast Stampers or a photo sharing site not all DT members may be able to comment.   Thank you for understanding.
  • Turn off Word Verification.  We love to comment but word verification can make that difficult.

Please do join us and make your own card with this fun sketch!  Thank you for stopping by my blog!


Tuesday, April 23, 2024

Tic Tac Toe! Friendship card

Spring is inching happily towards us!  At Retro Rubber Challenge Blog we have a fun Tic Tac Toe and it happens to be my contributed challenge.  Often I have a hard time with Tic Tac Toe challenges, as I overthink the process.  But once I got going on this one I was able to check all the squares off, and complete a black out, well I guess that's a bingo term!

 
This is the challenge image to create your card or project. 
 
 
My card was created using the following:
  •  The die cut is Stitched Ovals from Elizabeth Craft Designs.  It is die cut from white cardstock and stamped with Hero Arts 2009 Friends are Flowers in Memento Luxe Pear Tart and heat embossed with clear embossing powder.  Fireworks! Bamboo leaves is gently tapped over the image to add some depth and painted into the leaves. Small die cuts from Sizzix Tim Hotlz Tattered Flowers are die cut from scraps of cardstock to put over the stamped flower.
  • The pink shimmer card stock is first die cut with the Stitched Ovals from Elizabeth Craft Designs then pressure embossed with Darice Petal Background embossing folder.  With a white core paper, the flowers are distressed with a sanding block as well as the edges.  K & Company adhesive gems are added to a few of the flower's centers.
  • The card base has Fireworks! Bamboo leaves gently tapped around the edges to pair with the focal image.
  • The layers are adhered together to the card base, taking care the the oval is placed the same direction as it was die cut.  Even with symmetrical dies they are not perfect!
  • Sheer purple ribbon is tied into a small bow and adhered to the card.

How fun is that?  Sometimes a Tic Tac Toe board can inspire the next little detail on your card!

 CHALLENGE GUIDELINES

  • We require stamps older than one year.  If we feel you are using newer stamps, you may be disqualified from the challenge without notification.
  • New papers/dies are OK – but you must use at least one stamp older than a year and describe the age in your blog post.
  • Please note that all challenges require the use of at least one stamp older than a year.
  • Post your new creation to your blog or online gallery.   Use keyword RRCB229.  No backlinking. 
  • Link back to the blog using the Linky Tools by the due date. 
  • Enter as many times as you like. 
  • Feel free to combine our challenge with a maximum of 10 challenges.  Entries linked to more than 10 challenges will be disqualified without notification.
  • If your project is posted on a private group site such as Split Coast Stampers or a photo sharing site not all DT members may be able to comment.   Thank you for understanding.
  • Turn off Word Verification.  We love to comment but word verification can make that difficult.

Do come and play along with us at Retro Rubber Challenge Blog. We would love to see what you create!

Thursday, August 25, 2022

Create a Watercolor Sunflower using stencils and Fireworks!


In today's tutorial I will share how I used layering sunflower stencils to create a water color look to my image.  Notice there is no stamp outline, that helps achieve a more organic look to the project.  I learned a few things along the way, and almost want to include a few blooper photos!  Instead I share the way that will give you the cleanest look avoiding the pit falls!

Skill:  Intermediate

Time:  2 hours

 Directions:

Step 1:

Trim white watercolor cardstock to 4 1/4" x 9 1/4",  or about 1/4" on each side larger than your stencil.  this will allow you to handle your project more cleanly.  Use reposition able painters tape or washi tape to secure stencil along left side with edges matching along the upper and left hand side.  Spritz with Fireworks! in New Sprout until color depth desired is achieved.  In this close up photo freezer paper is used underneath the stencil and paper with the plasticized side up.  This allows collection of the over spray for background papers.    Carefully lift stencil to keep excess Fireworks from leaking under the stencil and adding unwanted color. 

Step 2:


 Secure next layer of layering stencil in place and spritz with Fireworks! in Bamboo Leaves.  This photo shows a spray box that protects your work area from over spray.  It also shows the best distance of 12" to 18" to spray the stencil to avoid large droplets of Firewoks. 
 
Step 3:


Clean stencils with sections of watercolor paper after each layer.  Move the watercolor paper around on the freezer wrap to pick up excess spray.  Keep color families together, as both colors of green are used on this background paper.  Clean up excess with paper towels or baby wipes. 

Step 4:

Continue with additional layering stencils.  Here Dandelion is used for Stencil 3, and Tangelo for Stencil 4. 

Step 5:


Sometimes as a designer you discover easier methods in the process of designing a project.  I was not satisfied with the color through the stencil by just spraying with the stencils that were smaller openings.  It is recommended to use this method for the rest of the layers.  Fireworks! in Tangelo is shown here sprayed on a plastic sheet.  Using a cotton swab the color is carefully dabbed through the stencil to give better color depth.  A cotton swab also prevents leakage underneath the stencil of excess color.  A lot less of the spray was used with this method!  Stencils 5 and 6 used this method to complete the look.  Stencil 5 used Fireworks! in Lilac Posies, and Stencil 6 a mixture of Fireworks! Rich Cacoa (for shimmer) and Walnut Ink in Java for a darker color. 

Step 6:


Here are the images from the entire stencil set.

Step 7:

One "blooper" photo, all the backgrounds made with the over spray and Fireworks! left on the stencils.  To be used in future projects?  The green sheet is trimmed to 4 1/4? to 5 1/2" to cover the front of the card.

Step 8:


Tap drop of Fireworks! in Dandelion on white watercolor paper trimmed to 3 3/4" x 5".  Use quilted card front die to add texture to front panel.

Step 9:

Part of the remaining background section is stamped with Memento Luxe in Lilac Posies using a sentiment from the Sunflowers stamp set.  It is die cut with a Spellbinder die.

Step 10:


The Sunflower is die cut with the coordinating die.  The layers are adhered together with Tear It! Tape with dimension foam tape behind the card front.  


Art Supplies

Imagine:

Fireworks!--New Sprout, Bamboo Leaves, Dandelion, Tangelo, Lilac Posies, Rich Cocoa

Walnut Ink--Java

Memento Luxe--Lilac Posies

Embossing Powder--Iridescent

Tear It! Tape

Other:

White Watercolor Cardstock

Pink Fresh Studio Sunflowers Stencils, Coordinating Die, and Clear Stamp

Concord & 9th Quilted Card Front Die

Spellbinders Fancy Tabs

Dimension Foam adhesive

Cotton swabs

Die Cut machine

Stamp Platform


Thursday, June 23, 2022

Fourth of July Layout Made Easy with Memento inks and Fireworks!

Today I will share how easy it is to create a very cohesive layout using just two ink colors and the matching Fireworks! colors for an amazing Fourth of July scrapbook layout.  With just white cardstock, an embossing folder, a large die cut, and stamps this layout is perfect for Independence Day.

Skill:  Beginner

Time:  2 hours

 Directions:

Step 1:


Trim white cardstock to 1" on each edge larger than the photos.  Pressure emboss with Star Blanket.  Ink raised portion of embossed areas and edges with Memento Danube Blue or Lady Bug.  For my layout I trimmed two sections 5" x 7", three sections 4" x 5", and one section by 4" x 4" to back my phtotos.

Step 2:


Die cut two sets from Spellbinders Cascading Stars die and remove the stars.  Trim one outline die cut into a section of five stars, with the other being four stars.  Use Jumbo Dauber to tap Memento Danube Blue over one die cut and the smaller portion of the trimmed die cut.  Tapping the ink onto the paper keeps from damaging the die cut, which can occur if a rubbing motion is used.  The larger portion of the trimmed die cut is inked in Memento Lady Bug.  Continue to add ink until it is the desired hue. 

Step 3:


The splatter method is used with Fireworks! to add some interest to the white background.  Shake the bottle to distribute glimmer and then remove spritzer nozzle and gently tap the top to splatter ink from the outside of the spray tube.  Continue to tap until the desired amount of ink is on the paper.  I choose sections where the die cuts would be eventually placed.  I alternated the color choices from the die cut color.  This is the lower right corner of the right page.  

Step 4:


The left side of the layout shown completed with splattered Fireworks! in Memento Lady Bug and Danube Blue.

Step 5:


Determine placement placement of elements to add stamped sentiments.  Place on layout and remove other elements.  Use a stamp platform to stamp sentiments in proper position.

Step 6:

On the right page the stamped elements are determined, then half are removed before stamping to allow for clean stamping of correct colors.  The remaining elements are added and stamped.  It was easier to stamp all the images Memento Lady Bug at one time, then follow with images in Memento Danube Blue.

Step 7:


Spritz Fireworks! into a plastic tray or surface.  Place die cut stars from step 2 face down on the Fireworks! ink to add color.  Use tweezers to move around in the ink and add more ink to tray as needed.  About a third of the stars were inked with Fireworks! in Lady Bug the remaining in Fireworks! Danube Blue.

Step 8:


Determine correct placement of Fireworks! stars in the die cut.  I rotated the star until it fit properly into the die cut area.  Not all the stars are identical, so taking the time to find the right one was worth the effort for a seamless look.   

Step 9:

Adhere elements to layout.  Tear It! tape was used to adhere the photos to the textured mats.  The die cuts are adhered with On Point! glue.  The small dots around the star frames keep the layout clean and smudge free.  


Art Supplies

Imagine:

Memento--Lady Bug and Danube Blue

Fireworks!--Lady Bug and Danube Blue

Jumbo Dauber

Tear It! Tape

On Point Glue

Other:

White Cardstock

Cuttlebug Star Blanket embossing folder

Spellbinders Cascading Stars

Technique Tuesday Spectacular Memories

Hero Arts CL493 Holiday Sentiments

Tweezers

Die Cut machine

Stamp Platform

Friday, April 29, 2022

Colorful Peonies Created with Ink and Stencil Birthday Card


See how to use a variety of inks to create a stunning card using layering stencils and Fireworks as an embellishment.  Layering stamps have been around for a few years, but recently a few companies have come out with layering stencils that match stamp sets.  It takes a bit more time, but the results are phenomenal and I find that the placement is just a tiny bit easier.  For a finishing touch The Essential Glue Pad produces the look of foil without the need for heated plates or a laminating machine, a win in my book!


Skill: Intermediate


Time: 1 hour


Directions:


Step 1:


Stamp Pink Fresh Painted Peony Mix in Delicata Golden Glitz and heat emboss with Iridescent Embossing Powder.  I placed the stamp at a 45 degree angle on my stamp platform, as the stamped image is longer than most platforms.  This technique creates enough images for at least three cards!


Step 2:


 Most Peonies are white or light pink.  I choose Memento Angel Pink and used a heavy hand with the ink dauber to ink the first stencil.  Using an ink dauber allows for a bit of shading in the process as well.  Each stencil has registration marks to allow precise placement. 


Step 3:


The next stencil in the series colors the complementary flowers in the design.  Memento Dandelion Yellow is inked with an ink dauber, again with a heavy hand.  


Step 4:


The next layer creates the leafy background.  It is inked with Memento New Sprout.  


Step 5:


To shade in the fourth layer of color I used Versa Color Orchid.  As you can see the images are coming together.


Step 6:


Each successive layer adds more dimension, so pretty!
Memento Rose Bud is added in this layer.


Step 7:


Small pieces of removable tape are placed on the flowers that I preferred to accent with something other than the Memento Cottage Ivy used on the leaves.


Step 8


To finish the flowers, Memento Sweet Plum was inked through the previously covered sections of the stencil.


Step 9


Die cut with the matching die.  All nine pieces cut at the same time!


Step 10


Trim a section of white linen textured cardstock to 4" x 5.25".  Shake each Fireworks! and Shimmer spray until the fine shimmer particles are dispersed in the bottle.  Remove sprayer nozzle and tap gently to add color sprays around the white cardstock.  This method produces larger droplets that are not as closely placed together as compared to using the direct spray technique.  


Step 11


Stamp the sentiment on a piece of black cardstock with The Essential Glue Pad and gently place Metallic Flakes over the glue.  Use a brush to remove larger pieces of Metallic Flakes and return to the jar.  A paper towel will clean up the rest of the image.  Trim to desired shape, in this case a fishtail banner. 


Step 12


Trim black cardstock to 5 3/8" x 4 1/8".  Adhere layers together on a A-2 size card base with Tear It! tape.  The flower bouquet is adhere with dimensional foam adhesive. 


Art Supplies


Imagine

  • Delicate Golden Glitz
  • Iridescent Embossing Powder  
  • Memento--Angel Pink, Dandelion, New Sprout, Rose Bud, Cottage Ivy
  • Versa Color:  Orchid
  • Fireworks!--Rose Bud, New Sprout
  • Shimmer Spray Gold
  • The Essential Glue Pad
  • Tear It! Tape
  • Ink Daubers

Other

  • Pink Fresh--Painted Peony Mix Stamp, Stencil Set, Die
  • Black and white cardstock
  • Stamp Platform
  • Heat Embossing Gun
  • Paper Studio Fish Tail punch
  • Painter’s tape
  • Prima Art Ingredients Metallic Flakes Vintage
  • Small paint brush
  • Dimensional Foam Adhesive


Tuesday, February 15, 2022

Sketchy Time at Retro Rubber

 Sketches are a great way to get a card quickly put together.  This sketch is no exception.  Stop by Retro Rubber Challenge Blog and check out all the cool ways the design team used this sketch.  


For my version I went with scraps laying on my table, and water color paper that I had tried a little experiment with to create this card.

  • The background base white cardstock has Fireworks! in Danube Blue gently tapped on the background.  (Honestly I though of this after the card was finished, and had to dismantle gently and then reattach after the Fireworks! dried.)  
  • The watercolor paper has Bahama Blue and Teal Zeal Memento inks applied directly to the paper, and then spritzed with water so the colors would blend a bit.  Water color paper has a fun finish texture.
  • The scraps that were already trimmed to 1 1/8" were trimmed down to 3" long.  
  • After the layers were attached to the card base the Happy Birthday Sentiment from Taylored Expressions from September 2014 In and Out Birthday was stamped in Memento Luxe Danube Blue and heat embossed with iridescent embossing powder.  

My definition of a quick card!  I actually made three in less than 20 minutes!  Please do join us over at Retro Rubber and have some quick fun with this simple sketch!

CHALLENGE GUIDELINES

  • We require stamps older than one year.  If we feel you are using newer stamps, you may be disqualified from the challenge without notification.
  • New papers/dies are OK – but you must use at least one stamp older than a year and describe the age in your blog post.
  • Please note that all challenges require the use of at least one stamp older than a year.
  • Post your new creation to your blog or online gallery.   Use keyword RRCB176.  No backlinking. 
  • Link back to the blog using the Linky Tools by the due date. 
  • Enter as many times as you like. 
  • Feel free to combine our challenge with a maximum of 10 challenges.  Entries linked to more than 10 challenges will be disqualified without notification.
  • If your project is posted on a private group site such as Split Coast Stampers or a photo sharing site not all DT members may be able to comment.   Thank you for understanding.
  • Turn off Word Verification.  We love to comment but word verification can make that difficult.

Tuesday, September 28, 2021

Play Tic Tac Toe with Retro Rubber!

 We have such a variety of cards when a Tic Tac Toe is posted over at Retro Rubber.  Design Team's samples are all unique, do come check them out!


I choose the bottom row:  Something that flies, Die or Punch, Add a Bow for my inspiration.  After a quick search of Dragonfly colors I decided on this very autumn palette!


  • Black cardstock is misted with Fireworks! in Dandelion and Tangelo.  I was impatient so I used my heat gun to dry the cardstock.
  • Kaliedacolor in Cappuccino Delight and a rubber brayer is used to ink up glossy card stock.  It is hard to tell in the photo, but the tail portion and back wings have a darker ombre tone.  The Dragonfly is die cut with Technique Tuesday's 2016 Inspired Dragonfly die.  The overlay is die cut from black and carefully glued into place.
  • The sentiment is from the same set and is stamped in Versafine Habanero.  After a quick trim, the edges are inked in the same.
  • Sheer orange ribbon is wrapped around the card front and adhered.  A double looped bow is added to fit the challenge.
  • The sentiment and dragonfly are adhered with dimensional foam adhesive.
  • A few sequins from my stash add the finishing touch!

Thanks so much for joining me, I hope you will play along at Retro Rubber

 CHALLENGE GUIDELINES

  • We require stamps older than one year.  If we feel you are using newer stamps, you may be disqualified from the challenge without notification.
  • New papers/dies are OK – but you must use at least one stamp older than a year and describe the age in your blog post.
  • Please note that all challenges require the use of at least one stamp older than a year.
  • Post your new creation to your blog or online gallery.   Use keyword RRCB167.  No backlinking. 
  • Link back to the blog using the Linky Tools by the due date. 
  • Enter as many times as you like. 
  • Feel free to combine our challenge with a maximum of 10 challenges.  Entries linked to more than 10 challenges will be disqualified without notification.
  • If your project is posted on a private group site such as Split Coast Stampers or a photo sharing site not all DT members may be able to comment.   Thank you for understanding.
  • Turn off Word Verification.  We love to comment but word verification can make that difficult.

Friday, September 10, 2021

Fall leaves Thanks for Imagine


In today's card making tutorial I will show you how to create fall themed Thanks card using three different inks from Imagine.  The autumn colors are vibrant and blend well with kraft card stock and burlap ribbon.  I hope this card inspires you to think of all things pumpkin spice and apple cider as we head into fall!

Skill:  Intermediate

Time:  1.5  hours 

Directions:


Step 1

Spritz white cardstock with Fireworks! Lady Bug, Tangelo, and Dandelion.  I like to start with the darkest color first working to the lighter color to fill in the last areas of white.  Set aside to dry. 


Step 2

Use Memento Peanut Brittle and Ricch Cocoa to ink white cardstock.  I used the ink pad directly on the cardstock as I wanted a splotchy look.


Step 3

Die cut the Fireworks! colored cardstock with Skeleton Leaves dies.  Cut an outline to back the skeleton leaves either by hand or with an electronic die cutting machine.  Adhere the layers together with On Point Glue.  Small dots in the thicker areas of the leaves works best.


Step 4

Die cut one “Thanks” sentiment from the Fireworks! colored cardstock and three from white cardstock.  Layer together with On Point Glue to create a dimensional sentiment.  To avoid glue from leaking out from between the layers use small dots of glue on the outside edges.


Step 5

Use a soft rubber brayer to ink cardstock trimmed to 4.74” x 5.75”.  Kaleidacolor in Autumn Leaves was used with the green portion in the middle and the light orange on either end of the cardstock.  Flip the cardstock to achieve this look.


Step 6

Pressure emboss the cardstock with Basket Weave embossing folder.  Use a sanding block to remove color and allow the embossed design to pop.


Step 7

Adhere background to A7 kraft card base with Tear It! Tape.  Adhere burlap ribbon with Tear It! Tape, it is translucent enough that it does not show through the burlap, and will hold the card together.  Adhere Thanks sentiment with On Point Glue.  Adhere the leaves with Tear It! Tape.


Art Supplies


Imagine


·      Fireworks!—Lady Bug, Tangelo, Dandelion

·      Memento—Peanut Brittle, Rich Cocoa

·      Kaleidacolor—Autumn Leaves

·      On Point Glue

·      Tear It! tape


Other

·      Sizzix Thinlets Skeleton Leaves

·      Spellbinders Phrase Set One

·      Darice Basket Weave embossing folder A7 size

·      Recollections A7 card Base

·      Burlap Ribbon

·      Sanding Block

·      Dimensional Foam Adhesive

·      Brother Scan-N-Cut


Thanks for stopping by!