Showing posts with label Altered art. Show all posts

Thursday, April 29, 2021

Learn How To Make Elegant Flowers For A Spectacular Mother's Day Card

In today's crafting tutoring I will share how to make absolutely gorgeous flowers from foam paper and StazOn inks that hold their shape beautifully.  Create a very special card to give to a Mother for Mother's Day. 


Skill:  Advanced

Time:  3 hours plus time to dry ink on art foam paper

Directions:


Step 1

Stamp Calla Lily image in StazOn Bordeaux.  Stamp Calla Lily Leaves image in StazOn Forest Green.  Set aside while working on the rest of the card.  The ink will take time to dry, otherwise it will smear or come off on your fingers.

Step 2

Trim a sheet of Strathmore Bristol Vellum Finish 100 lb paper to 7" x 15".  My pad comes in 14" x 17" so it will make two cards of this style from one sheet.  Score at 5" from each end and accordion fold sheet using bone folder to crease folds.  

 
Step 3

Place folded cardstock into Largest die from the Teardrop Lattice Gateway die by Heartfelt Creations.  Run through die cut machine.  Remove curved corners once they are cut, to allow all layers to cut through.

Step 4 

Die cut decorative card front from white cardstock.  It is from the Heartfelt Creations Lattice Swirl Gateway die.  Die cut lower portion of Heartfelt Creations Lattice Flourish Gateway die (shown below).

Step 5

Use an ink blusher and Delicata Rose Gold to color die cuts.

Step 6

Use Versa Magic Aqua Splash Dew Drop to ink all outside edges of the tri-fold card.  Front is shown.

Step 7 

Using direct to paper method ink the front panel and back panel of the tri-fold card.  Shown is the back panel.   

Step 8

Die cut scalloped edge die from the Hearfelt Creations Scalloped Flourish Gateway die.  Ink the edge with Versa Magic Perfect Plumeria.  Using direct to paper method ink the center of the panel.


Step 9

Stamp the sentiment from Heartfelt Creations Fancy Special Day Stamp in StazOn Bordeaux at the top of the panel from step 8.

Step 10

Center Lattice Flourish Gateway die below the sentiment and trim to fit.  Adhere with On Point glue. 

Step 11

Die cut the third from the largest Hearfelt Creations Eyelet Frame Gateway from white cardstock.  Ink the edges and the center of the panel with Versa Magic Aqua Spalsh.  Die cut center panel form Heartfelt Creations Regal Lattice Gateway die from white cardstock.  Use an ink blusher to color the die cut.

Step 12

Die cut two smallest Eyelet Frame Gateway dies from white cardstock.  Ink smallest with Versa Magic Aqua Splash around the edges and lightly in the center.  Stamp with Inspire Me Sentiment Stamp in Caribbean Green StazOn ink.  Ink the larger die with Perfect Plumeria around the edges and lightly in the center.  Stamp "Happy Mother's Day" from the Hearfelt Thank You Sentiments in StazOn Caribbean Green. 

Step 13

Apply Tear It tape to the back of prepared panels from Steps 9, 10, and 11.  (Notice that I decided to change color used for the sentiments  for step 12 and simply used the opposite side of the die cut.)

Step 14

Use and ink dauber to color the leaves and Calla Lily images with StazOn ink in Caribbean Green and Bordeaux.  Set aside for the ink to dry, I let mine dry over-night to keep from staining my fingers in the next step and smudging the ink.

Step 15

Die cut the Calla Lily and leaves.  Prep space to create flowers.  Heat glue, glue gun, die cuts and Heartfelt Creations Pastel Pollen Stamens.  (Note I colored the back of the die cuts as well, but turns out it is not necessary because the back of the images do not show on the finished card.)

Step 16

Holding the Cally Lily die cut with a pair of tweezers and heat the back of foam paper until it just begins to curl.  The foam paper will curve towards the heat.  While the foam paper is still warm gently add a small dab of hot glue at the very base of the Cally Lily.  Place stamen and pinch closed, hold for a moment until hot glue cools and flower will hold it's shape.  Repeat with remaining five flowers.


Step 17

Heat the back of the leaf image until it curls.  While it is still warm pinch into shape until the foam paper has cooled and it will hold its shape. 

Step 18

Using small dots of On Point glue adhere the Lattice Swirl Gateway die cut from Steps 4 and 5 to the front panel of the card.  


Step 19

Apply Scalloped panel to middle of section of the tri-fold card. 

Step 20

Use hot glue to adhere foam flowers to the front of the card as shown above

 
Step 21

Continue to adhere flowers and leaves to the card front as shown.  Adhere the sentiment over the trimmed wires from the stamens.

Step 22

Adhere die cuts from Step 11 to the back panel of the card.  Adhere flower and leaf and the sentiment panel in place as shown.  

Art Supplies

Imagine

  • StazOn Ink Pad-Bordeaux, Caribbean Green, Forest Green
  • Versa Magic Ink Pad-Perfect Plumeria, Aqua Splash
  • Delicata Ink Pad-Rose Gold
  • Ink Blushers
  • Ink Daubers
  • On Point Glue
  • Tear It Tape!

Other

  • Strathmore Bristol Vellum Finish 100 lb cardstock
  • Bone folder
  • Heartfelt Creations Art Foam Paper
  • Heartfelt Creations Calla Lily stamp and die
  • Heartfelt Creations Inspire Me Sentiment stamp
  • Heartfelt Creations Fancy Special Day stamp
  • Heartfelt Creations Thank You Sentiments stamp
  • Heartfelt Creations Scalloped Flourish Gateway die
  • Heartfelt Creations Lattice Swirl Gateway die
  • Heartfelt Creations Lattice Flourish Gateway die
  • Heartfelt Creations Regal Lattice Gateway die
  • Heartfelt Creations Eyelet Frame Gateway die
  • Heartfelt Creations Pastel Pollen Stamens
  • Tweezers
  • Heat Gun
  • Hot Glue Gun and hot glue sticks

Thursday, September 21, 2017

Christmas planning, and fun Blackboard Menu


Featured at Imagine today is my Christmas planning project.  Blackboard menus are popular at many eating establishments, so I decided to make one of my own for Christmas parties that I hold in my home during the holiday season. I host at least one party every year, and may even get in on the neighborhood progressive dinner this year! Creative Medium, a little glitter and two stencils quickly made this menu board very festive! The Creative Medium will hold fine particle embellishments like glitter or beads. The Iridescent Green Creative Medium shows up fabulously on the black background, and the Gold Creative Medium adds a touch of metallic elegance. The menu is written in colored Crayola chalk that was sharpened with a child’s large pencil sharpener.  This fun and easy project is a great way to enhance any party! Enjoy and thank you for stopping by

Imagine

Other
Sierra Pacific Crafts 12” x 12” Chalkboard Tile
Stencil Girl—Three Trees
C-Thru Stencils—3/4” Swash Bold Italic alpha stencil
Art Institute Ultra Fine—Christmas Red glitter
Crayola Chalk
Pencil sharpener for large pencils

Tuesday, April 18, 2017

Bigger is Better AIR challenge for Imagine, COLE


Imagine is featuring this fun project on their blog today along with another really cool BIG word project, go check it out!

This project is a perfect example of buying something with the full intent of completing a project but never actually getting around to working on it . . . I’ve had these letters for about 2 years, maybe even more.  Insert a blush here!  When the challenge to create something Bigger and Better came along it was finally time to decorate these 9 ½ inch tall letters that spell our family name.  The Sierra Pacific Crafts Medium Density Fiberboard (MDF) letters were painted with a mixture of Creative Medium mixed with Versa Magic Jumbo Java ink.  This gives a nice glossy color in one coat that dries quickly.  Several stencils and Creative Medium Metallic in Gold mixed with a small amount of Copper finishes the look.  The stenciling was completed in several steps with drying time in between to avoid smearing.  This fun wall décor was easy to create in an afternoon which included dry time and was ready to hang on the wall with small Velcro hangers.  Our name is now proudly hanging above the coat rack my husband built in the entry way of our home.   


Imagine:

Other:
Sierra Pacific Crafts MDF large letters
Stencil Girl—Compass Rose stencil
ART-C Adhesive Stencils Imagine
Momenta Adhesive Stencils Celebrate
The Crafter’s Workshop TCW 219 stencil

Wednesday, April 12, 2017

Lapis Mini Jar for Imagine AIR


The color challenge for April at Imagine is the stunning deep blue color of Lapis Lazuli. With a little research, I discovered that it is semi-precious stone used in ancient mosaics and as a pigment in many well-known paintings.  It most likely is what is referred to as sapphire in Biblical times as the sapphire was not known at that time.  I was inspired to create a mini Lapis jar from a votive candle holder and large glass drop fashioned into a lid.  This simple project is only time consuming due to dry time and the results are very realistic.  This tutorial is featured at Imagine today. 

Level:  Intermediate
Time:  1 hour plus ample dry time


Step 1:
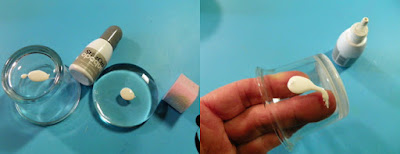
Apply StazOn Opaque Cotton White directly to the surfaces of the votive candle holder and the glass drop. 


Step 2:
Use and Ink Blusher to gently move ink and cover the surface of the glass.  Set aside to dry.


Step 3:
Place StazOn Azure on a plastic surface (for ease of clean-up) and gently apply to the surfaces with an Ink Blusher over the StazOn Cotton White.  Work quickly to prevent picking up the Cotton White, some variation will add to the realistic look of the project.  Set aside to dry.


Step 4:
Add GlazOn Layer Protectant to each surface with an Ink Blusher.  Set aside to dry. 


Step 5:
Apply a second layer of StazOn Azure with an Ink Blusher.  Set aside to dry.  Apply a second layer of GlazOn and set aside to dry, each successive layer requires more drying time.


Step 6:
Place StazOn Metallic Gold on a plastic surface (for ease of clean-up) and apply with crumpled cling wrap to the surfaces to mimic gold flecks in the Lapis stone.  Set aside to dry.  Apply a final coat of GlazOn and set aside to dry.

Step 7:
Stain a small wood bead with StazOn Azure and set aside to dry.  Thread wire through bead and twist into a fixture.  Adhere to the lid with E6000 adhesive.

Imagine:

Other:
Ashland glass votive candle holder
Sierra Pacific Large Glass Drops
Small white wood bead
Crafting wire
Cling wrap
E6000 Adhesive


Monday, December 12, 2016

Quick and Easy Gift Ornaments


One of my favorite traditions since childhood is crafting a new ornament for the Christmas Tree.  I have carried on in this tradition for this season and made a few ornaments to give as gifts as well.  It is so easy and quick with flat glass ornaments, stencils, and Creative Medium.  All three ornaments took less than 20 minutes to create.  I plan on making a few to share with my family and to use as hostess gifts for a upcoming Christmas parties.

Do stop by the Imagine Blog and check out the quick and easy tutorial!

Imagine:
            Embossing Powder—Candy Red
            Palette Knife

Other:
            Flat Round Glass Ornaments
Clear Scraps—Hope Is stencil
            Stencil Girl—Three Trees stencil
            Momenta—Celebrate Adhesive Stencil
            Painters tape
            Decorative snow
            Shimmer Tinsel
            Cotton swab

Saturday, November 12, 2016

Tom Turkey for your Table


Head over to Imagine's blog for the fun tutorial on this cute Tom Turkey


Turkeys are synonymous with Thanksgiving and the fall holidays.  We have enjoyed raising a few on our mini-farm, and my favorites were the Bronze Breasted turkey.  They had beautiful iridescent colored feathers, and the Tom turkey would strut around showing off his beautiful tail plumage.  This was the inspiration my version of a pine cone turkey to add to our table decorations.  A little irRESISTibles Texture Spray, Kraft card stock, and almost any large flower die can be used to create a cute turkey.

He will take about an hour to create plus dry time!  What are you waiting for?  Go have some fun and make a few for your table. 

Tuesday, October 4, 2016

Regal Purple Masquerade Mask


One of my favorite colors is purple, and with Halloween right around the corner I decided to make myself a fun Masquerade Mask to celebrate the season. You can totally customize the perfect mask for your Halloween party or to answer the door for Trick-or-Treaters  Check out the post on the Imagine Blog for this and other fun ideas!

Skill level: Advanced Time: 2hours
Directions: 
Step One:
Measure to determine the width needed for the mask and sketch the mask on scrap paper folded in half. Cut out the mask and eye holes and check for fit. Adjust as necessary, the crazy cross-eyed look is optional!


Step Two
Place pattern over thick fun foam and cut out with scissors and craft knife. 


Step Three:
Die cut embellishments.  The lace edging is die cut from white wool felt.  Wool felt is easily die cut and can be colored with All Purpose Ink.  Synthetic craft felt will not give the same results.  Embellishments are die cut from Snakeskin Vertigo, but any Vertigo will work well as the pieces are small enough only the iridescent effect is apparent.

Step Four:
Spread Creative Medium in Purple Iridescent over the surface of the mask and set aside to dry. 


Step Five:
Mix Ink Potion No.9 and All Purpose Ink in Thistle in a small spray bottle. I wanted my lace a dark purple so I added about 20 drops to the small bottle which was filled about quarter way with Ink Potion No. 9. 


Step Six
Spritz wool felt die cut lace and 48 inches of silk 1⁄4” ribbon with API mixture. I moved the felt and ribbon around on my work surface to soak up the API to obtain the dark Thistle color. Set aside to dry.


Step Seven
Adhere the wool felt lace with a glue dot type of adhesive. I used Therm O Web Zips Ultra Thin. Adhere jewel bling to the front of the Vertigo die cuts and adhere to the mask with glue dots behind the bling. Take care in the application as the glue dots will lift the dried Creative Medium from the fun foam if you try to move them after the first touch.


Step Eight
Mark and punch holes to apply an eyelete on each edge of the mask. Thread the ribbon through the holes to tie the mask into place.


Imagine
·      Ink Potion No. 9
·      Vertigo
·      Craft mat
·      Palette Knife
·      Spray Bottle
·      Ink Dropper

Other
·      Black Fun foam
·      White wool felt
·      White silk ribbon
·      Spellbinders Moroccan Accents, Moroccan Motifs
·      Various sizes of jewel bling
·      2 coordinating eyelets
·      Therm O Web Zip Ultra Thin
·      Glue dots
 

Monday, September 19, 2016

Mini Book Fun for Imagine


I was very excited when I heard our theme at Imagine for the month of September was to highlight books because I am a mini-book fanatic!  I have truly enjoyed creating small books over the last 20 years.  So I set out to craft a cute little book from fun foam, chipboard and cardstock that has a ribbon binding.  To make the book more portable, I made an elastic closure to hold it together.  It is easy to decorate the fun foam with StazOn ink, and the elastic closure uses some Fabrico makers to add color inside the ridges. 

A few details:


Skill Level:  Intermediate
Time:  2 hours plus dry time


Step 1
Trim tan fun foam to 5” x 7”.  (This size was chosen as I hoped to add some texture with an embossing folder, but didn’t like the lack of results so that ended up on the inside.)  The fun foam is stamped with a variety of marbling stamps using StazOn in Saddle Brown, Timber Brown, and Cactus Green.


Step 2
The create a color coordinated elastic closure, a 12” piece of soft ¼” elastic is inked with StazOn in Saddle Brown and colored with Fabrico markers in Chocolate and Pea Pod.  The colors are muted with a spritzing of Ink Potion No. 9.  It was a little lighter than I liked, so another layer of StazOn ink in Timber Brown was added.  The elastic is set aside to dry. 


Step 3
The stack of pages, called a signature of the book, is 5 sheets of cream cardstock trimmed to 4 ¾” x 6 ½”.  Each sheet is scored down the middle and creased.  The signature is lined up and the inside set is marked with a pencil at the center and 1 3/8” away from center. The holes are punched with a paper piercer, or you can use a heavy duty thumb tack.  The same marks and punch holes are made in the fun foam cover.  The signature and cover are slightly different sizes so it is more simple to use a centering ruler for this measuring task.   


Step 4
A 15” length of 1/8” ribbon is threaded through the signature and cover using a tapestry needle.  Starting from the outside, the ribbon is threaded through the center hole in the cover and signature.  You will have to line up the needle with holes in the signature before pulling it all the way through.  A length of ribbon, or tail, is left on the outside. 


Step 5
From the inside the ribbon is threaded through an outside edge hole of both layers.  Next the ribbon is threaded from one outside hole to the other outside hole back to the inside of the book.  From the inside the ribbon is threaded back through the center hole.  Take care to not pierce the ribbon and only go through the hole.


Step 6
The ribbon tails should be on either side of the center ribbon.  You may gently adjust the length of the tails at this point.  Tie the tails around the center ribbon and make a bow.


Step 7
Round the signature in a stack with a heavy duty corner rounder like Zutter.  Rounding the corners after binding allows them to line up more neatly.  Trim two pieces of chipboard to 3 ¼” x 4 ¾” and round outside corners.  Line up the chipboard between the cover and the signature. 


Step 8
Mark holes for elastic 1” from the top and bottom edges of the cover and ¾” from the outside edge.  Punch holes through both the chipboard and foam cover.


Step 9
Add a quick dry adhesive designed for paper to the chipboard cover and adhere to the foam cover.  Place wax paper between chipboard and the signature in case a bit of adhesive leaks out from around the edges.  Repeat for the front of the mini book.  Place under a stack of books and let dry.  Mine took about an hour.


Step 10
Thread elastic through the holes in the back cover.  Leave the elastic slack enough to go around the front cover.  Pin the elastic together and then stitch at the mid-point to secure.  This is flatter than knotting the elastic. Trim the excess elastic.  Add adhesive to the chipboard and adhere to the last page of the signature so the elastic is hidden.  Adhere the front page of the signature to the front chipboard cover.  Add the wax paper to protect the rest of the signature as before and dry under a stack of books. 

This little book is the perfect size to hold wallet size photos, meandering thoughts and notes, or sketches. 

Supplies

Imagine
·      StazOn-- Timber Brown, Saddle Brown, Cactus Green
·      Fabrico Markers—Chocolate, Pea Pod
·      Ink Potion No. 9

Other:
·      Fun foam--tan
·      Chipboard
·      Cardstock—Cream
·      1/8” ribbon
·      ¼” elastic
·      Quick dry paper adhesive—Scotch works well
·      Yvonne Albrition Designs—Marble tile stamps
·      Acrylic blocks
·      Score board
·      Centering ruler
·      Paper piercer and mat
·      Tapestry needle, needle and thread
·      Heavy duty corner rounder
·      Heavy duty hole punch
·      Wax paper