Sunday, February 21, 2021

Playing along with Sheetload of Cards February 2021

 I've recently started playing along with Alicia at the Call Me {Crafty} Al YouTube Channel.  Her February sheetload was fun to use to creat a batch of cards.  The February Sheetload can be found with this link

Here is my take on the February Sheetload, along with the extra scraps leftover from the batch of nine cards.

The top five cards follow the Sheetload design, the next four flip it around a bit to fit the sentiments.  The remaining cards used up the last bits of patterned paper.

Supplies used:

  • ProvoCraft Stack I circa ~2000?
  • Memento Luxe Olive Grove
  • Technique Tuesday Large Birthdy
  • Lawn Cuts Everyday Sentiment Banners
  • WeRMemoryKeepers corner rounder 7 mm
  • Paper Studio Fishtail Punch.

Now I have a masculine birthday card ready to send out at a moments notice!

Thanks for stopping by, and go give Alicia's Channel a looksie.  It is a great way to get a nice set of cards finished in a relatively short amount of time! 

#SUYSFeb2021 #showusyoursheetload

Tuesday, February 16, 2021

Sketch Time for Retro Rubber

 Such a wonderful sketch to work with from Retro Rubber for our challenge for the next two weeks. The design team has really out done themselves in the variety shown with this sketch by our own Claire.

 
 This sketch had me thinking about all the card scrap "kits" I have in my stash from past projects.  The first set I pulled out was perfect for this sketch.  With the paisley printed paper and a recent challenge to use up naked chipboard I was ready to roll!
 
  • The patterned papers are all from Boxer Scrapbooking, a company that I loved that left the industry several years ago.  Originally they were used to make a mini album so I had a plethora of scraps to work with for each element of the card.
  • The fishtail banner is easy to punch using the Paper Studio punch that accepts 1.5", 2", or 2.5" strips.  
  • To match the colors of the patterned papers I used Memento Luxe inks in Tuxedo black, Rose Bud, and Pear Tear to color the Paisley #1 from Deluxe Designs Plain Janes, the naked chipboard that needs a little love in my stash.  I applied the color with an ink dauber and set them aside to dry while I assembled the rest of the card.
  • Elizabeth Craft Designs Stitched Circles was perfect to die cut the lime green cardstock.
  • The image is from 2019 Ms. Sparkle & Co, one of the bargain sets you can find at Joann's.   
Working from a sketch is a really quick and easy way to put together a beautiful card.  This card came together in about 30 minutes total!  Please do come play along with us at Retro Rubber Challenge Blog.   

We have a few simple rules to play along with our challenge:  1) Use at least one stamp that is more than a year old 2) Tell us how old the stamp is 3)  Enter up to only ten challenges including Retro Rubber and 4) You may enter our challenge up to three times.

Thanks so much for stopping by!  I enjoy reading your comments if you happen to stop by!

Friday, February 5, 2021

New Techniques for Embossing Stunning Cards for Imagine

In today’s crafting tutorial I will show you how to use various Imagine products to create a sparkly stunning spring time Birthday Card.  It will feature both Mboss Valentine, Versa Mark Ink, and Embossing Powders.  The tutorial will also show you how you can use Versa Mark over other inks to create a cohesive embossed look for a card, even if you do not have embossing powders in additional colors. 


Skill:  Intermediate

Time:  45 minutes


1.     Trim card front to 4.75” x 6.25” to fit a standard A-7 card base.  It is important to use a stamp positioner platform for this technique to ensure that the image lines up properly on the finished card front.


2.     Color stamen portion of Penny Black First Waltz Tulip with Versa Marker and heat emboss with Black embossing powder.  Pro tip: use a dry fine tip paint bush to remove any embossing powder that ends up on the card you do not want to emboss before heating. 


3.     Use the Versa Mark small cube which allows you more precision in where you place the Versa Mark ink to ink the flower portion of the image.  Cover with Mboss Valentine, and carefully remove powder from the stamen area with a dry fine tip paint brush then heat emboss.


4.     Color directly on the stem portion of the image with Memento Dual Marker in Pear Tart and Bamboo leaves.   Mist stamp lightly with water before stamping as this reactivates the ink to create a crisp image.


5.     Clean leaf portion of the image and ink with Versa Mark ink.  Stamp over the previously colored and stamped image with Versa Mark Ink and heat emboss with Iridescent embossing power.


6.     Stamp the Celebrate sentiment in Versa Mark Ink and heat emboss with Mboss in Valentine.  Die cut the sentiment, I used my Brother Scan N Cut.


7.     I also stamped the inside of the card, as I intend to send it to a special friend for her birthday.  Stamp the sentiment in Versa Mark Ink and heat emboss with Mboss in Valentine.


8.     Lightly ink the card base and card front with the Memento Luxe Pear Tart ink pad to add just a hint of green around both layers.  I ran the ink pad around the edges of the cardstock to create a light tint.


9.     Apply Tear It tape to back of the card front and adhere to the card base.


10.  Adhere the Celebrate sentiment to the card front using adhesive foam tape.


Art Supplies


Imagine

·      Versa Mark Ink

·      Versa Marker

·      Mboss - Valentine

·      Memento Dual Marker - Pear Tart, Bamboo Leaves

·      Embossing Powder - Black, Iridescent

·      Memento Luxe - Pear Tart

·      Tear It! Tape

    0.5 fl oz spray bottle


Other

·      Penny Black - First Waltz

·      Kelly Creates - Traceable Celebration Stamps

·      Brother Scan N Cut

·      Stamp positioner

    Fine tip paint brush

Thanks so much for stopping by, know that I always appreciate your comments.  It is super fun to be back with Imagine as a Guest Designer!

Tuesday, February 2, 2021

For My Love Valentine for Retro Rubber

Hello!  It is Valentine's season and our challenge over at Retro Rubber Blog Challenge can be either for a Valentine, or other special card as the Design Team will demonstrates on the blog.  Do go check out their wonderful cards for our theme:


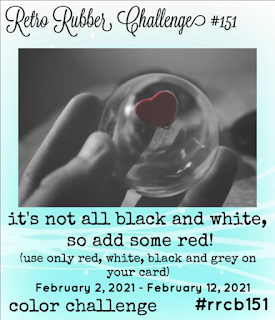
I wanted to create a special Valentine for my husband and using this color scheme makes for a very masculine look.

I just purchased this great die from Sizzix designed by Tim Holtz and thought it was perfect for a shaker card.

  • I used the Sizzix Thinlits 66416 to die cut the heart with the heartbeat squiggle from 4" x 5 1/2" grey cardstock from Recollections.  
  • The front was then pressure embossed with Sizzix 3-D Confetti Hearts embossing folder.
  • The squiggle didn't fare so well after being embossed so I die cut another and fussy cut tabs so it could be adhered to the back of the card front.
  • A section of acetate was trimmed to fit the heart opening and Darice Adhesive foam strips were used to create the window around the heart.  More foam adhesive was put around the outside edges of the card front.
  • An A-2 card base was inked with Versa Fine Crimson Red before the card front was adhered.  A small amount of heart confetti (manufacturer unknown--too old!) in the spot where the window will be in the card.  It is much easier to center the card front on the card base using this method.
  • The sentiment is by Technique Tuesday, a set from 2008 "All you need is Love".  It is stamped in Versa Fine Crimson then die cut with Lawn Cuts Everyday Sentiments Banners.  The custom length is done be placing the die cut piece back in the die to get the diagonal ends just where I wanted them.

Wait, there's more!  Here is the inside of the card!  I also loved the additional squiggle die cuts and had to use them on the inside.

 
  • The heart and love squiggles are die cut from the same grey cardstock and adhered with very small dots of Zig blue at the tips of the lines.
  • The inside sentiment is from the same Technique Tuesday set and is stamped in Vera Find Crimson Red.
  • The final touch is a small cupid sequin, again it is so old I have no idea who made the sequins, but they sure come in handy around Valentine's Day! 
Do come join the fun for our challenge at Retro Rubber!   We have a few simple rules:  1) Use a stamp that is at least one year old or older in your project.  2)  Tell us how old your stamp is  3)  You may enter up to ten challenges including ours 4)  You may enter our challenge up to three times.  Thanks so much for stopping by and do have some fun with this challenge!