It is time for a new challenge over at Ruby’s RainbowChallenges, and it is a fun one! Create
your own background, and the Design Team have come up with some lovely examples
of different ways you can copy and share.
I choose to try a new to me technique using Imagine Crafts (Tsukineko)
All Purpose Inks and white foam shaving cream.
The card I created is for someone who recently lost her
fur-child, and needs a special sympathy card.
I was glad to have many choices for embellishments as I am a dog lover
too, and have created scrap book pages for my dogs.
Step One:
Spread a thin layer of white foam shaving cream on your work
surface and smooth flat. I used a little
too much and know that next time I can use less. It is simply a carrier for the All Purpose
Inks.
Step Two:
I dropped several drops of API in Black Pearl, Vegas Gold,
and Chocolate over the surface of the shaving cream then drag a tooth pick
through the ink until I achieved a pleasant pattern. I didn’t want to over work the ink and make
it muddy.
Step Three:
After carefully laying the Bristol weight cardstock over the
surface I lifted it and scrapped the excess off with a squeegee. It was set aside to dry. After drying Elizabeth Craft Designs Stitched
Rectangles die cut the chosen area for the card front.
Step Four:
A section of Bristol weight cardstock is inked with an Ink
Blusher and Delicata Golden Glitz. Paula
Best’s Dog Set image is stamped in Delicata Dark Brown Shimmer and heat
embossed with clear embossing powder.
Unity’s sentiment was stamped on the previously inked Golden Glitz
cardstock with Delicata Dark Brown Shimmer and heat embossed with clear embossing
powder. The edges of the were inked with
Delicata Dark Brown and an Ink Blusher.
Step Five:
Die Cuts With a View brown cardstock and gold metallic
cardstock were trimmed to fit the front of the card. The edges of the brown cardstock were
distressed. Another piece of brown cardstock
is used to back the dog image and the edges were distressed. Two designs of Offray ribbon are trimmed to
fit the front of the card.
Step Six:
The embellishments are adhered to the front card panel,
included the paw brads by Around the Block.
The remaining card layers are adhered to the card base.
Please stop by Ruby’s Rainbow Challenges and share your background
that you have created. We would love to
see your projects!
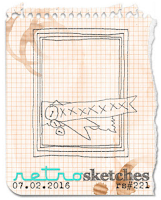
This card design was inspired by the following sketch:
I would like to enter the following challenges


I love the Crazy background so much, hun!
ReplyDeleteHugs and kisses from germany,
Silvi xoxo
Very creative is the background, also your colours that you have combine.
ReplyDeleteBeautiful!
Thank you for joining at Stamping Sensations this month.
Lovely card! Thanks so much for playing along with us at Retro Sketches!
ReplyDeleteA fab card in lovely colours and you've created a lovely background. Very original! Thanks for joining our challenge at Stamping Sensations and thanks for your tutorial on the background. Marlies
ReplyDeleteWow, this is one fun and clever background Hun. Fab card. Hugs xxx
ReplyDeleteLovely card. Very neutral colours. Thanks for joining us at Polkadoodles Hugs Tracy
ReplyDeleteFun technique and amazing background...love it...thank you for joining us at Craft your passion...hugs...Željka DT
ReplyDeleteWhat a great card, love the background. Thanks for joining our Polkadoodles Crafting Challenge - Add ribbon or twine , hugs, Carol DT
ReplyDelete