Hello Quick Quote fans!
Neva here to share with you a fun “Impossible Card” that I created from
my bits and pieces of Spring Showers I had left-over from previous
projects. I always hang on to coordinated
paper scraps and they often show up in cards later. Sometimes my design decisions are based on
the size and type of snippets I have left!
There are a few YouTube videos out there that walk you
through the process of the “Impossible Card”.
What I like about my version with Quote Quotes two-sided paper is you
can create a fabulous coordinated look!
o
I started with a 5” x 7” section of Spring
Showers 100.
o
Pencil lines are drawn in at 2 ½” across the
long direction.
o
Lines are drawn in from the bottom at 1 ½” and 5
½”
o
A line is drawn from the top at 3 ½”
o
Trim along lines and erase pencil marks while
the card is still flat.
o
Fold the center section up, and the right side
down on the reverse side.
o
The right side rotates 180° so the reverse side of
the cardstock is showing, in this case the aqua blue side.
Additional layers are trimmed to the following
dimensions. All dimensions are ¼”
smaller than the underlying layer. After
trimming all were inked with Capri Blue Powder Puff chalking ink.
o
The left side has two strips, 4 ¾” x 1 ¼” and 4 ½”
x 1”. I didn’t cut the chair shape as it
really doesn’t show in the finished card.
o
The right side is a bit more complicated as it
is trimmed to a chair shape.
o
The right base is 4 3/4” x 3 ¼” to start. It is trimmed at 2 ¼” to the 2” mark with the
remaining section being 1 ¼” wide and 2” tall.
o
The top layer starts as 4 ½” x 3”. It is trimmed 2” to the 1 ¾” mark with the
remaining section being 1” wide and 2 ¼” tall.
o
The cross-over section is 6” x 1 ¼” topped with
5 ¾” x 1”.
o
Two labels are die cut for the center section.
I love the create flowers for a spring-time feminine
birthday card and Spring Showers papers are perfectly coordinated to do
this. I die cut several layers along
with leaves, inked them in Buttercup, shaped the flowers, and added pearl
accents to finish them off.
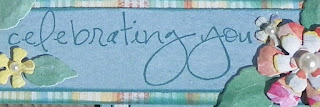
Before adhering all the layers together, I stamped the
sentiments in Capri Blue. It is shown
here in the finished card . . . I forgot to take a photo along the way!
Quick Quotes Products
Powder Puff Chalking Ink in Capri
Blue and Buttercup
Other Products
Labels Eight by Spellbinders
Small Tattered Florals by Sizzix
Pearls by Want 2 Scrap
In and Out Birthday by Taylored Expressions
It takes a little time to trim all the sections, but the
finished product is stunning! The card folds flat for mailing, but when the
recipient opens it the center section will stand up a bit for
presentation. So much fun!
~Neva


Beautiful card and I love the design and fold of it. I just recently heard about this type of card so I want to try it myself soon.
ReplyDeleteVerna, it is super easy and can be just about any size you want. Have fun!
Delete